Hanko LinkedIn OAuth Integration Guide:About Hanko:Hanko is a modern open source authentication solution and the fastest way you integrate passkeys, 2FA, SSO, and more—with full control over your data. Move between self-hosted and Hanko Cloud anytime. No lock-in. Just Auth how it should be: secure, user friendly, and fully yours.What This Guide Covers: This guide demonstrates how to integrate LinkedIn OAuth authentication with Hanko, enabling users to sign in using their LinkedIn professional accounts. You’ll learn to create a LinkedIn application, configure Sign In with LinkedIn using OpenID Connect, and implement LinkedIn authentication in your application.Key Technologies:
- OAuth 2.0 and OpenID Connect protocols
- LinkedIn Sign In with OpenID Connect
- JWT (JSON Web Tokens) for secure session management
- LinkedIn Developer Portal and API
- RESTful API integration
- Active Hanko Cloud account with a configured project
- LinkedIn account for developer portal access
- Basic understanding of OAuth 2.0 authentication flow
- LinkedIn company page (required for app creation)
- Create and configure a LinkedIn application with Sign In capabilities
- Request access to Sign In with LinkedIn using OpenID Connect
- Configure OAuth redirect URLs and obtain client credentials
- Configure LinkedIn OAuth credentials in Hanko Console
- Implement LinkedIn authentication in your frontend application
Prerequisites
- You need a Hanko Cloud account and a project. Learn more on how to set them up here.
- You need a LinkedIn account. You can create an account here.
Get your provider redirect URL
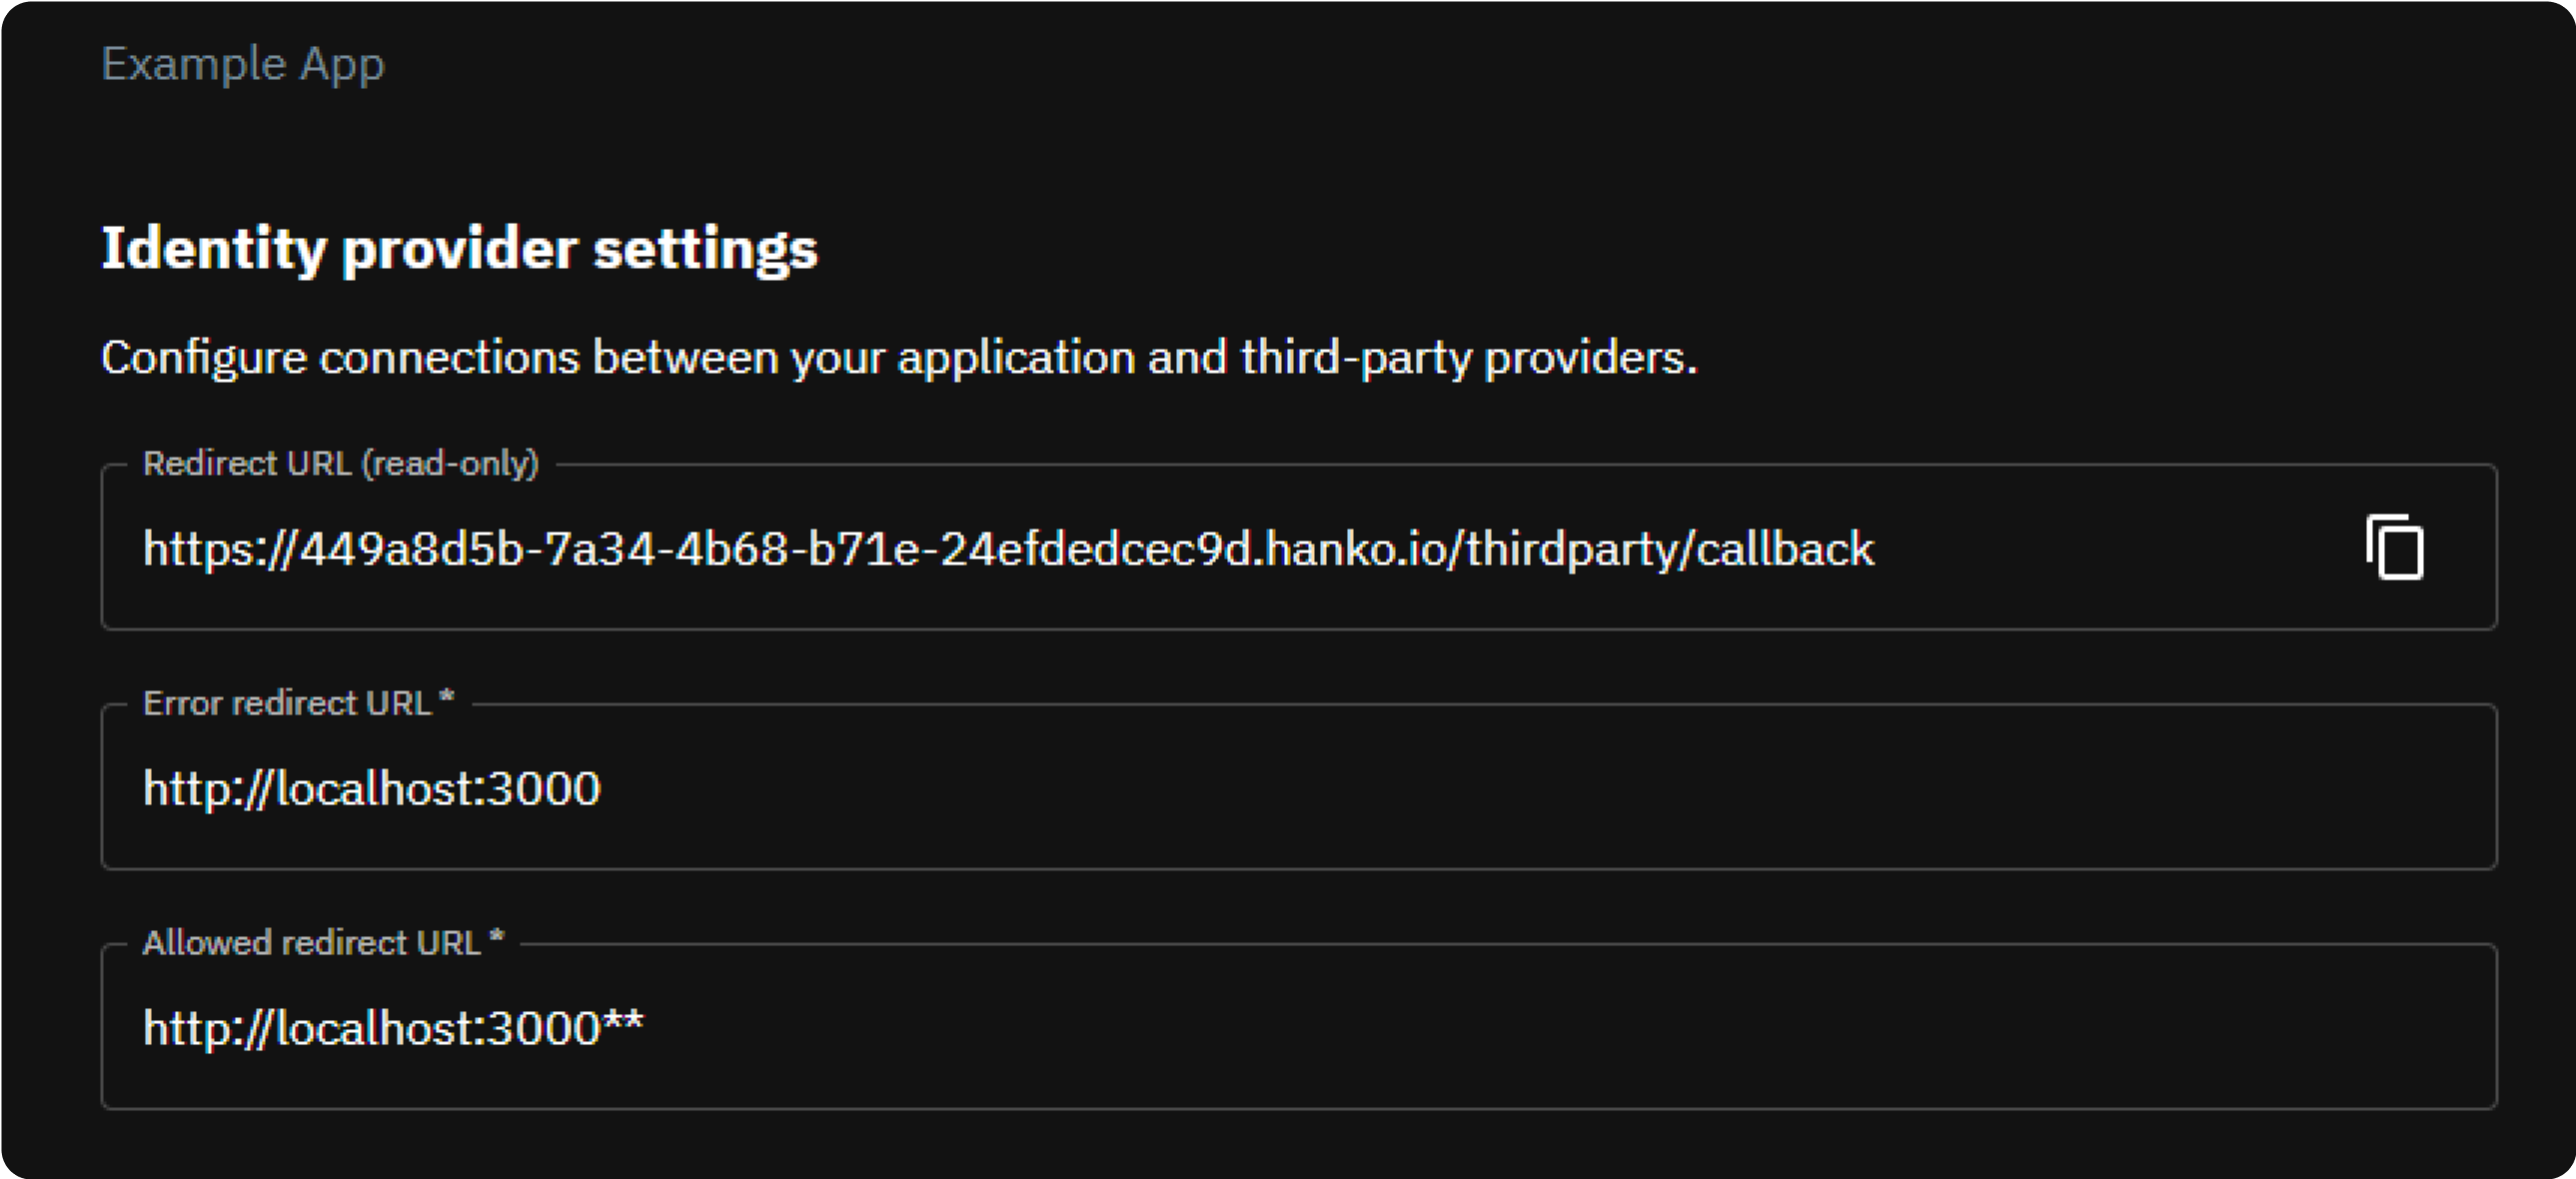
When creating an LinkedIn application, you need to provide a redirect URL that determines where the third party provider redirects after a successful login. This redirect URL consists of the base URL of the Hanko API and the/thirdparty/callback endpoint. You can always view your redirect URL in the Hanko Cloud Console:
- Sign in to cloud.hanko.io.
- Select your
Organization. - Select your
Project. - In the left sidebar, click
Settings, then selectSocial connections. - Find your redirect URL in the
Redirect URLinput.
Create a new LinkedIn application
- Navigate to and log in to the LinkedIn developer portal.
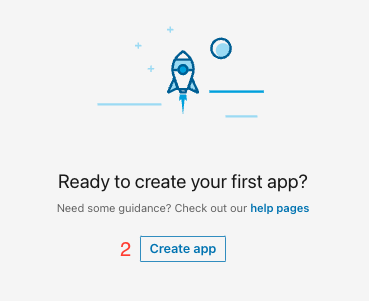
- Click on the
Create appbutton.
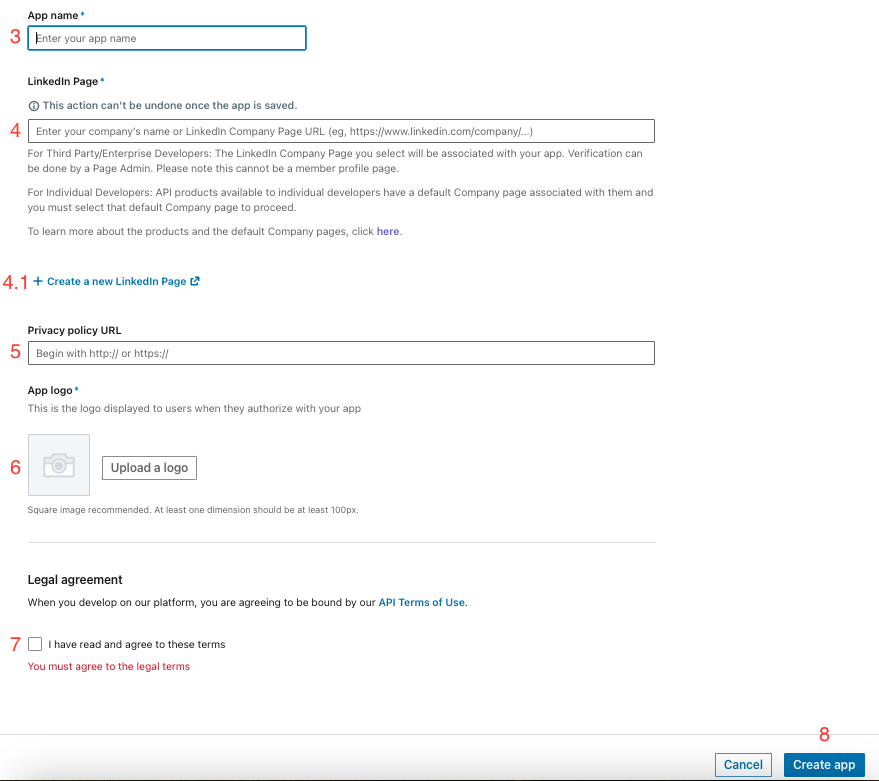
- Enter your application name in
App name. - Enter your LinkedIn company page url in
LinkedIn Pageor create one. - (Optional) Enter your privacy policy page url in
Privacy policy URL. - Upload a logo for your application.
- Accept the terms and conditions.
- Click on the
Create appbutton.
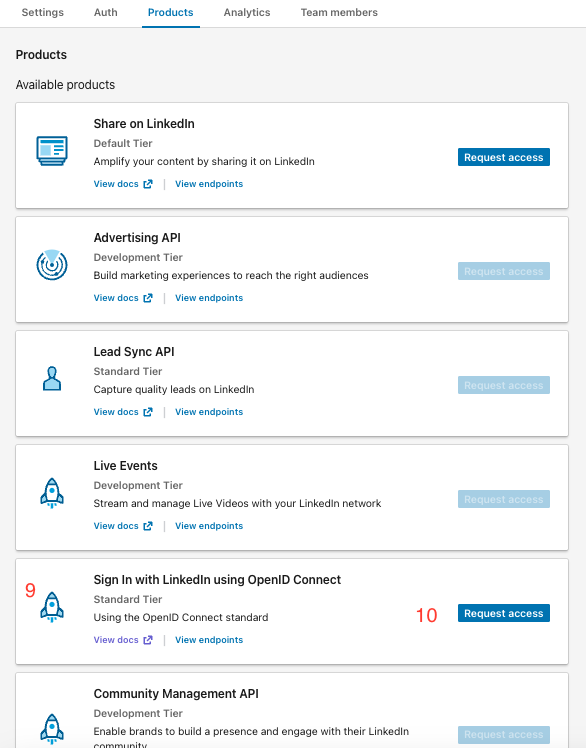
- Search for the
Sign In with LinkedIn using OpenID Connectcard from the product list. - Click
Request access.
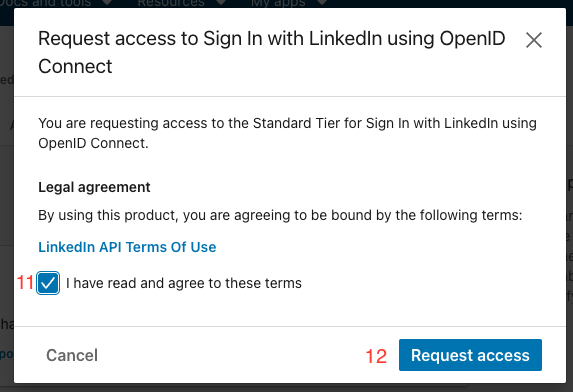
- Accept the terms and conditions.
- Click on the
Request accessButton. - The card should now show as added product.
- Click on the
Authtab up top and scroll toOAuth 2.0 settings
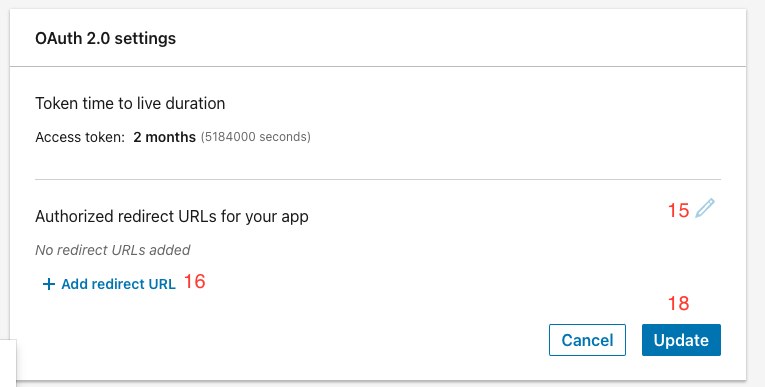
- Click on the
pencilnext toAuthorized redirect URLs for your app - Click on
+ Add redirect URL - Enter the
Redirect URLyou obtained in the first step as the value. - Click on the
Updatebutton.
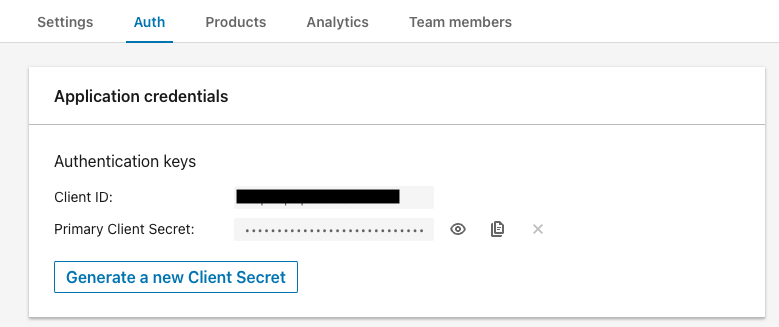
Get your client ID and secret
You can view the client ID as well as the secret of your app in theAuth tab on your app page.
You will need this when configuring your credentials with Hanko
Configure credentials with Hanko
- In the Hanko Cloud Console, navigate to your project
Settingsand selectSocial connections. - Configure the following:
-
Error Redirect URL: This is the URL target in your frontend the Hanko API redirects to if an error occurs during third
party sign-in. If your frontend uses the
hanko-elementsweb components, this URL should be the URL of the page that embeds the web component such that errors can be processed properly by the web component. -
Allowed Redirect URL: This is the URL target in your frontend the Hanko API is allowed to redirect to after third party
authentication was successful. If your frontend uses the
hanko-elementsweb components, this URL should be the URL of the page that embeds the web component.The allowed redirect URL supports wildcard matching through globbing:https://*.example.commatcheshttps://foo.example.comandhttps://bar.example.com.https://foo.example.com/*matches URLs likehttps://foo.example.com/page1andhttps://foo.example.com/page2.- Use ** to act as a super-wildcard/match-all.
- In the
Providerssection, selectLinkedInand use theEnable providertoggle to enable the provider. - Provide the
Client IDandClient Secretyou obtained in one of the previous section in the remaining inputs. - Click
Save.
Frontend integration
To enable a login with LinkedIn in your frontend application we recommend using either our pre-built UI as provided by the@teamhanko/hanko-elements package or building a custom UI using
the @teamhanko/hanko-frontend-sdk.
- Hanko Elements
- Hanko Frontend SDK
We recommend following one of our quickstart guides to integrate
the On successful authentication with the provider, the backend issues a session cookie and the web component
continues the usual component flow on success. Errors that occur during third party
provider authentication are also picked up and displayed in the web component accordingly.
<hanko-auth> component from our @teamhanko/hanko-elements package in your frontend application .
On successful integration, the component will display a button for signing in with LinkedIn in the login view
of the component.Make sure to configure the page the web component is embedded on as your
error redirect URL as well as an
allowed redirect URL (see the previous step).