

Hanko Supabase Integration Guide
About Hanko:Hanko is a modern open source authentication solution and the fastest way you integrate passkeys, 2FA, SSO, and more—with full control over your data. Move between self-hosted and Hanko Cloud anytime. No lock-in. Just Auth how it should be: secure, user friendly, and fully yours.What This Guide Covers: This guide demonstrates how to integrate Hanko authentication with Supabase database. You’ll learn to automatically sync user data between Hanko and Supabase, creating user profiles and managing authentication state across both platforms.Key Technologies:- Hanko Elements (Authentication)
- Supabase (Database & Backend)
- Next.js (React Framework)
- TypeScript
- Supabase JavaScript Client
- Database Schema Design
- Basic knowledge of React/Next.js
- Understanding of database concepts
- Node.js development environment
- Active Hanko project configured
- Supabase account and project
- Set up Supabase project and database
- Create users table with proper schema
- Configure Supabase client in your application
- Build API endpoint for user synchronization
- Integrate user sync with Hanko authentication
- Test user creation and data flow
1
Create Supabase account
Sign up for a Supabase account if you don’t have one already.
2
Create new project
From the Supabase dashboard, click ‘New Project’ to create a project for your application.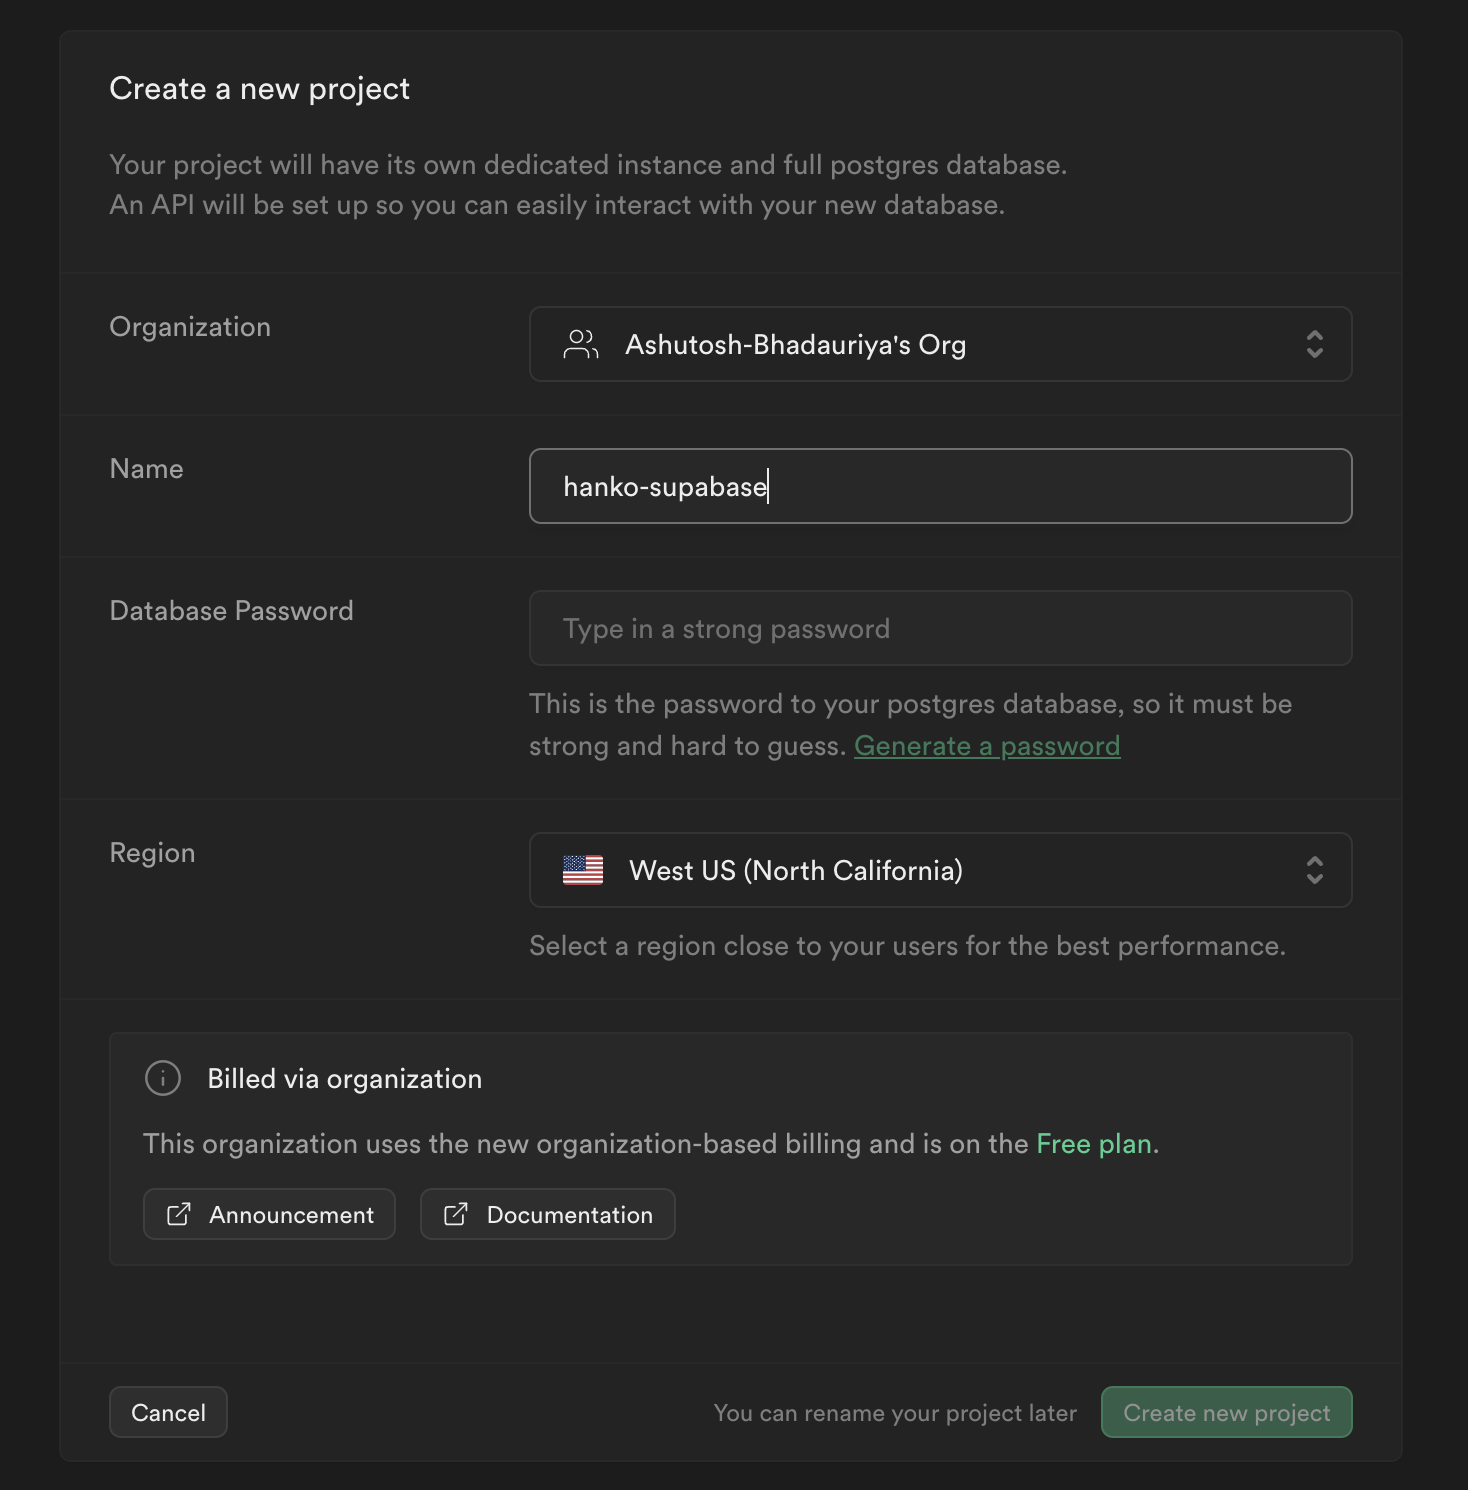
3
Create users table
In your project dashboard, navigate to ‘Database’ and create a new ‘users’ table.
This table will store user information from Hanko. Add these columns beyond the default ‘id’: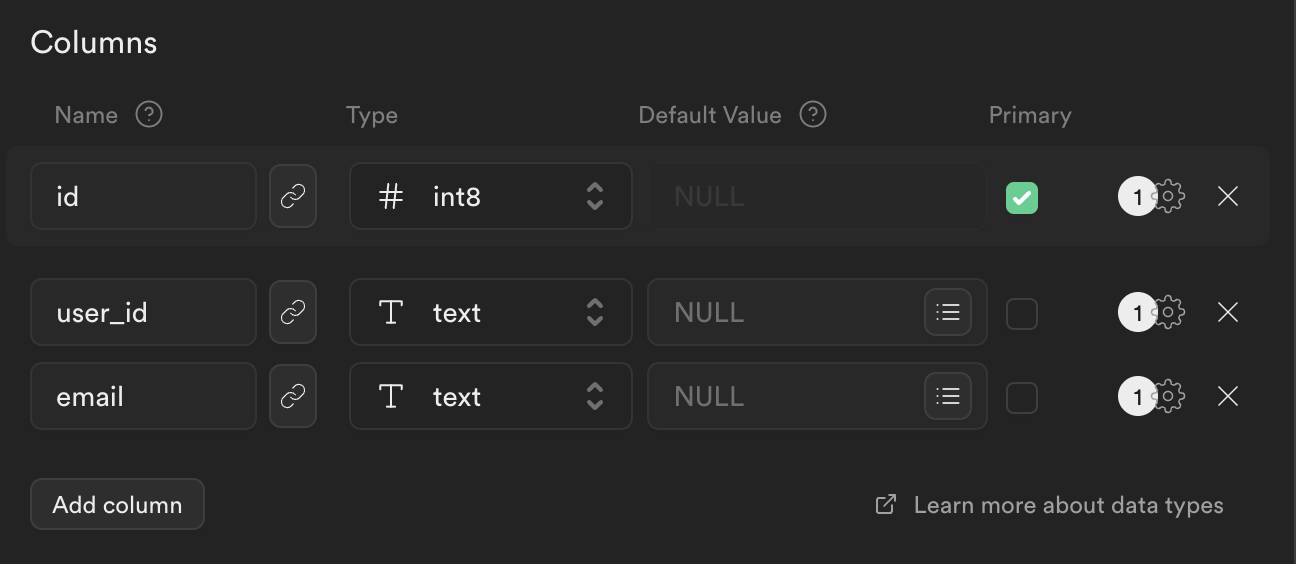
- ‘user_id’ (to match Hanko’s user ID)
- ‘email’ (to store user email addresses)
4
Configure environment variables
In your project dashboard, go to ‘Project Settings’ > ‘API’. Copy the ‘URL’ and ‘service_role’ key, then add them to your
.env.local file..env.local
5
Install Supabase JavaScript Client
Add the Supabase client library to your application (assuming Hanko Auth is already configured).
6
Set up Supabase Client
lib/supabase.ts
7
Create user synchronization API
Build an API endpoint to sync user data between Hanko and Supabase.
app/api/create-user/route.ts
8
Integrate with HankoAuth component
Modify your Hanko authentication component to automatically sync user data when
onSessionCreated triggers.components/hanko/HankoAuth.tsx
9
Try it yourself
Supabase example with Nextjs
Full source code available on our GitHub