Hanko Facebook OAuth Integration Guide:About Hanko:Hanko is a modern open source authentication solution and the fastest way you integrate passkeys, 2FA, SSO, and more—with full control over your data. Move between self-hosted and Hanko Cloud anytime. No lock-in. Just Auth how it should be: secure, user friendly, and fully yours.What This Guide Covers: This guide demonstrates how to integrate Facebook Login OAuth authentication with Hanko, enabling users to sign in using their Facebook accounts. You’ll learn to create a Facebook app, configure OAuth settings, and implement Facebook authentication in your application.Key Technologies:
- OAuth 2.0 authentication protocol
- Facebook Login API and Graph API
- JWT (JSON Web Tokens) for secure session management
- Facebook App Review process
- RESTful API integration
- Active Hanko Cloud account with a configured project
- Facebook developer account and access to Facebook Developer Portal
- Basic understanding of OAuth 2.0 authentication flow
- Frontend application ready for integration
- Create and configure a Facebook application in the developer portal
- Set up Facebook Login with required permissions and redirect URLs
- Configure Facebook OAuth credentials in Hanko Console
- Implement Facebook authentication in your frontend application
- Understand Facebook app publishing requirements
Prerequisites
Before starting this integration, ensure you have:- A Hanko Cloud account and project. Set up your account here if you haven’t already.
- A Facebook developer account. Visit the Facebook developer portal and select
Loginto create an account.
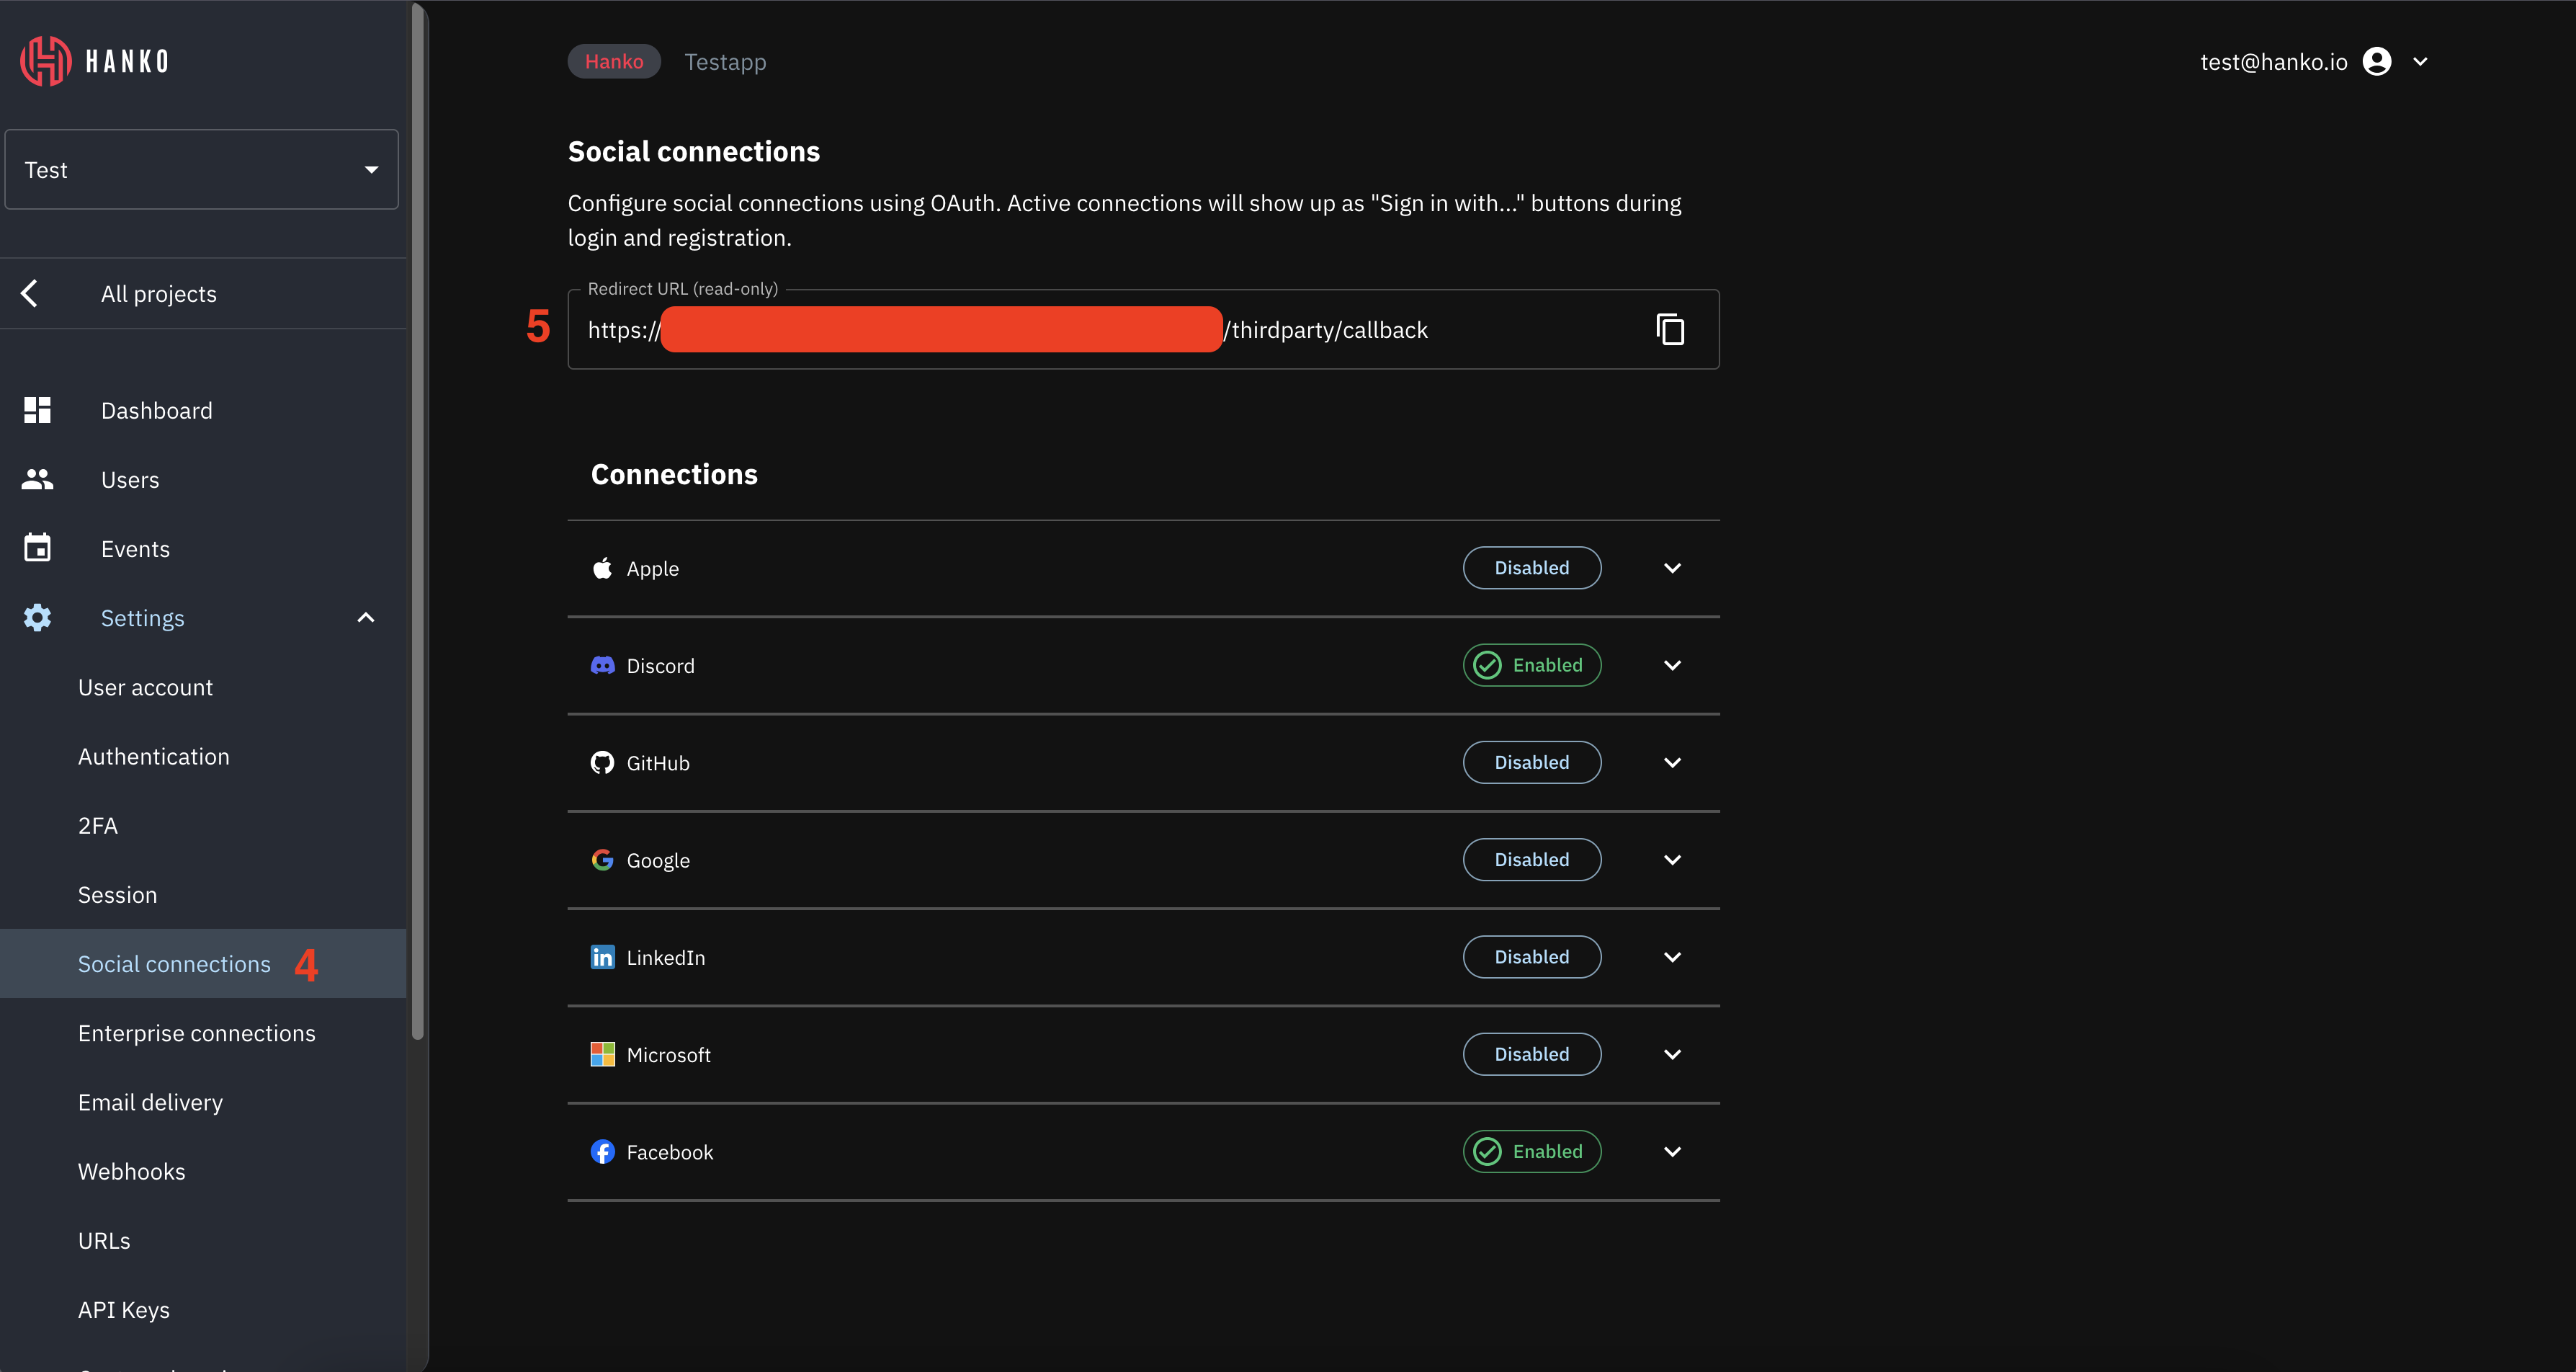
Get your provider redirect URL
You’ll need to configure a redirect URL in your Facebook application. This URL determines where Facebook redirects users after successful authentication. The redirect URL combines your Hanko API base URL with the/thirdparty/callback endpoint.
To find your redirect URL:
- Sign in to cloud.hanko.io.
- Select your
Organization. - Select your
Project. - In the left sidebar, click
Settings, then selectSocial connections. - Find your redirect URL in the
Redirect URLinput.
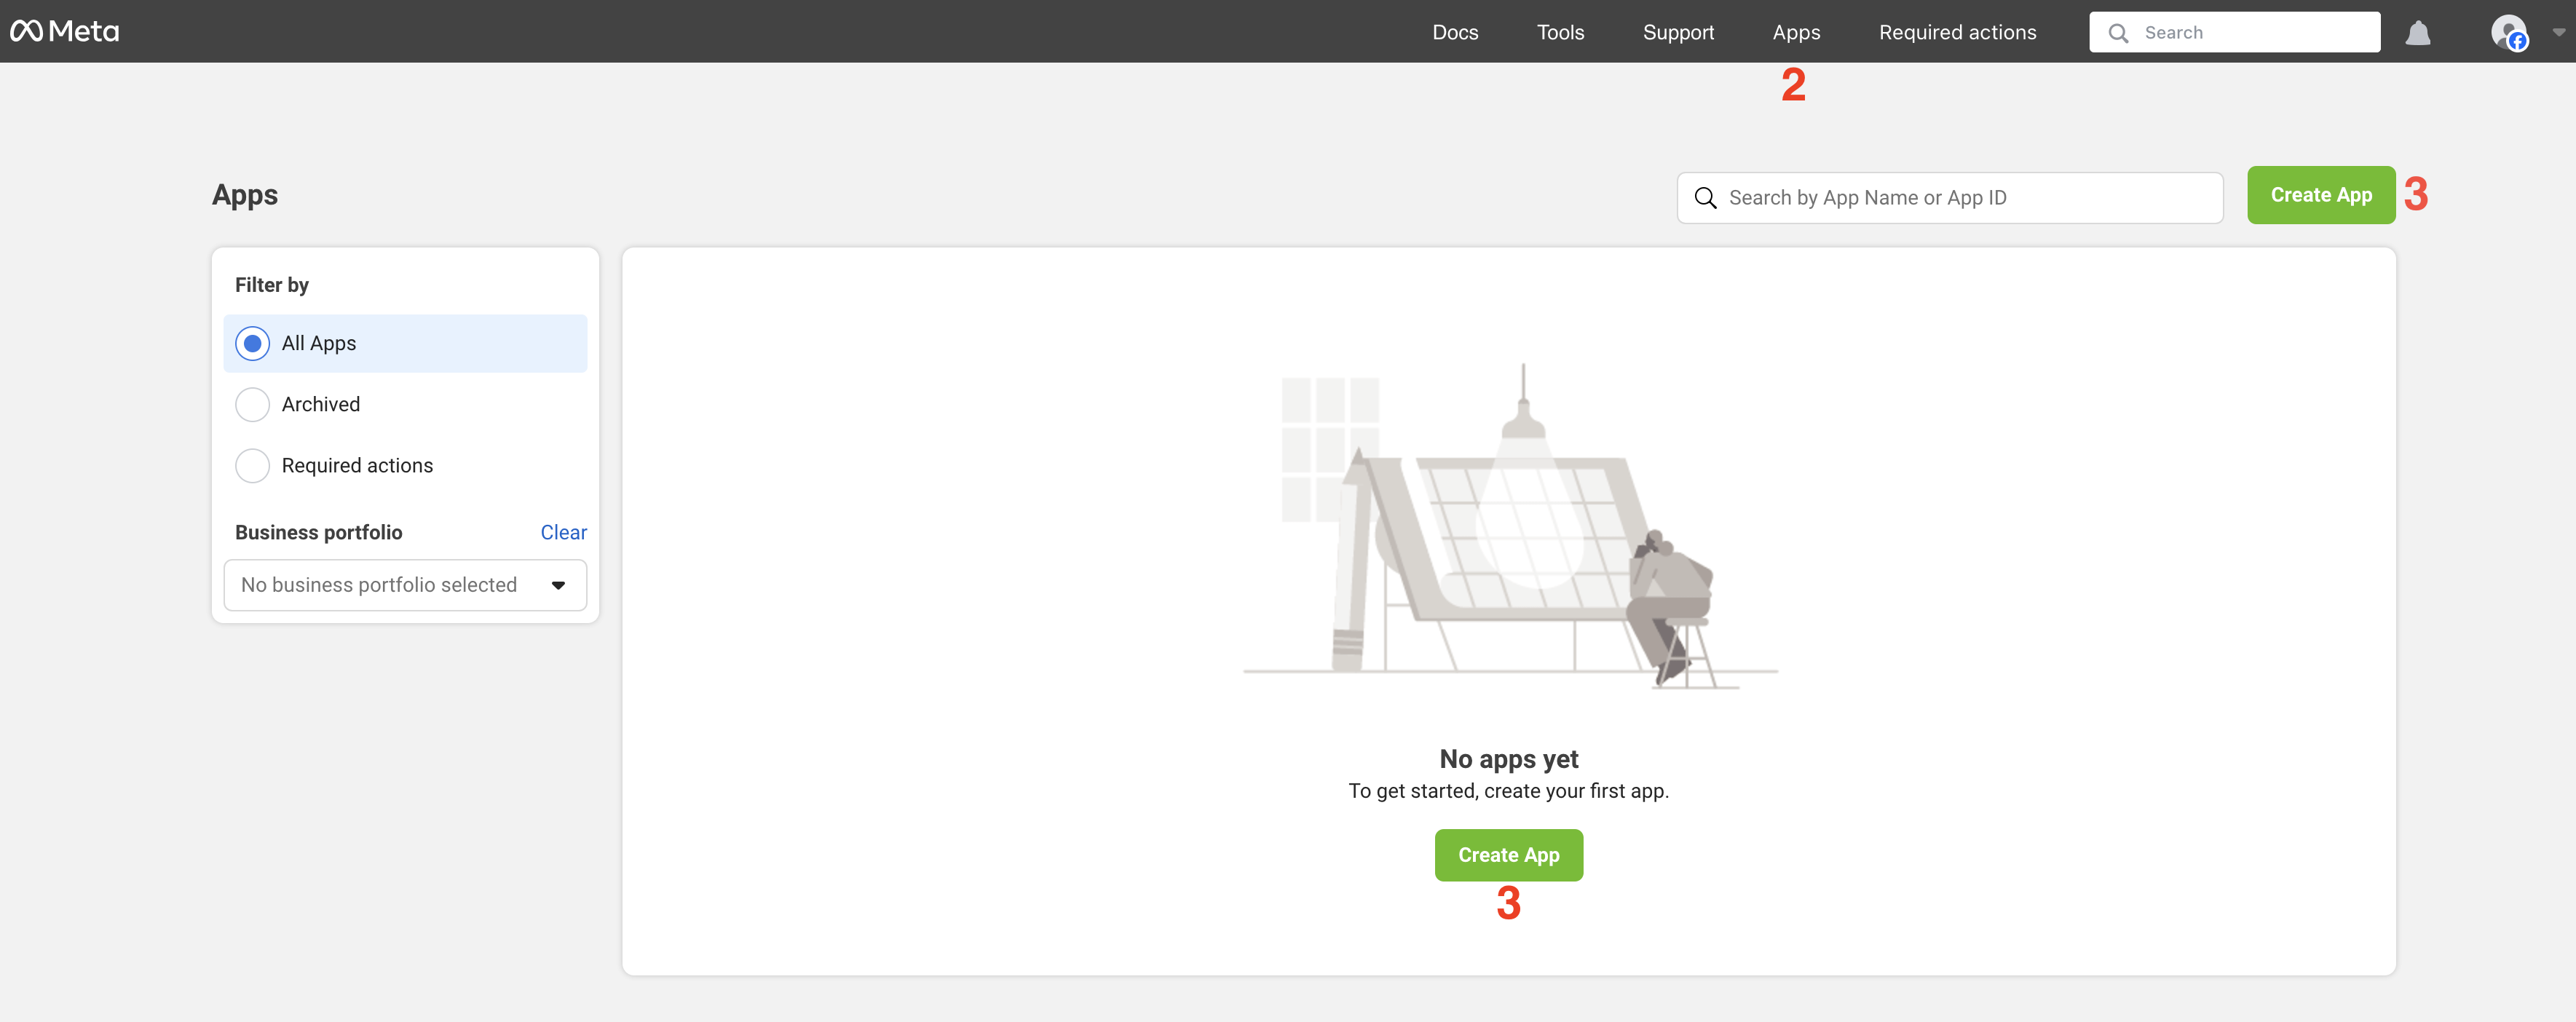
Create a Facebook application
- Navigate to and log in to the Facebook developer portal.
- In the top navigation, select
Apps. - Click
Create appin the center of the page or on the top right.
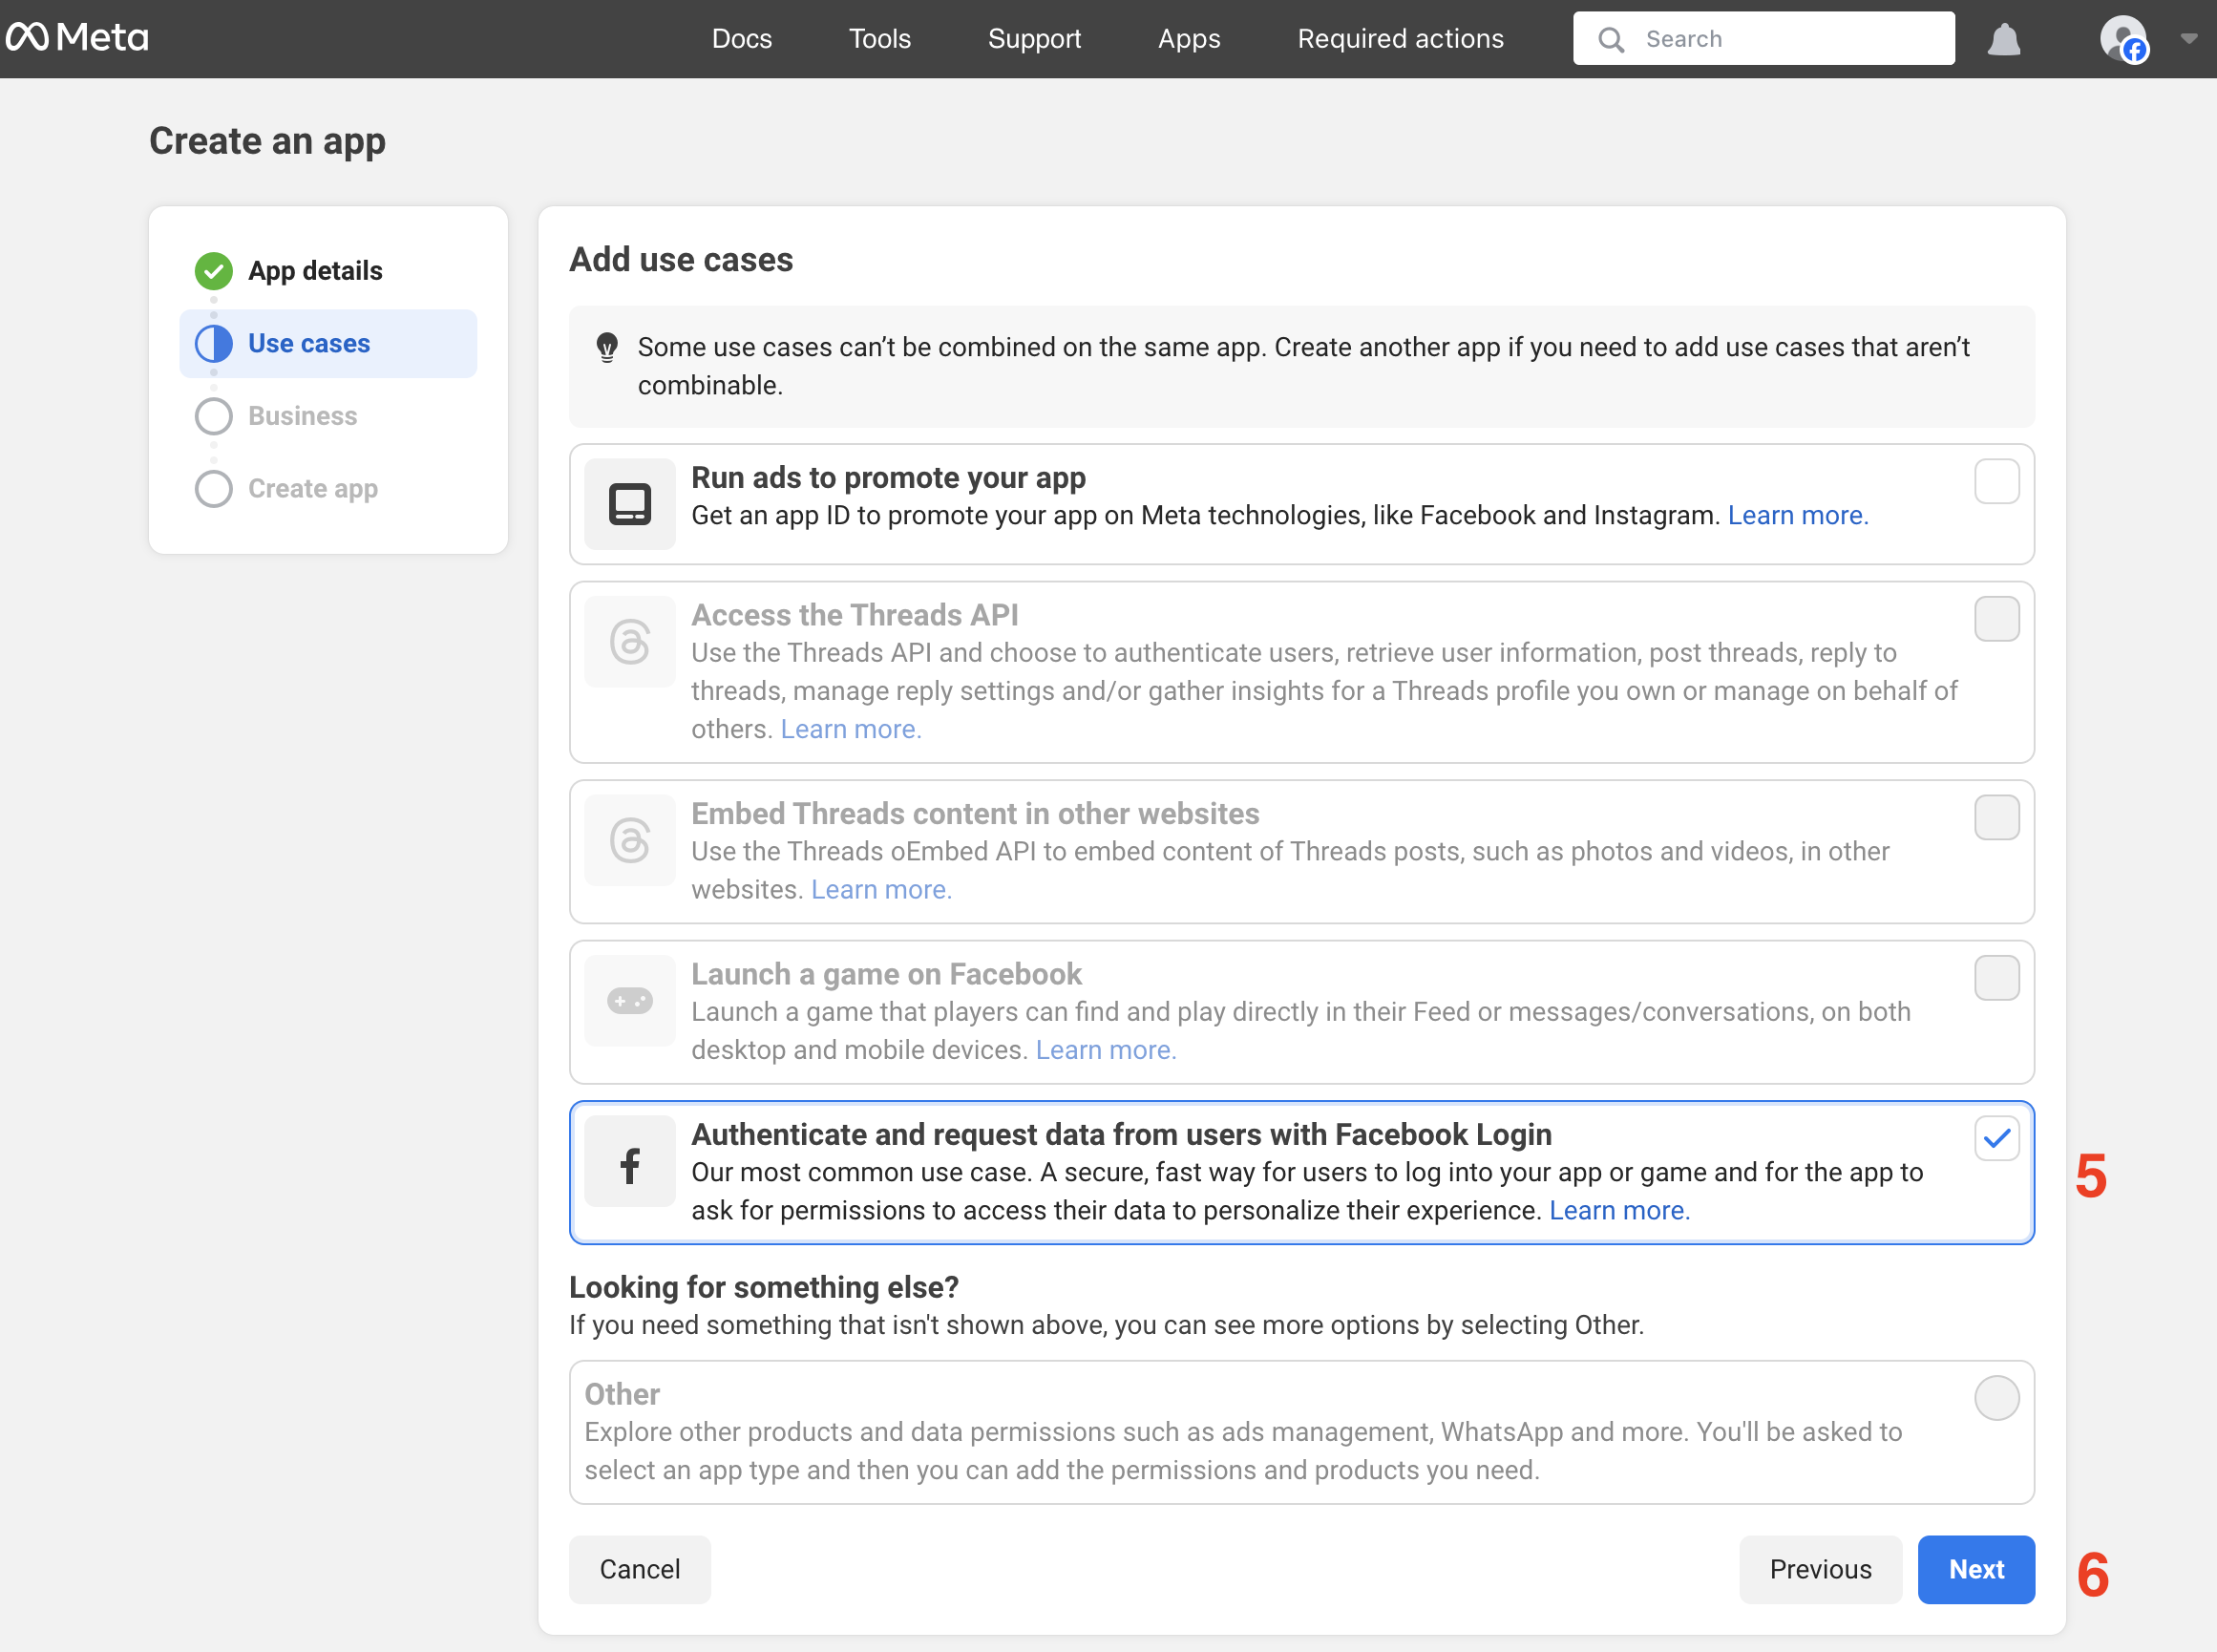
- Enter your app details and click
Next.

- On the
Use casesview, selectAuthenticate and request data from users with Facebook Login. - Click
Next.
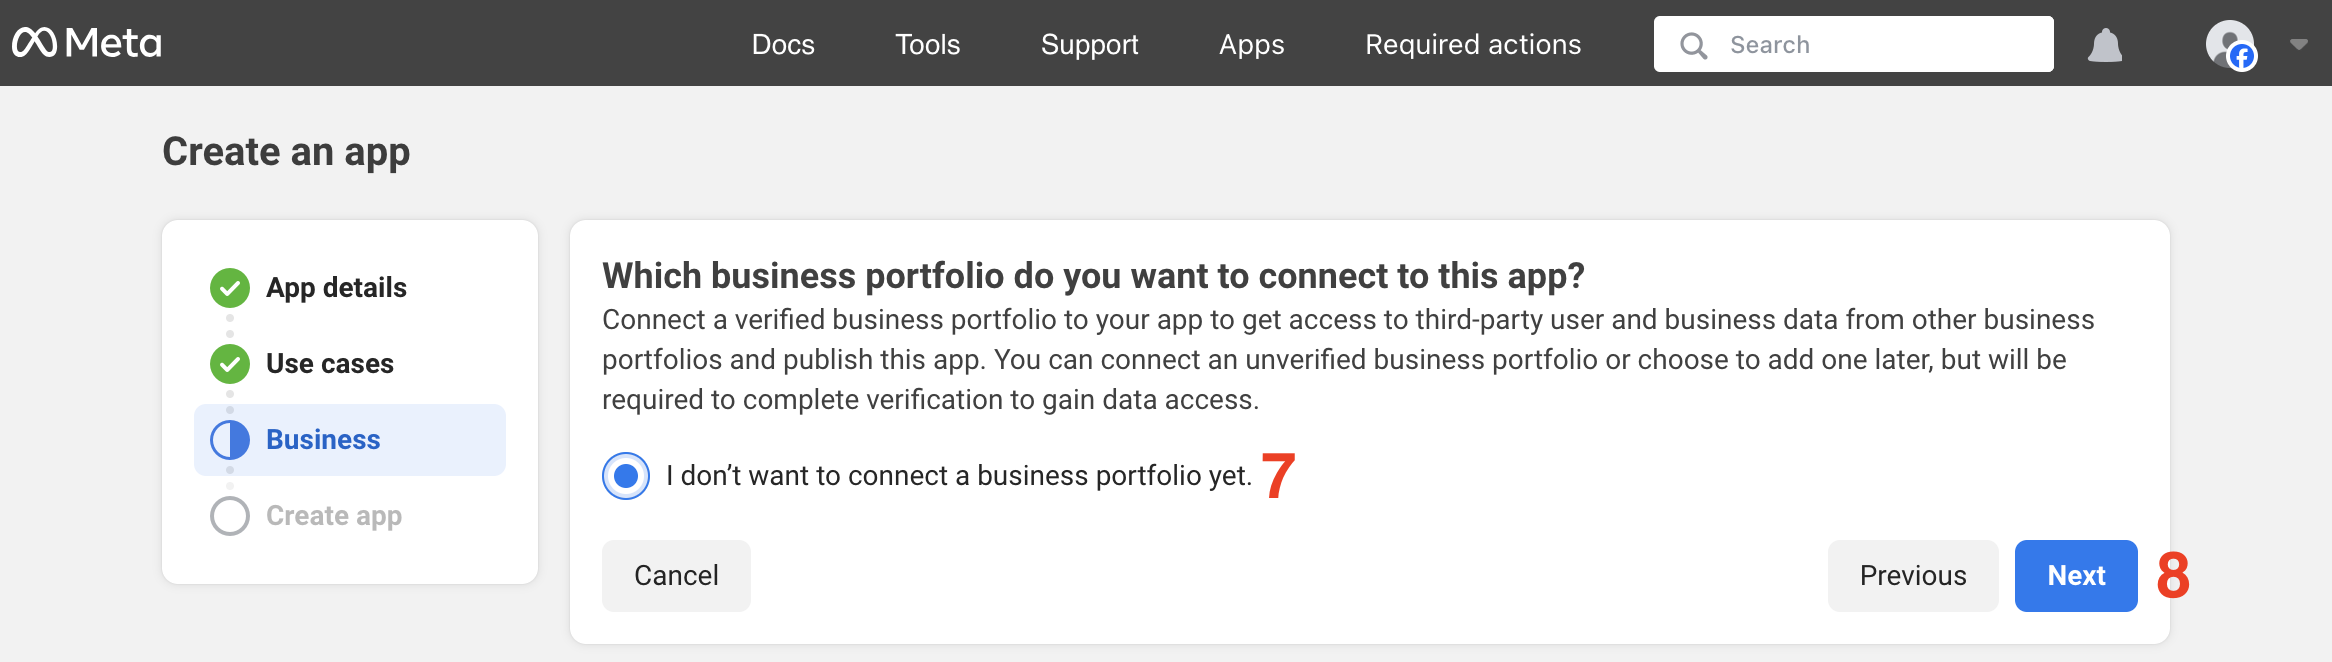
- On the
Businessview, selectI don't want to connect a business portfolio yet(or connect your existing business portfolio if available). - Click
Next.
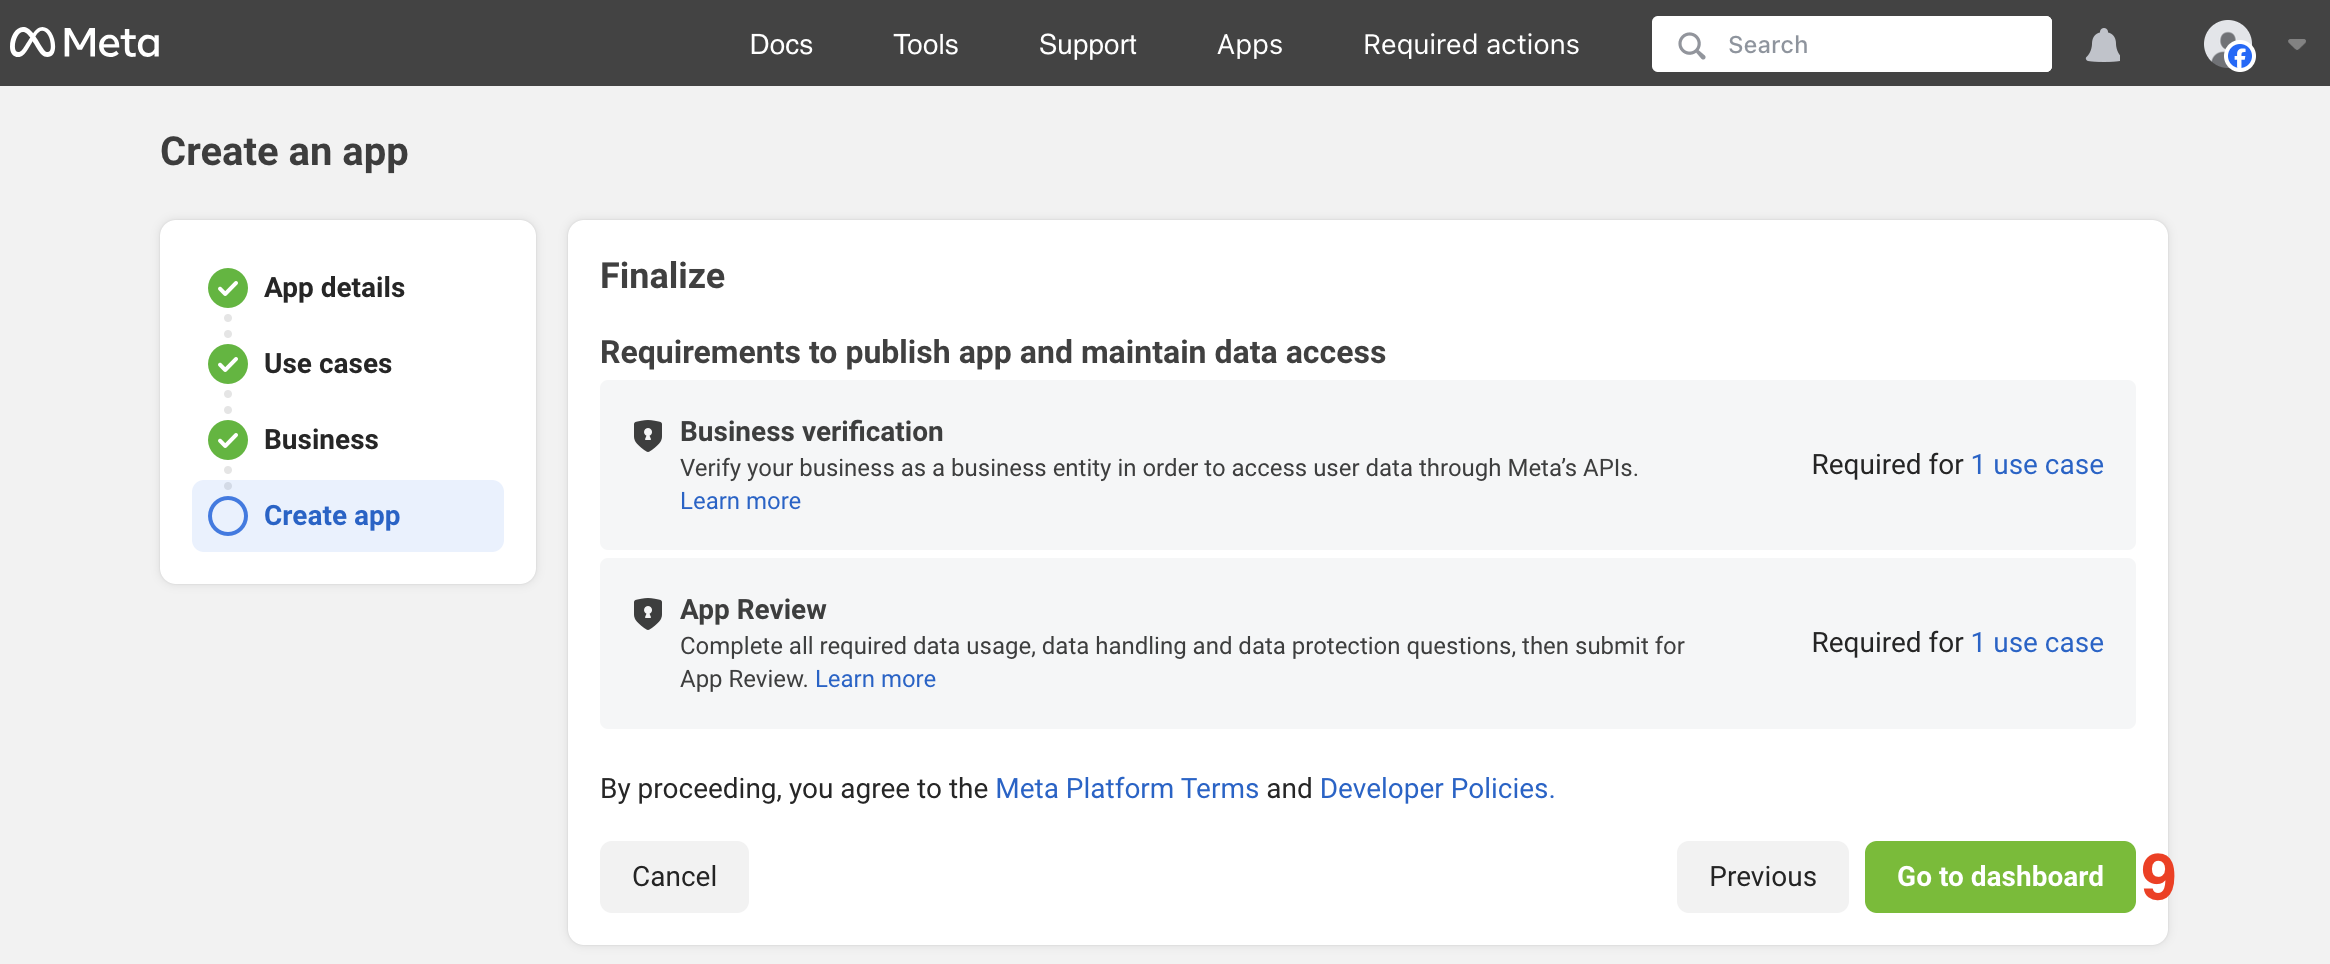
- On the
Create appview, clickGo to dashboard.
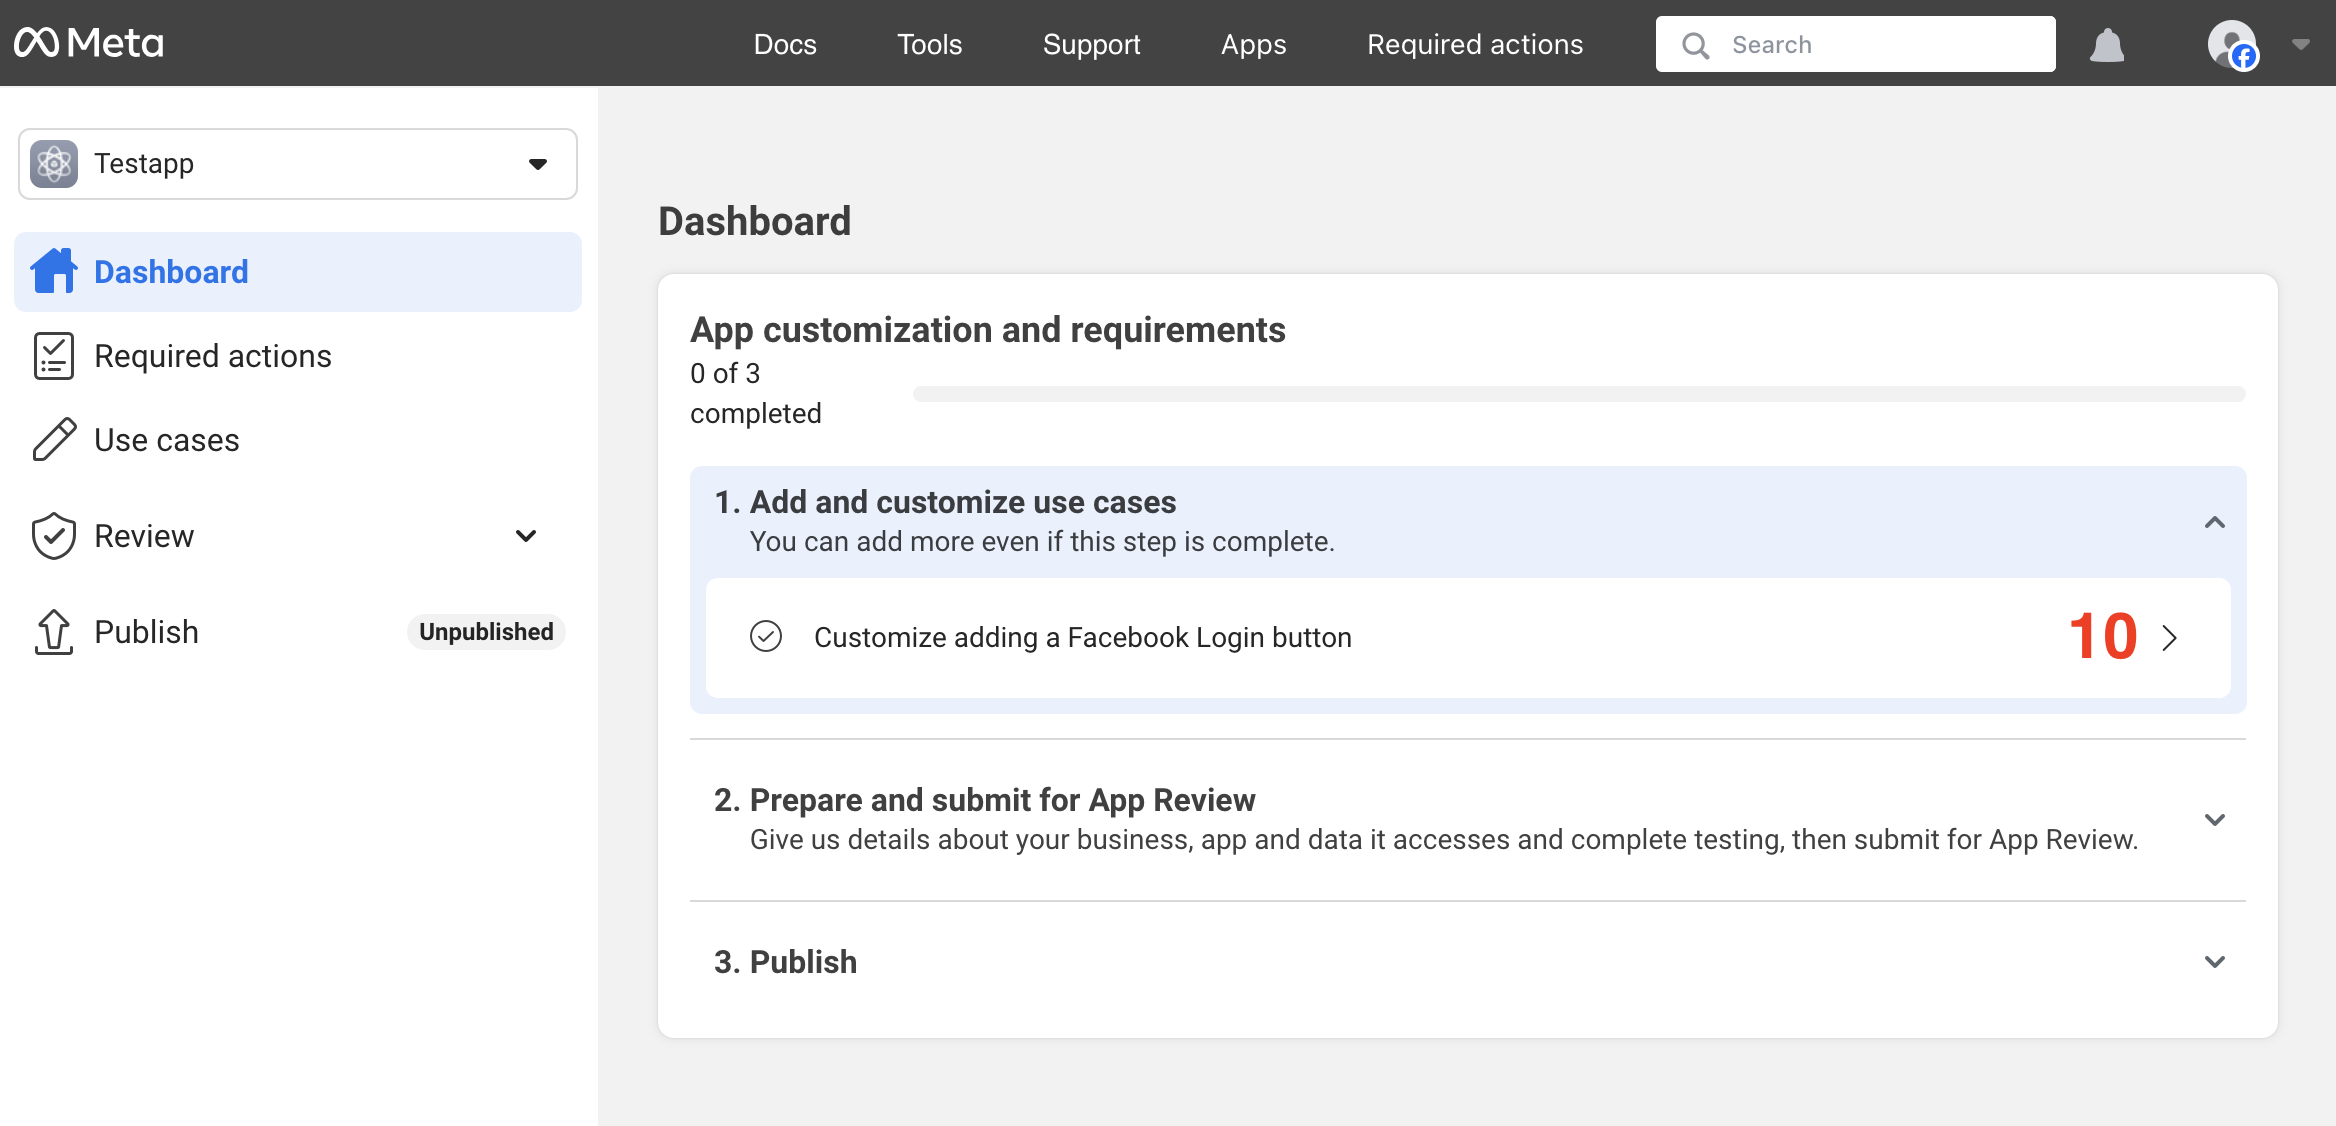
- On the app dashboard, click
Customize adding a Facebook Login buttonin theAdd and customize use casessection.
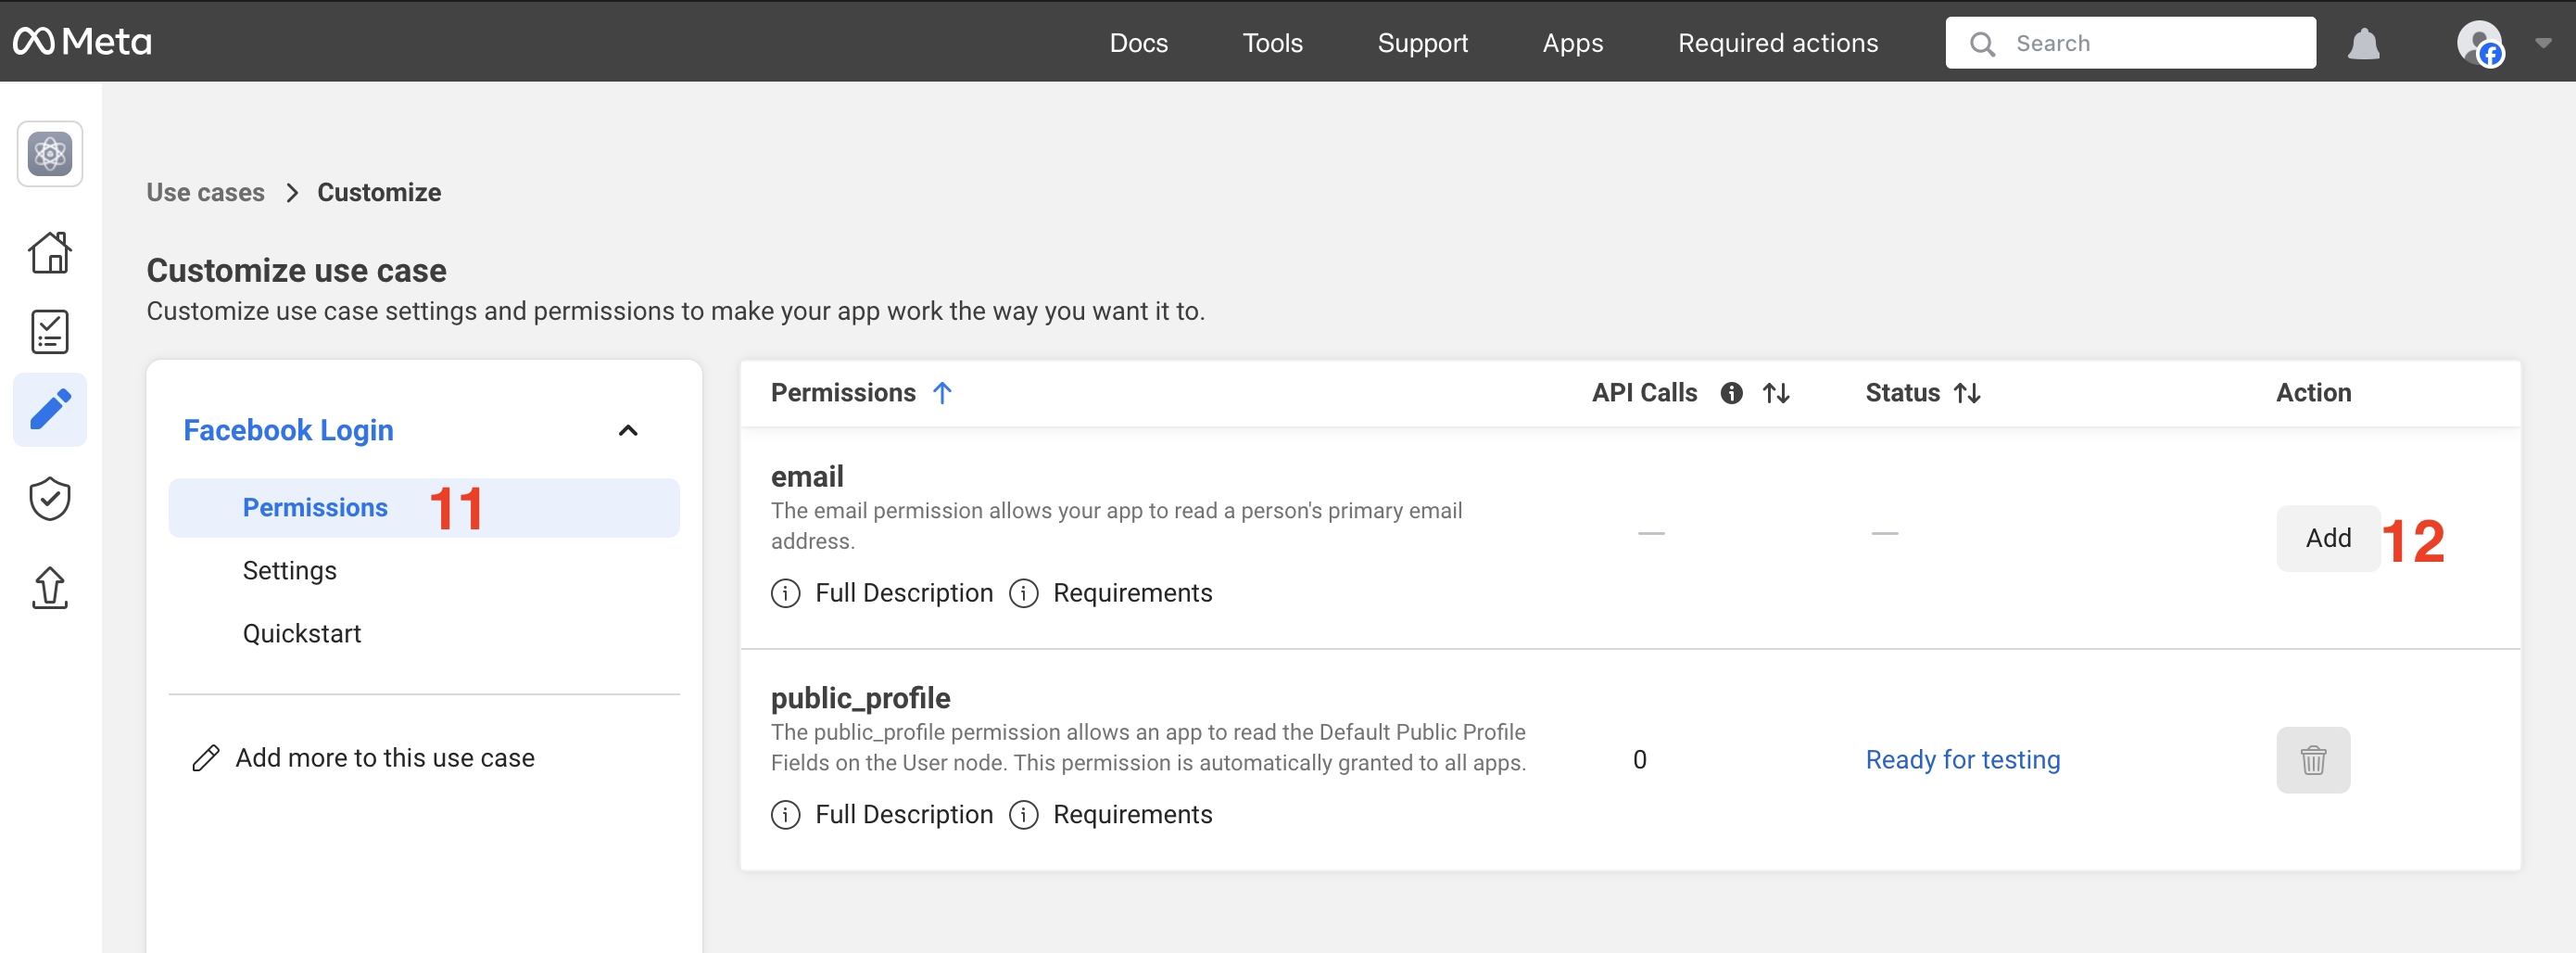
- In the
Customize use caseview, selectPermissionsin the left sidebar. - Click the
addbutton for theemailpermission in the permissions table to enable email access.
- In the
Customize use caseview, selectSettingsin the left sidebar. - Under
Valid OAuth Redirect URIs, add the redirect URL you retrieved from the Hanko Console.
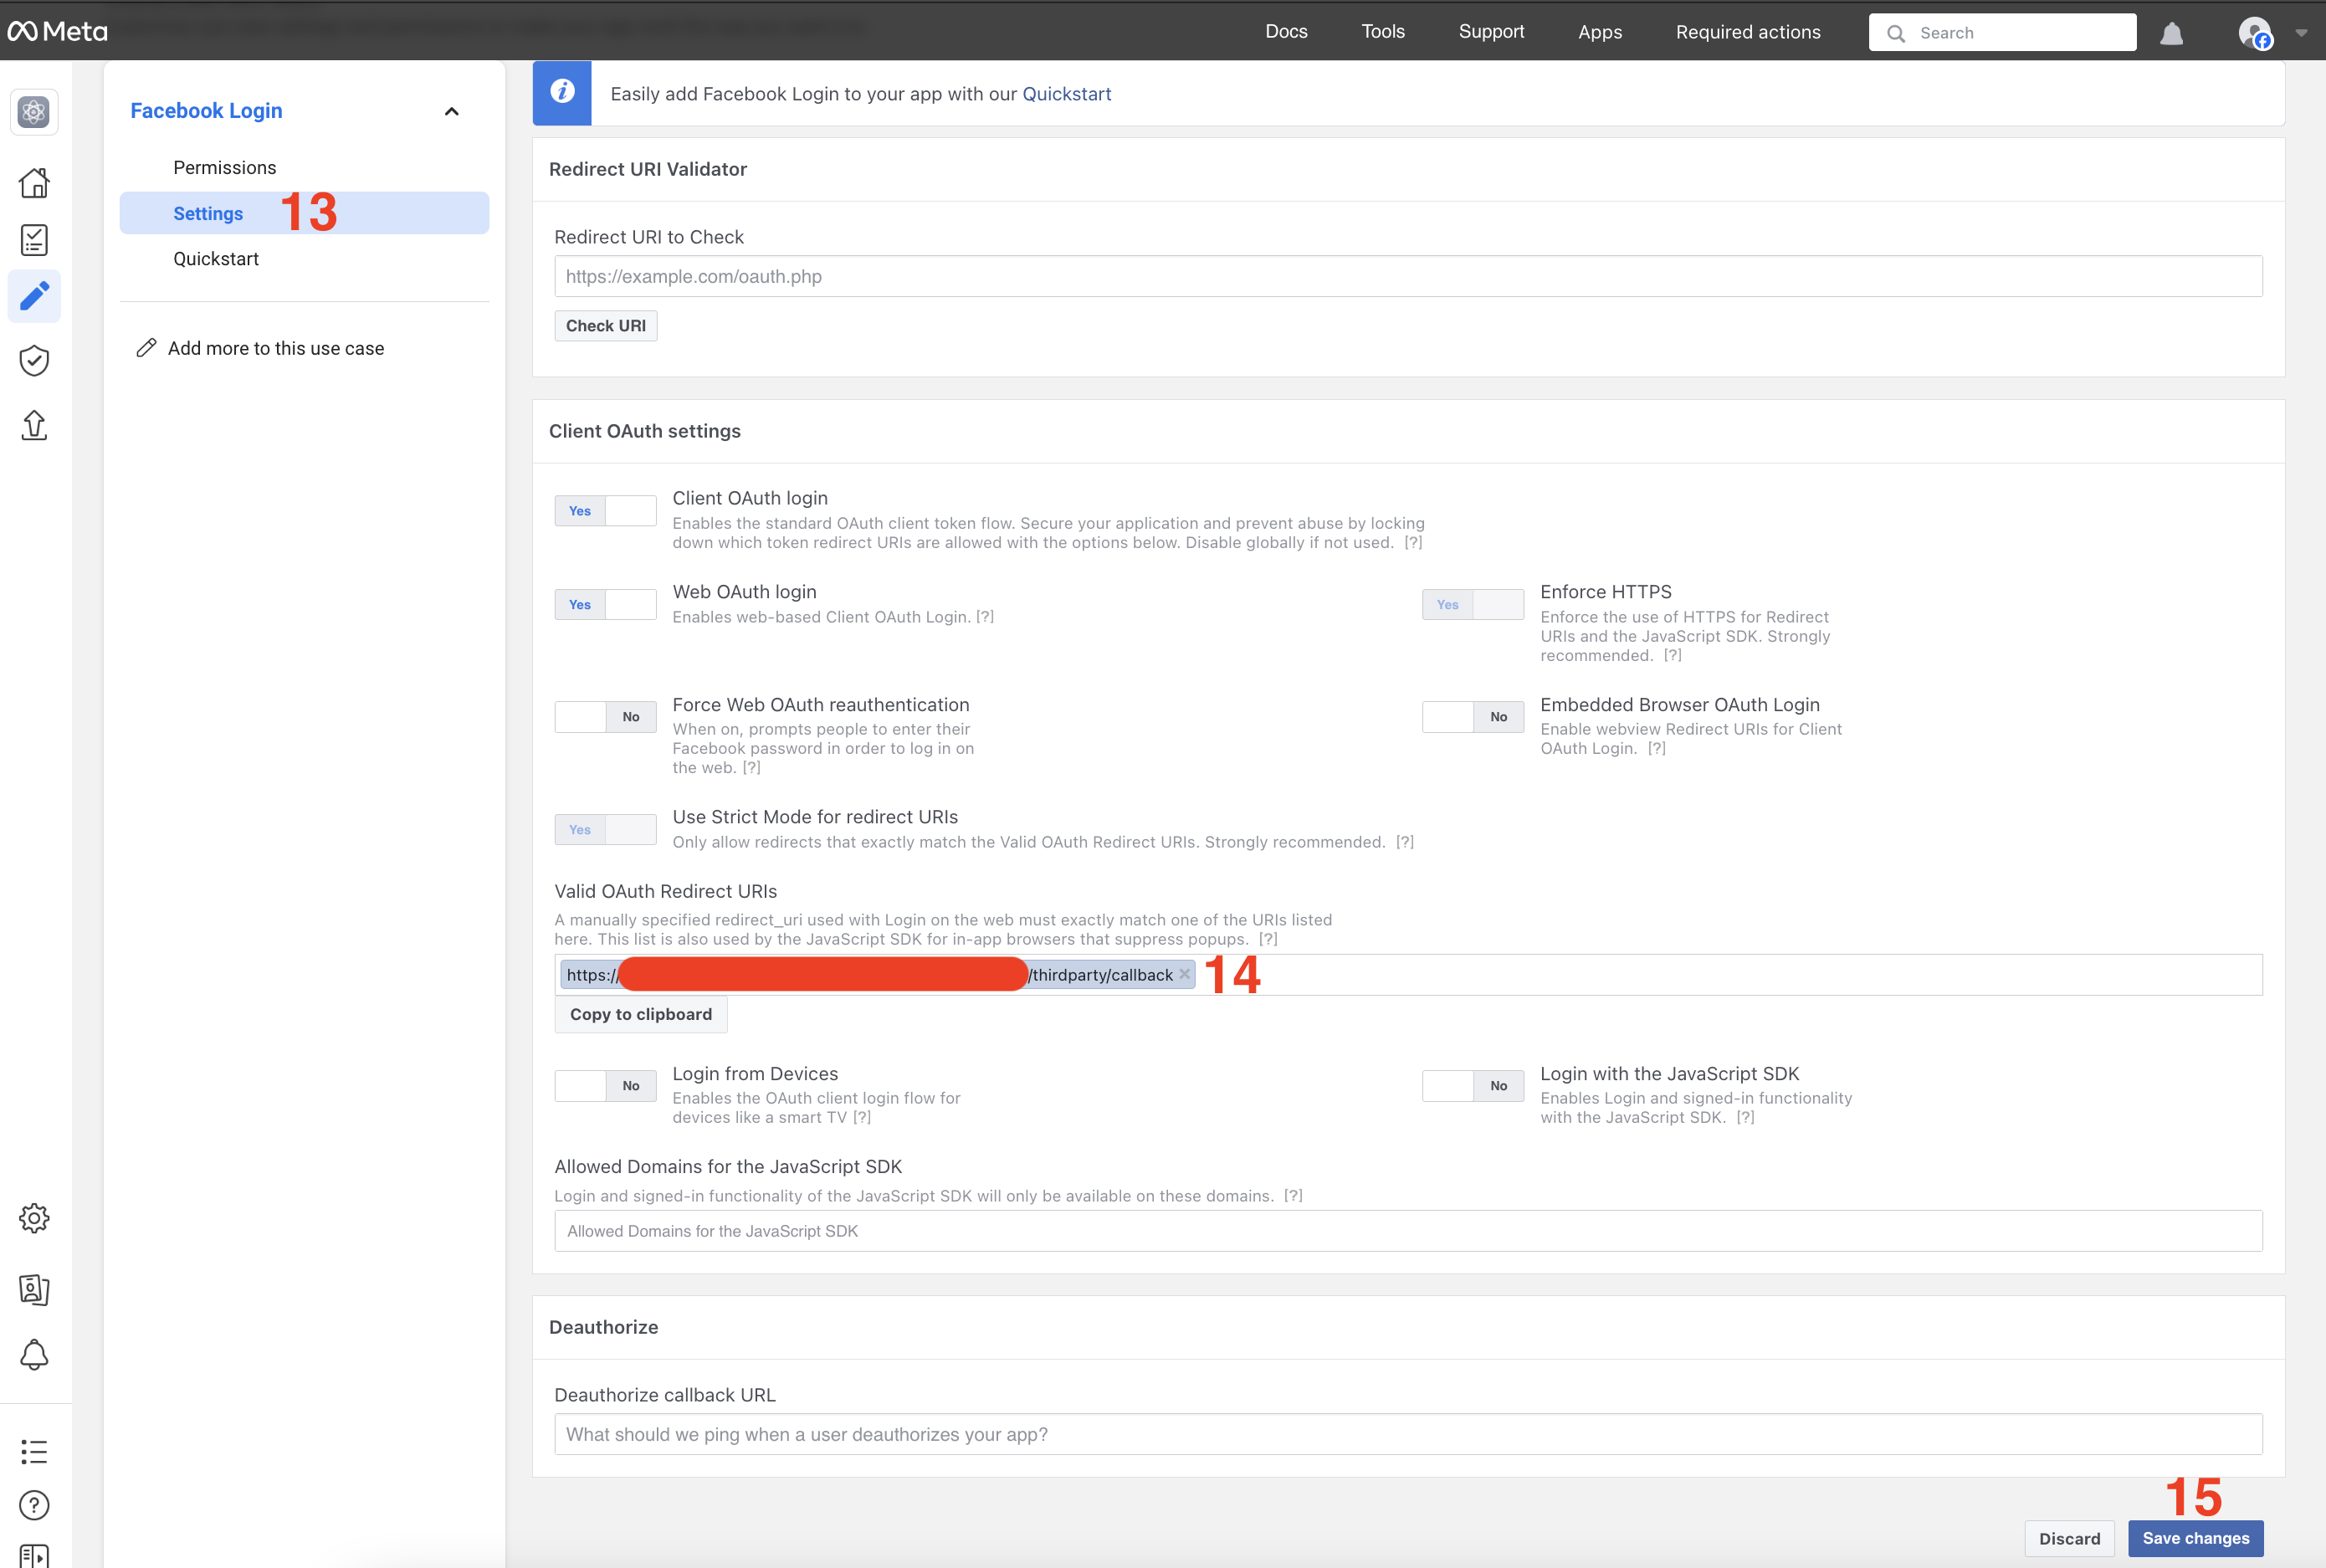
When testing locally, you don’t need to add localhost redirect URLs as Facebook automatically allows all
http://localhost redirects.Get your client ID and secret
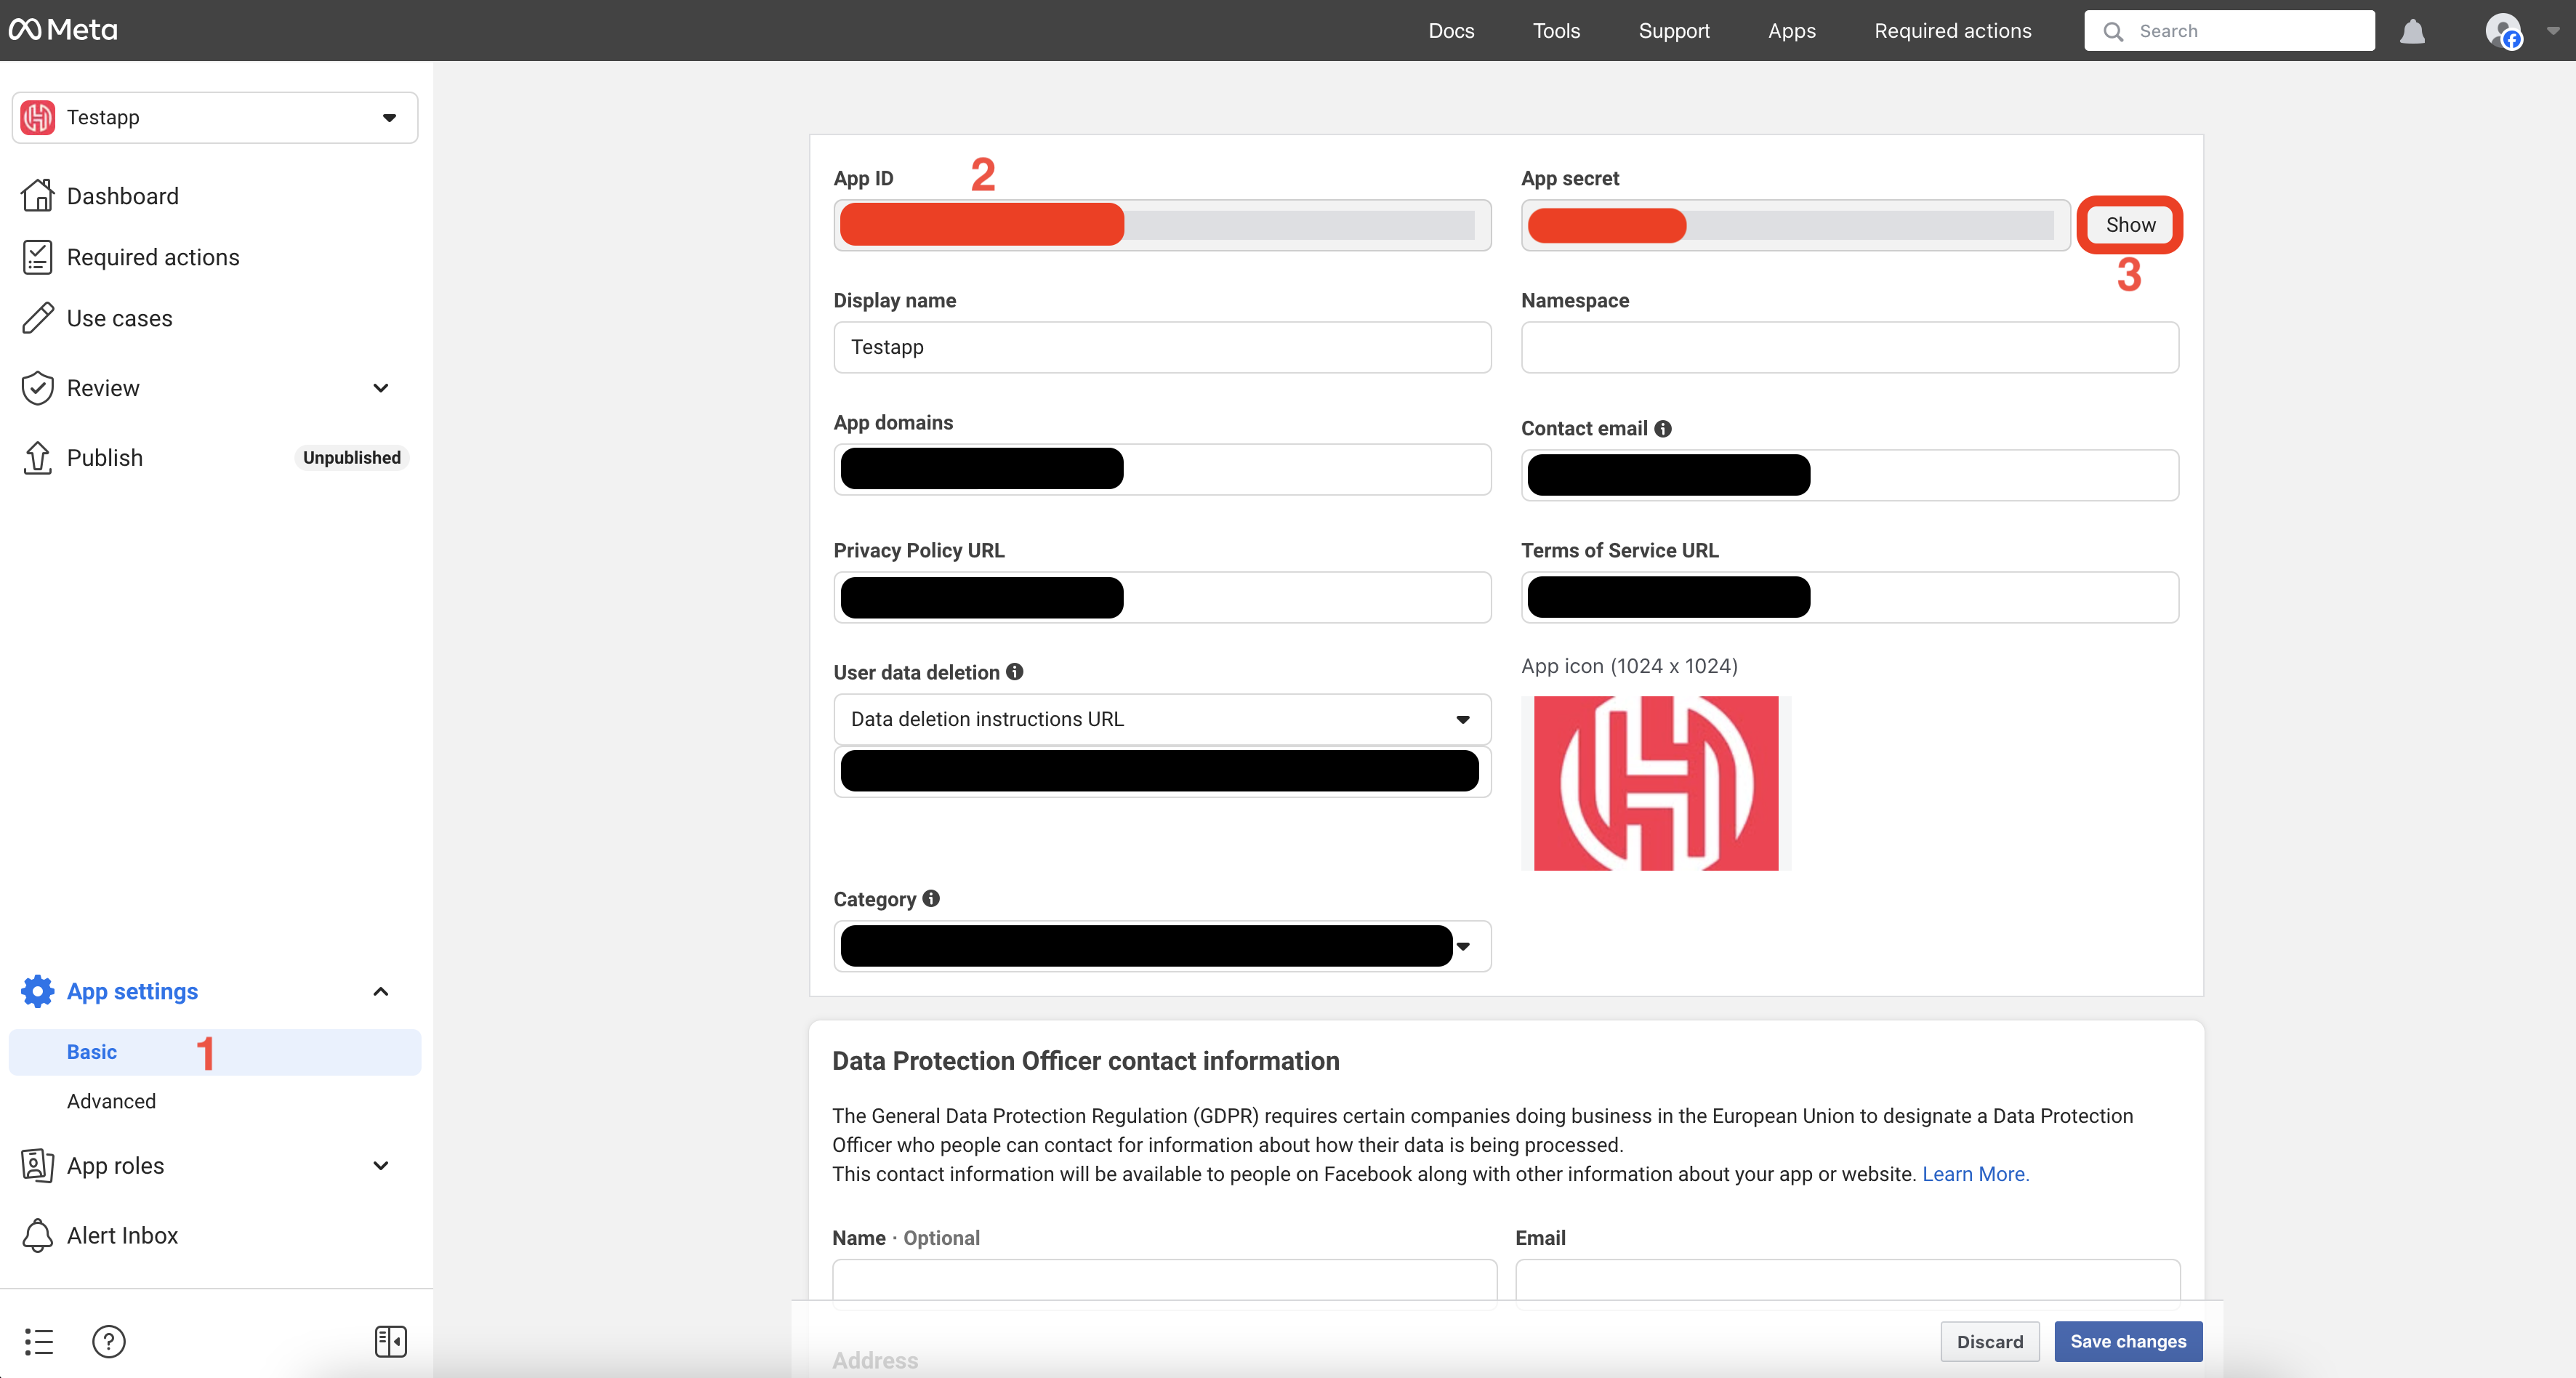
- Navigate to the
App settings>Basicfor your app. - Copy the
App ID. Showand copy theApp Secret.
Configure Facebook credentials in Hanko
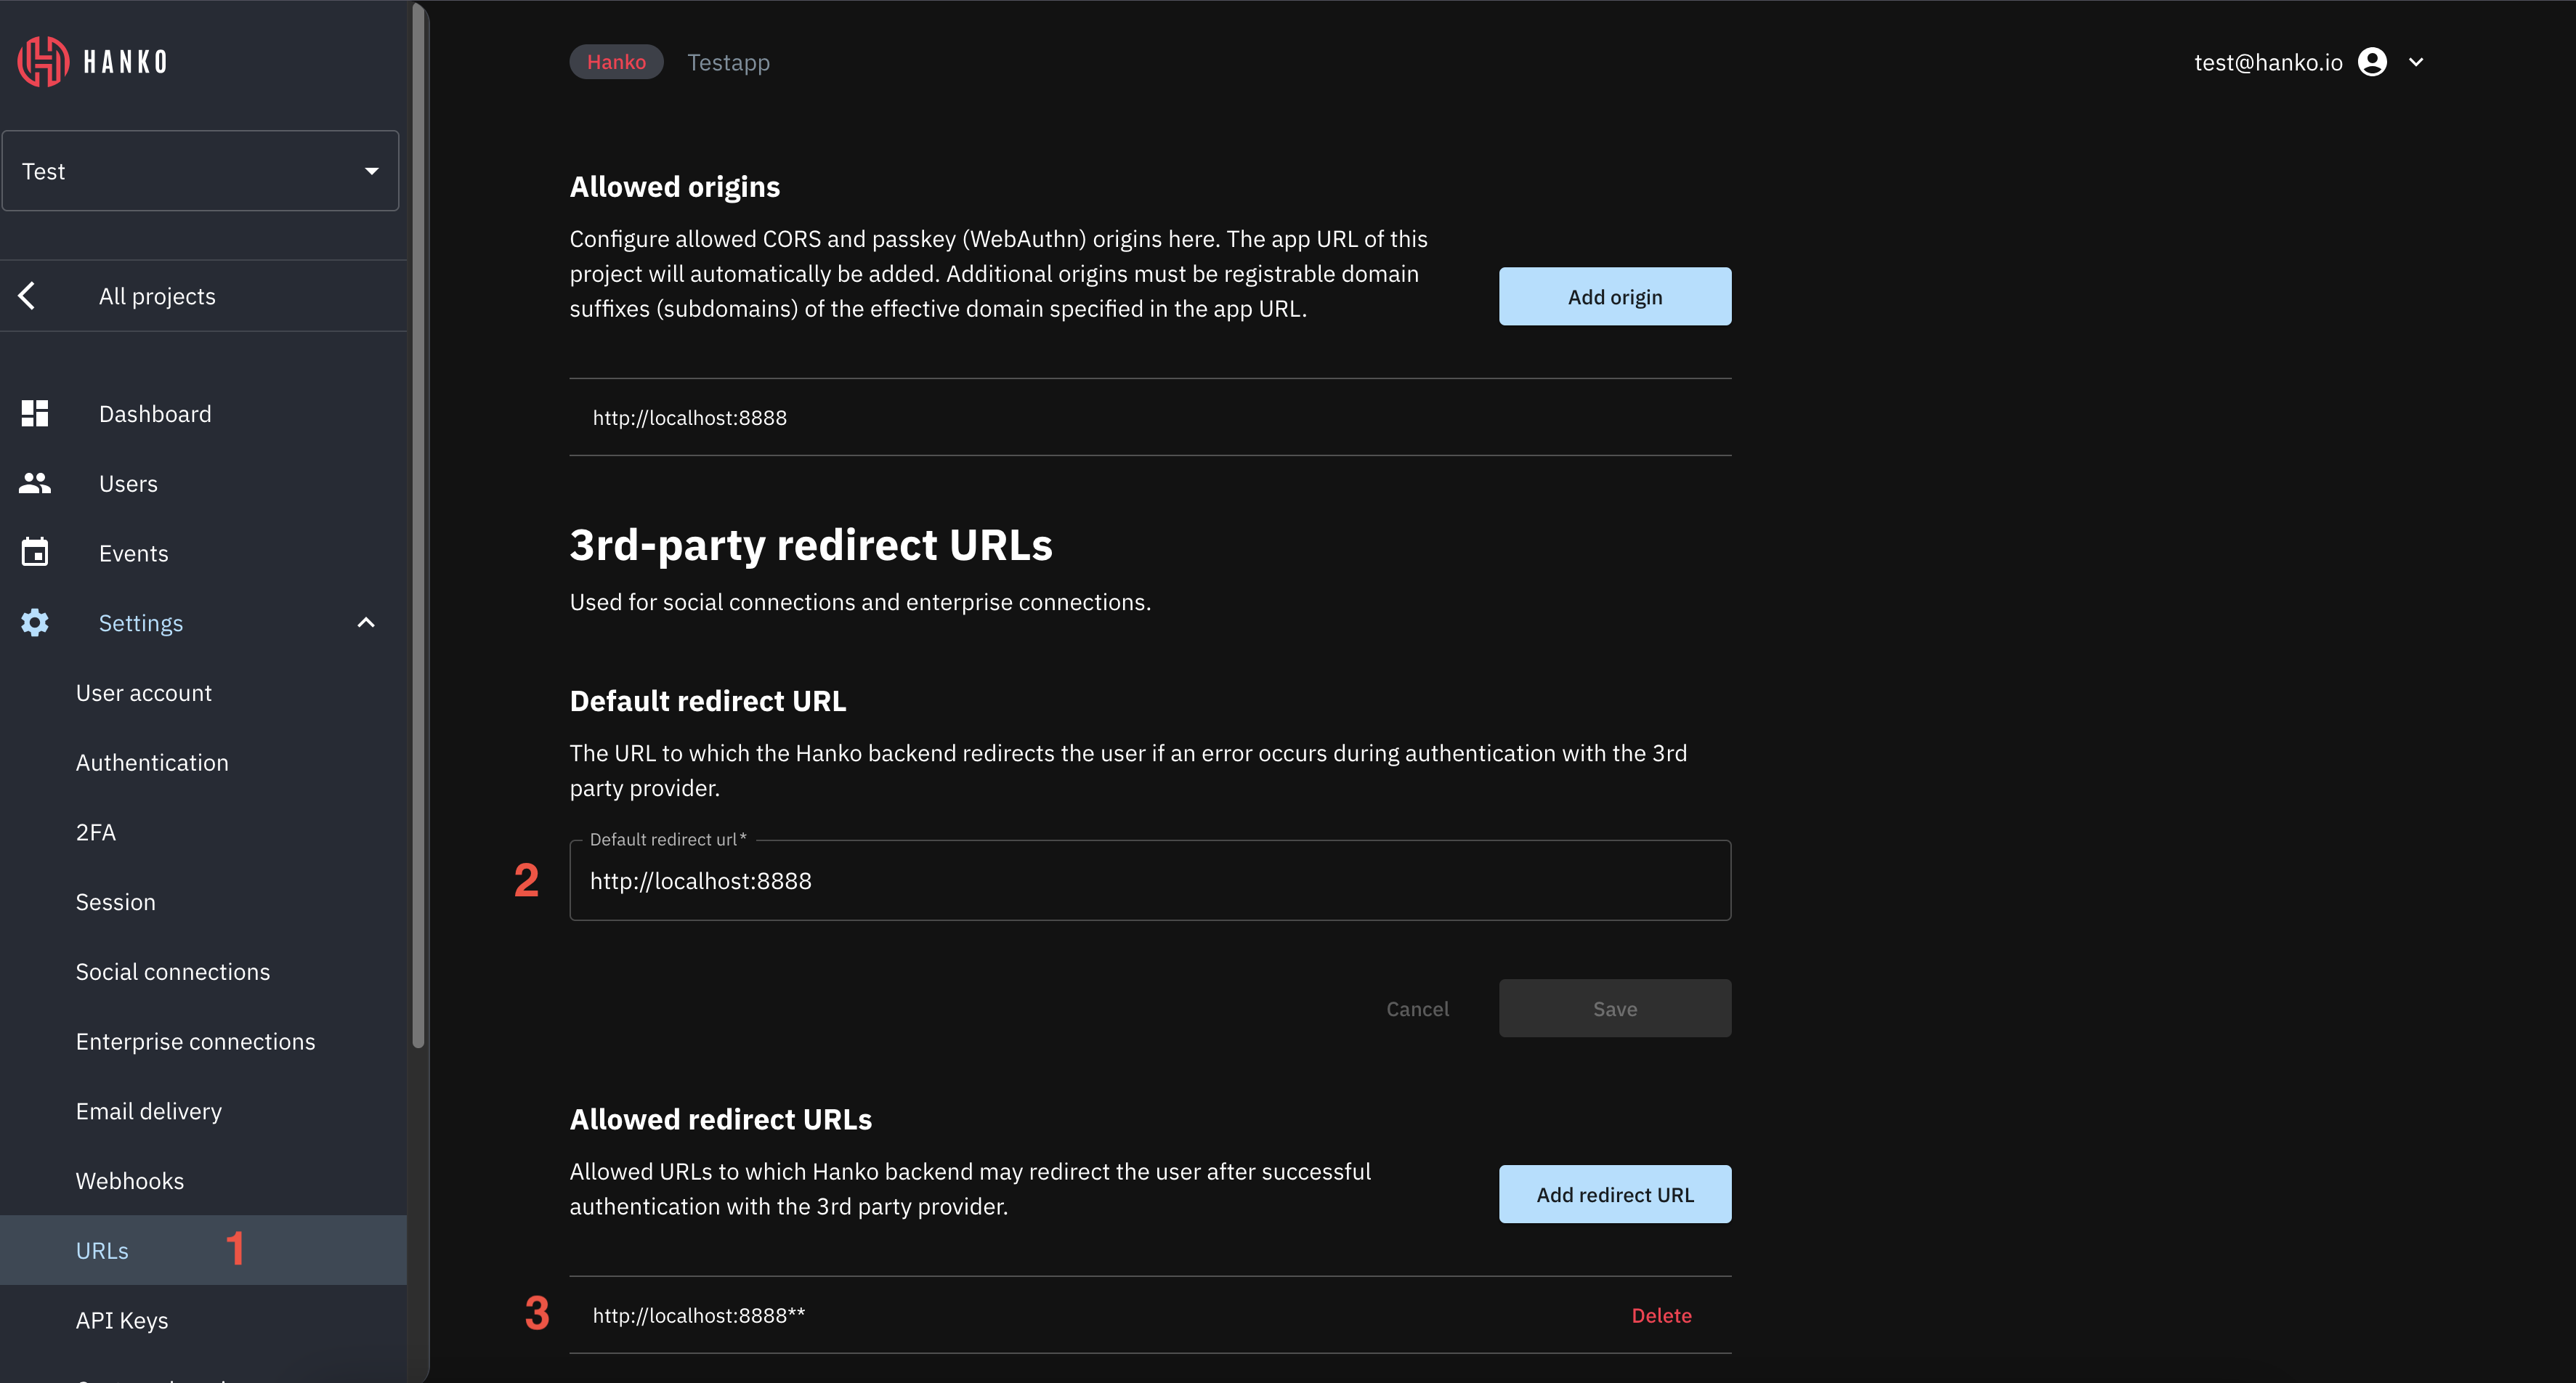
-
In the Hanko Cloud Console, navigate to your project
Settingsand selectURLs. -
Configure a Default Redirect URL - the frontend URL where Hanko redirects users if authentication fails. For applications using
hanko-elementsweb components, this should be the page containing the component to handle errors properly. -
Configure your Allowed Redirect URLs - the frontend URLs where Hanko can redirect users after successful authentication. For
hanko-elementsapplications, this should be the page containing the authentication component.The allowed redirect URL supports wildcard matching through globbing:https://*.example.commatcheshttps://foo.example.comandhttps://bar.example.com.https://foo.example.com/*matches URLs likehttps://foo.example.com/page1andhttps://foo.example.com/page2.- Use ** to act as a super-wildcard/match-all.
- Navigate to your project
Settingsand selectSocial connections. - In the
Providerssection, findFacebookand expand its configuration. - Enable the Facebook provider using the toggle switch.
- Enter the Facebook
App IDas theClient ID. - Enter the Facebook
App Secretas theClient Secret. - Click
Saveto apply your configuration.

Implement Facebook login in your frontend
You can integrate Facebook authentication using either:- Pre-built UI components from
@teamhanko/hanko-elements - Custom implementation with
@teamhanko/hanko-frontend-sdk
- Hanko Elements
- Hanko Frontend SDK
Follow our quickstart guides to integrate the After successful Facebook authentication, Hanko issues a session cookie and the component continues its normal flow. Authentication errors are automatically captured and displayed within the component.
<hanko-auth> component from @teamhanko/hanko-elements into your application. Once configured, the component will automatically display a Facebook sign-in button in the login interface.Make sure to configure the page the web component is embedded on as your
error redirect URL as well as an
allowed redirect URL (see the previous step).Publish your app
After following this guide, your Facebook app will have anUnpublished status, which limits its usage to developers and testers. To allow all users to authenticate with Facebook, you must submit your app for Facebook’s App Review process and get it approved for public use.