- a backend to handle the authentication flow and store data about your user’s passkeys
- a couple of functions on your frontend to bring up & handle the “Sign in with passkey” dialog
@teamhanko/passkeys-next-auth-provider.
Our open-source passkey server is an API you can call from your (Next.js) backend to handle the authentication flow (and storing all relevant data about your user’s passkeys).
@teamhanko/passkeys-next-auth-provider is a NextAuth provider that calls this API for you, and lets you bring up the “Sign in with passkey” with a single function call.
@github/webauthn-json is an optional package that makes it easier to work with the WebAuthn API on your frontend.
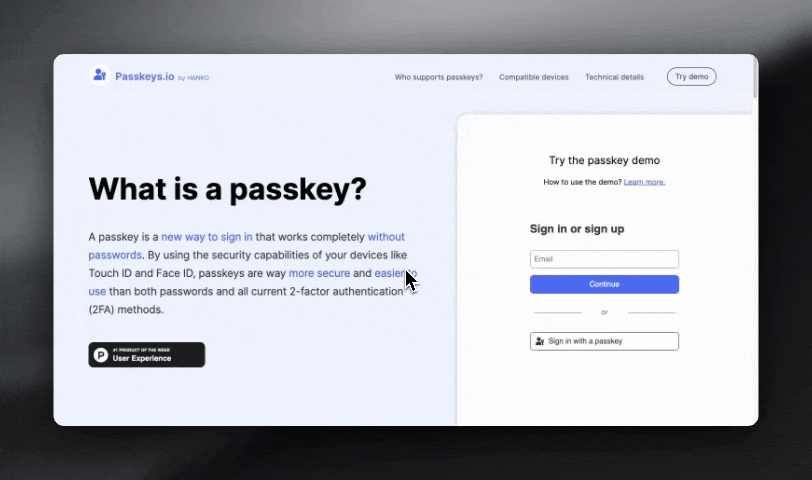
Let’s get to building. You can either follow the video or go through the guide below.
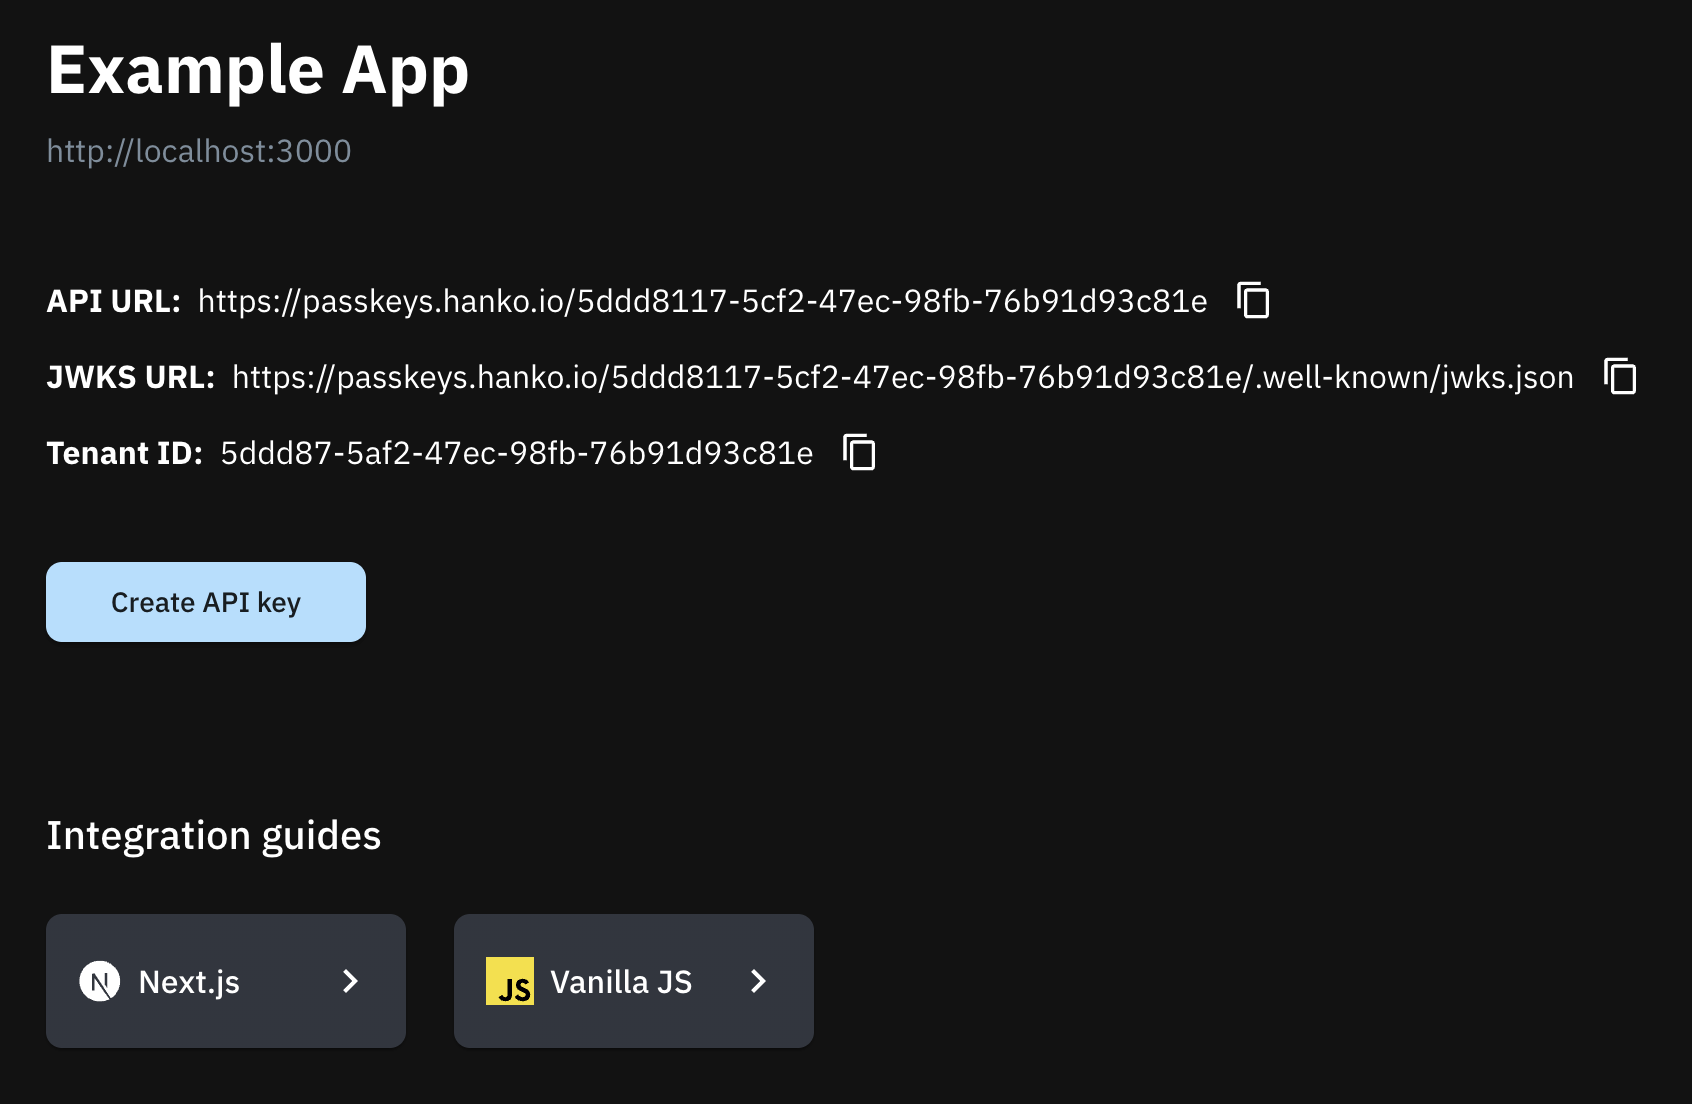
Get the API key and Tenant ID from Hanko
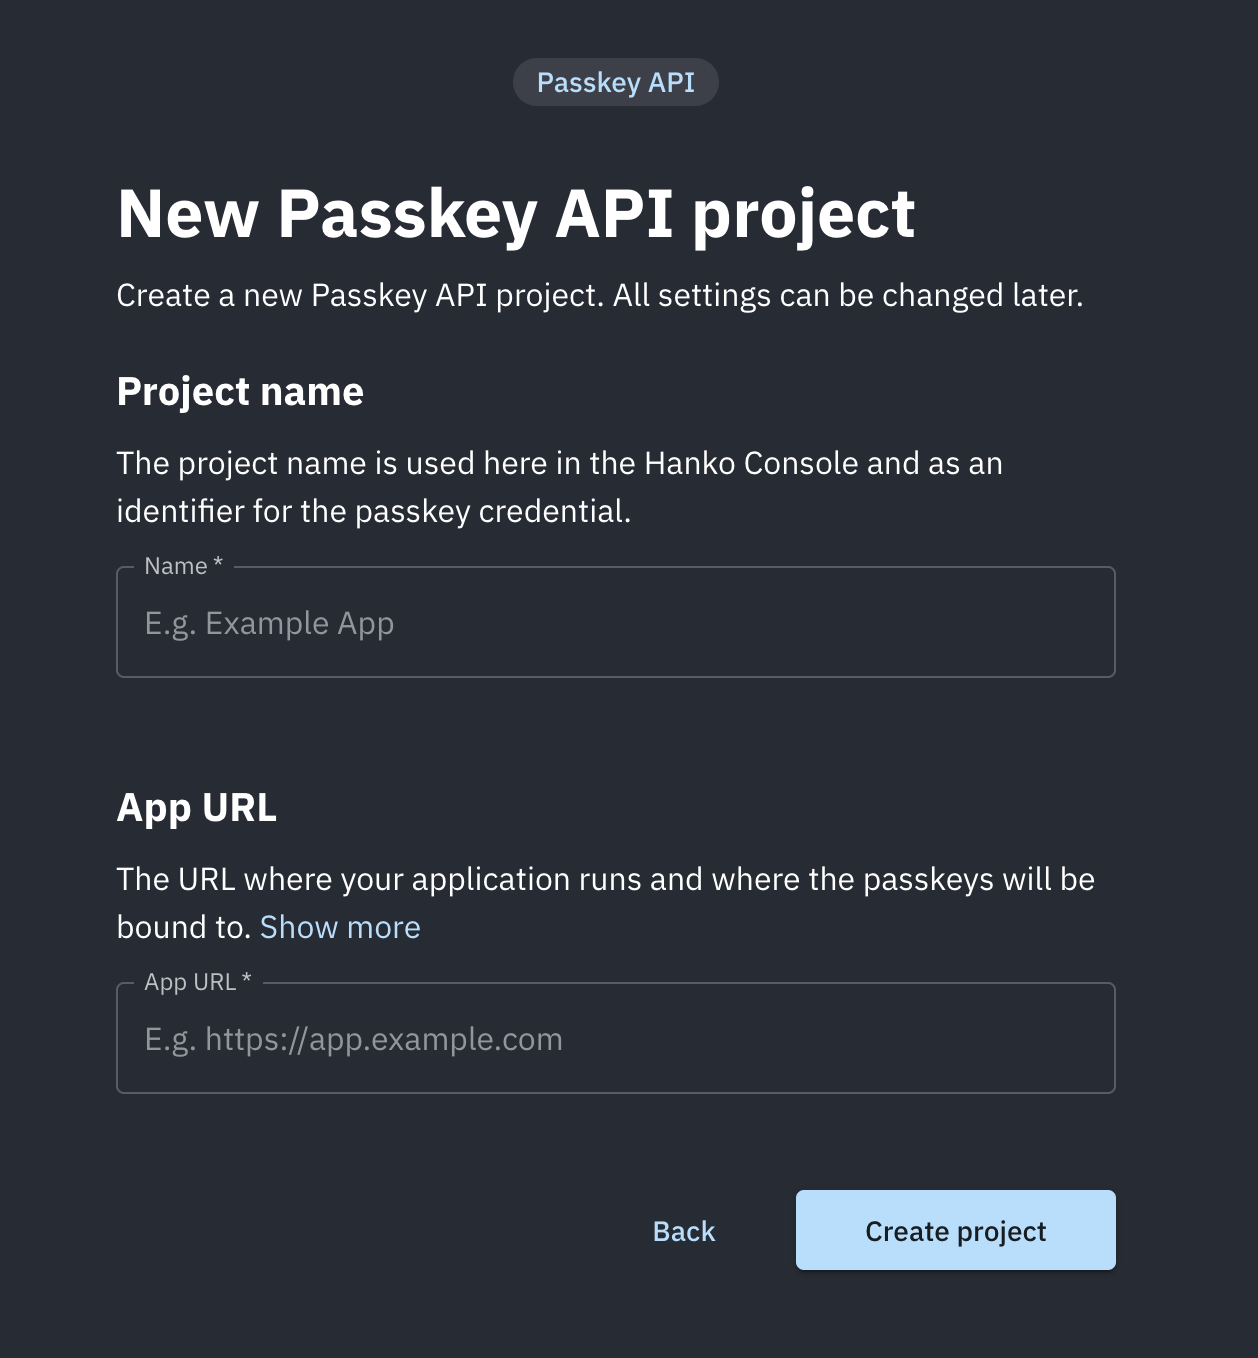
After creating your account on Hanko and setting up the organization, go ahead and select ‘Create new project,’ and then choose ‘Passkey infrastructure’ and ‘Create project’.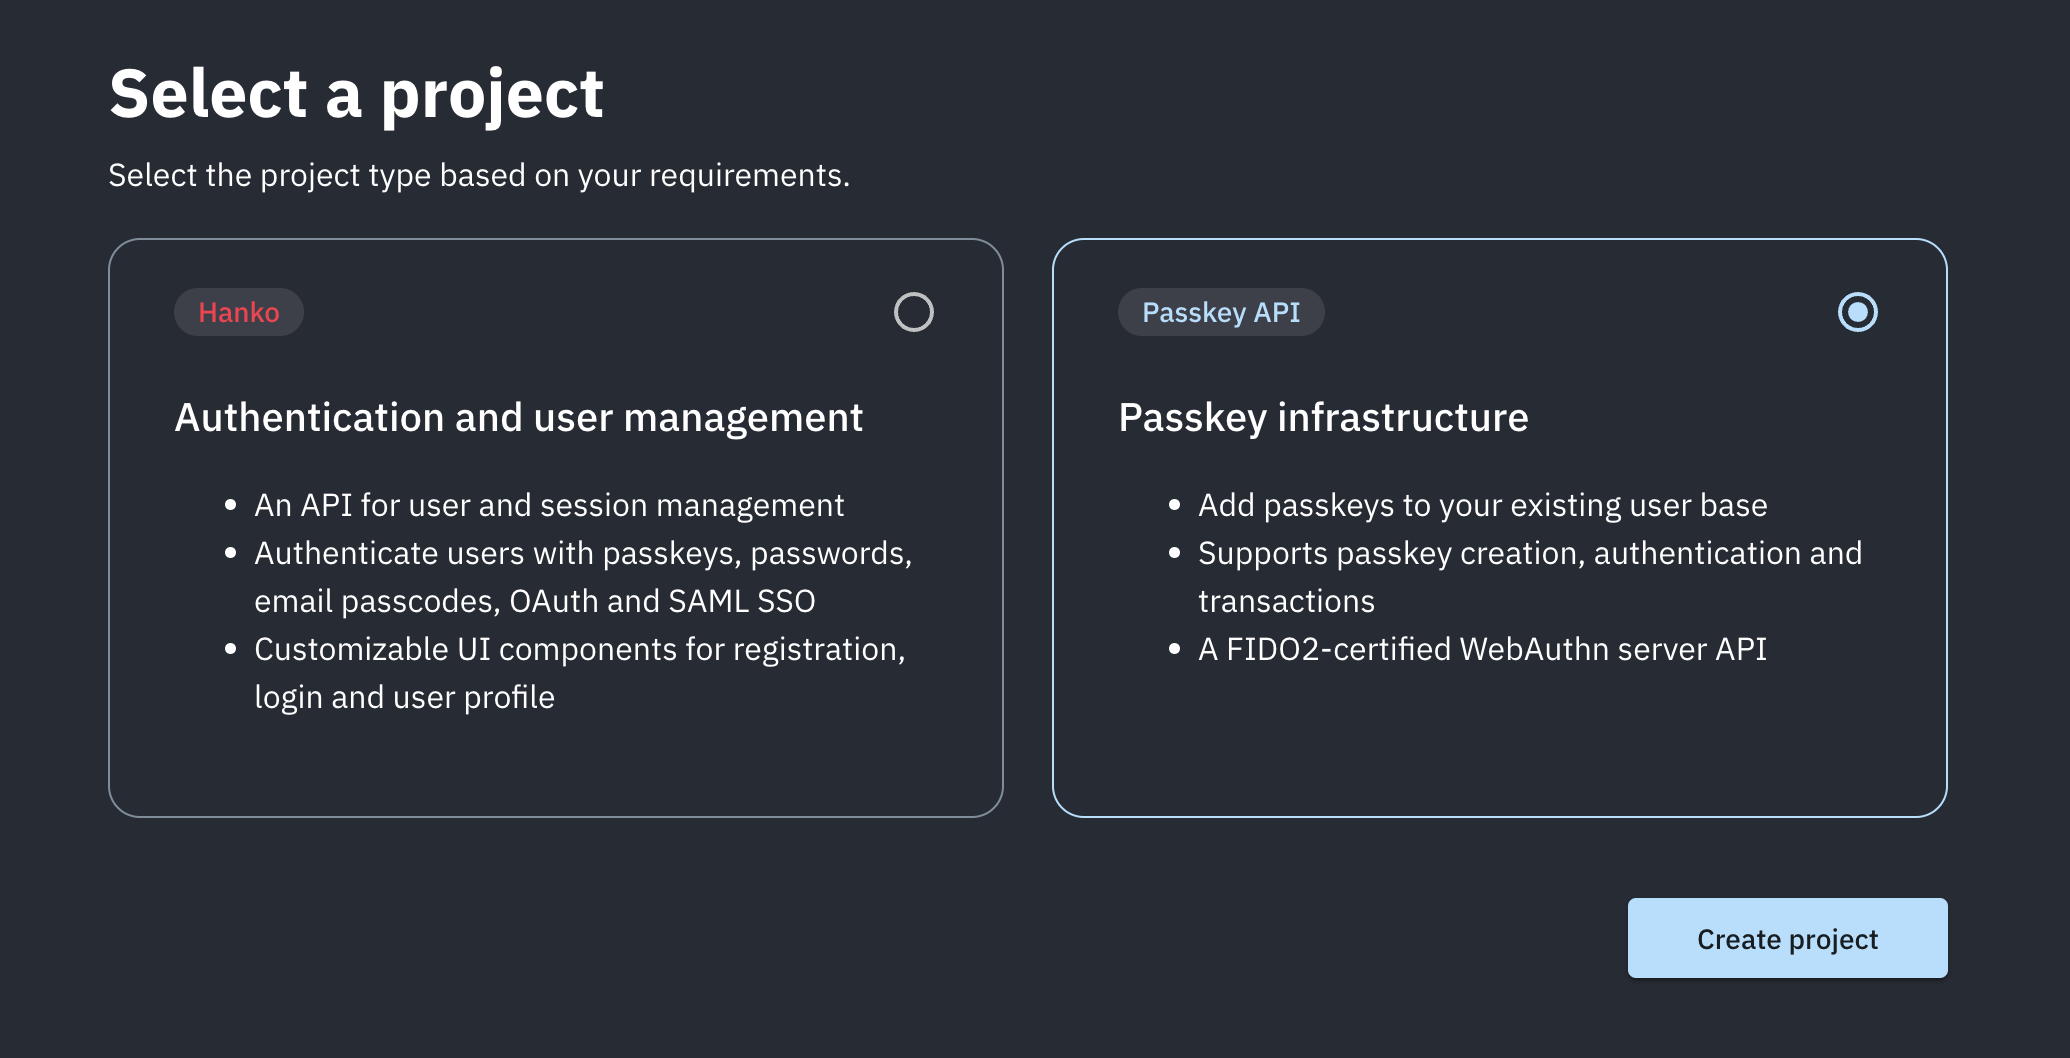
.env file.
Install the NextAuth Passkey provider
Install the passkey provider for NextAuth from Hanko andwebauthn-json package by GitHub.
Add the Passkey provider to NextAuth Config
auth.ts
session: { strategy: "jwt" } and modify the session to get id from token.sub. This is how the complete code for auth.ts the file looks after adding Hanko passkey provider.
Note that, if you don’t plan to use any adapters, you just need to add the Passkey provider and don’t modify anything.
auth.ts
Allow your users to register passkey as a login method
Your users will have to add passkeys to their account somehow. It’s up to you how and where you let them do this, but typically this would be a button on an “Account Settings” page. On your backend, you’ll have to calltenant({ ... }).registration.initialize() and .registration.finalize() to create and store a passkey for your user.
On your frontend, you’ll have to call create() from @github/webauthn-json with the object .registration.initialize() returned.
create() will return a PublicKeyCredential object, which you’ll have to pass to .registration.finalize().
Here we have created a new file named passkey.ts, inside of the server directory.
Add a button to allow your users to log in with a passkey
Now that the passkey is successfully registered, let’s add a ‘Sign in with Passkey’ button. This will allow users to easily login using their passkey.Example
Full source code available on our GitHub