Setting up a Passkey Project on Hanko Cloud
This guide will walk you through the initial set up process of a passkey project on Hanko Cloud.
You need to just follow these 5 quick steps.
Sign Up
To begin, head over to Hanko and sign up.
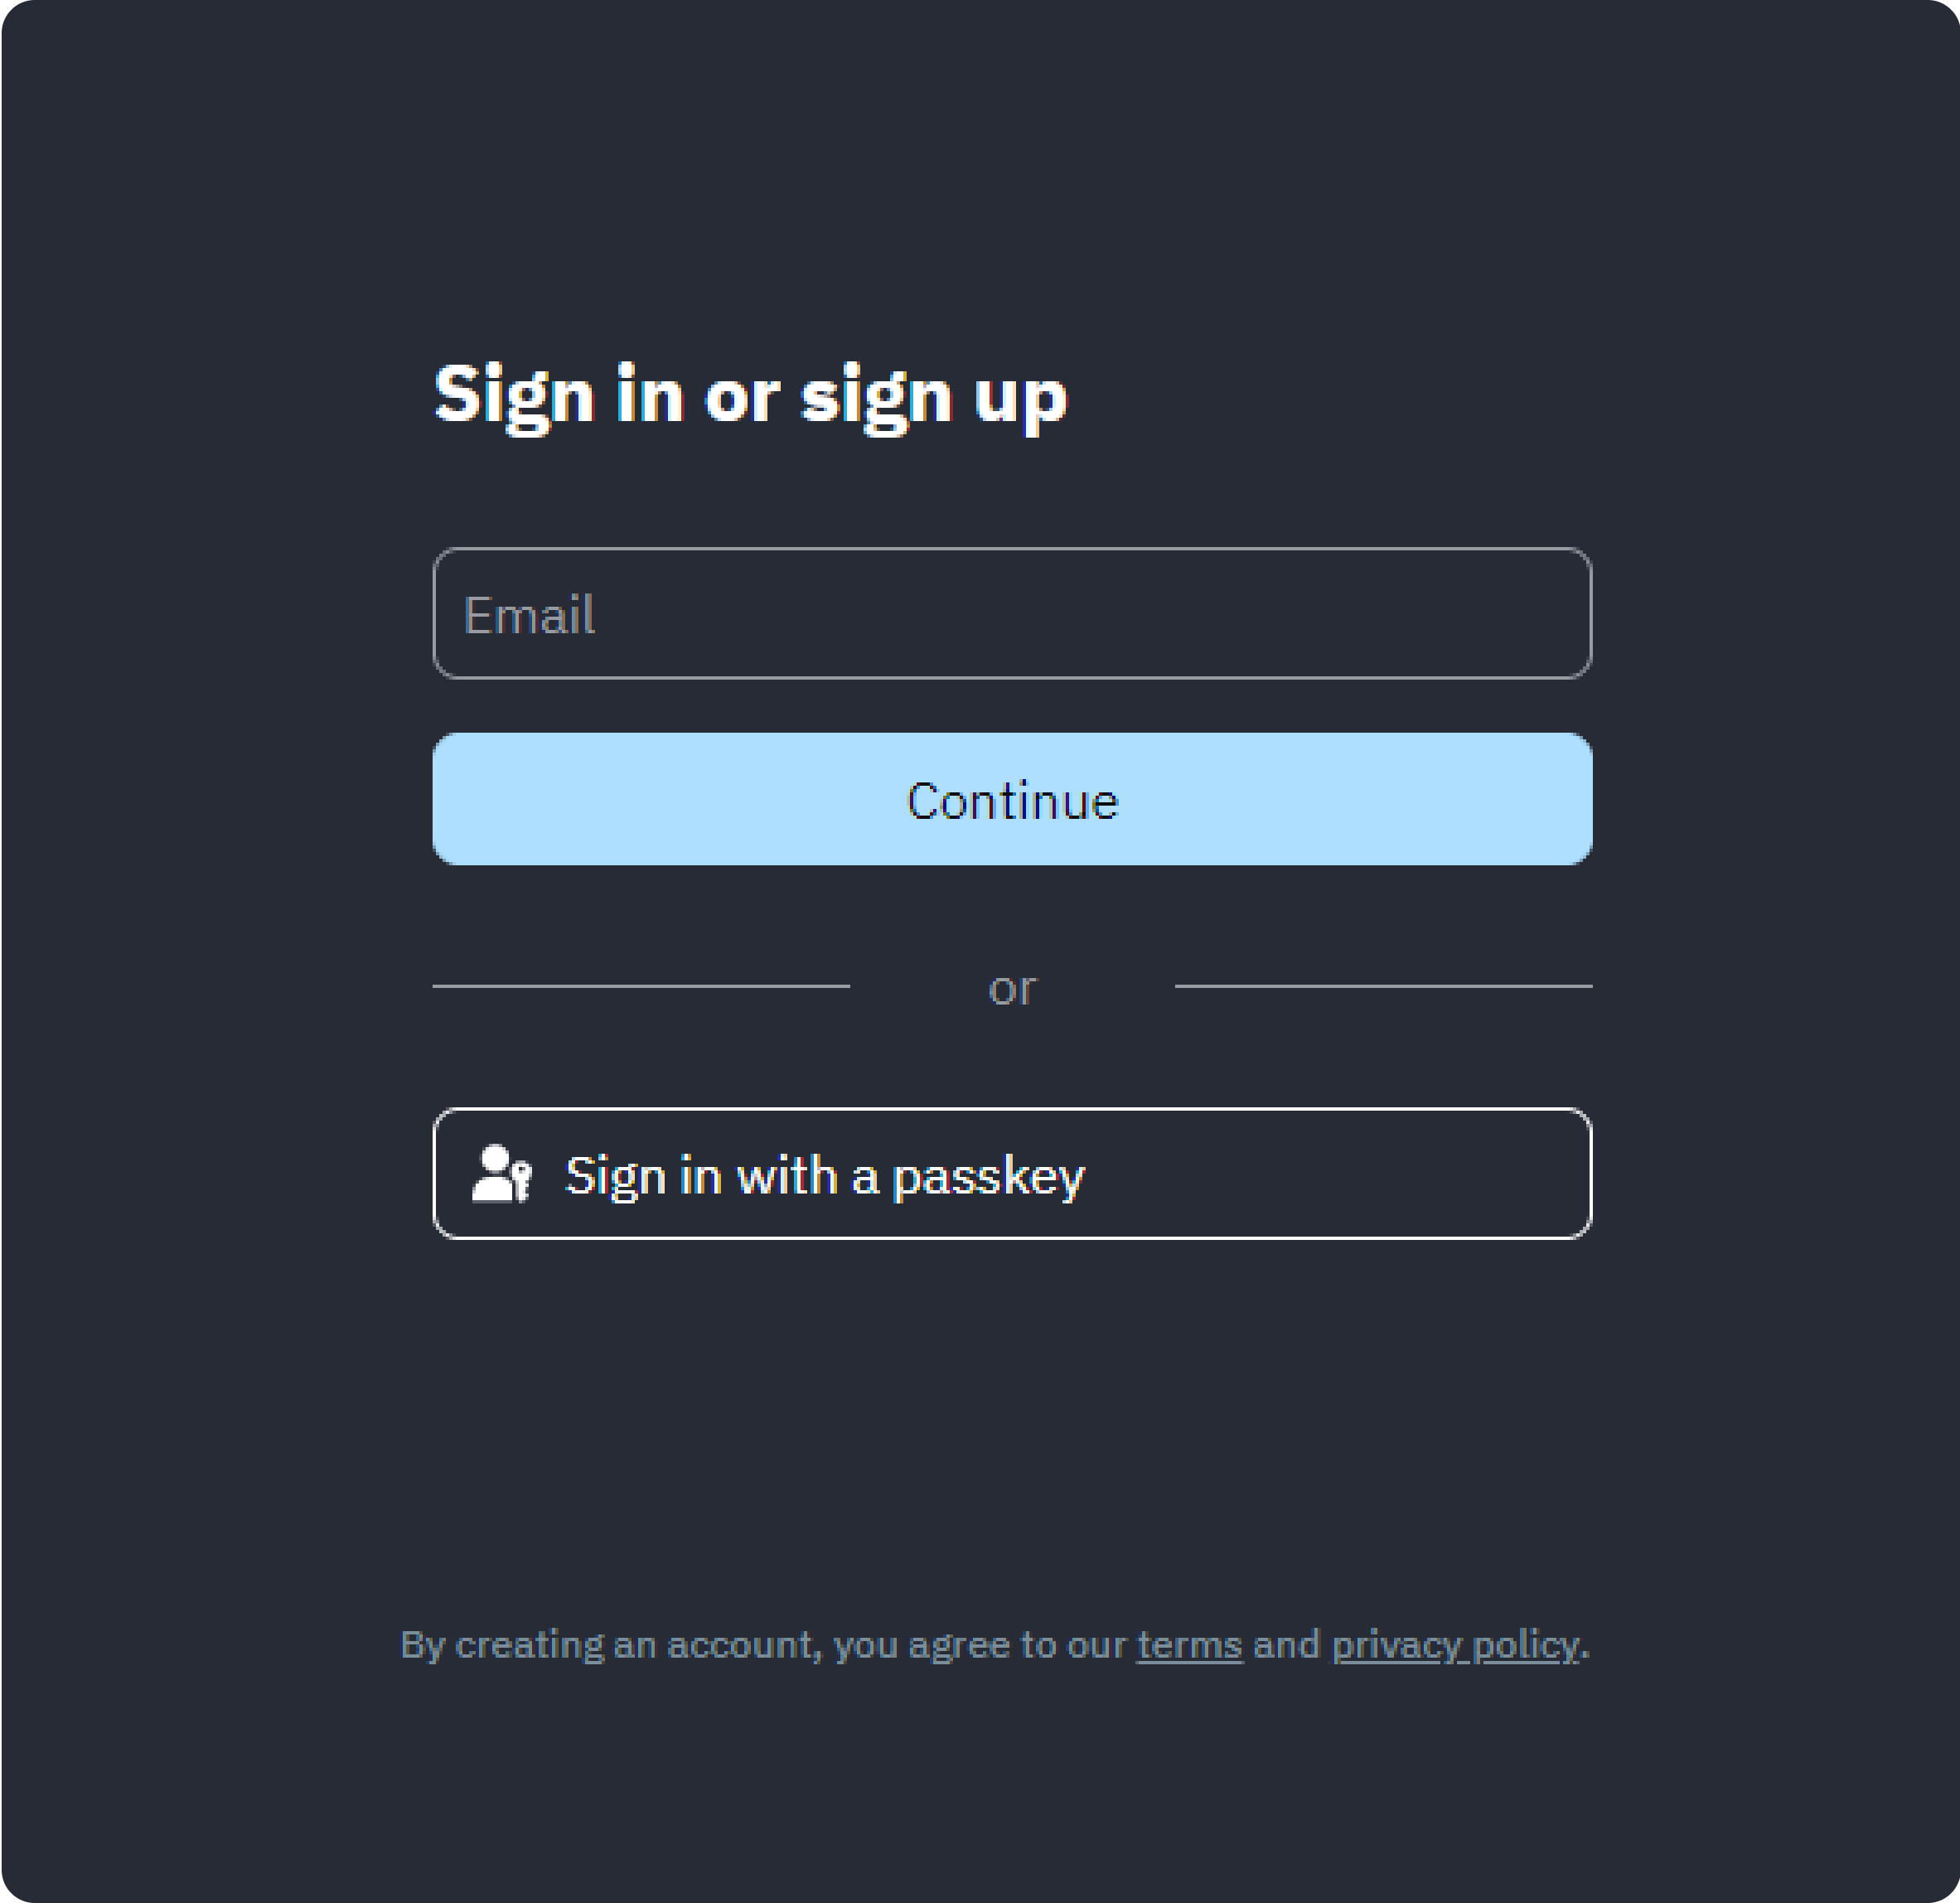
![](https://mintlify.s3-us-west-1.amazonaws.com/hanko/images/get-started/create-acc.png)
Create an Organization
Once you’ve signed up, you’ll be directed to create an organization.
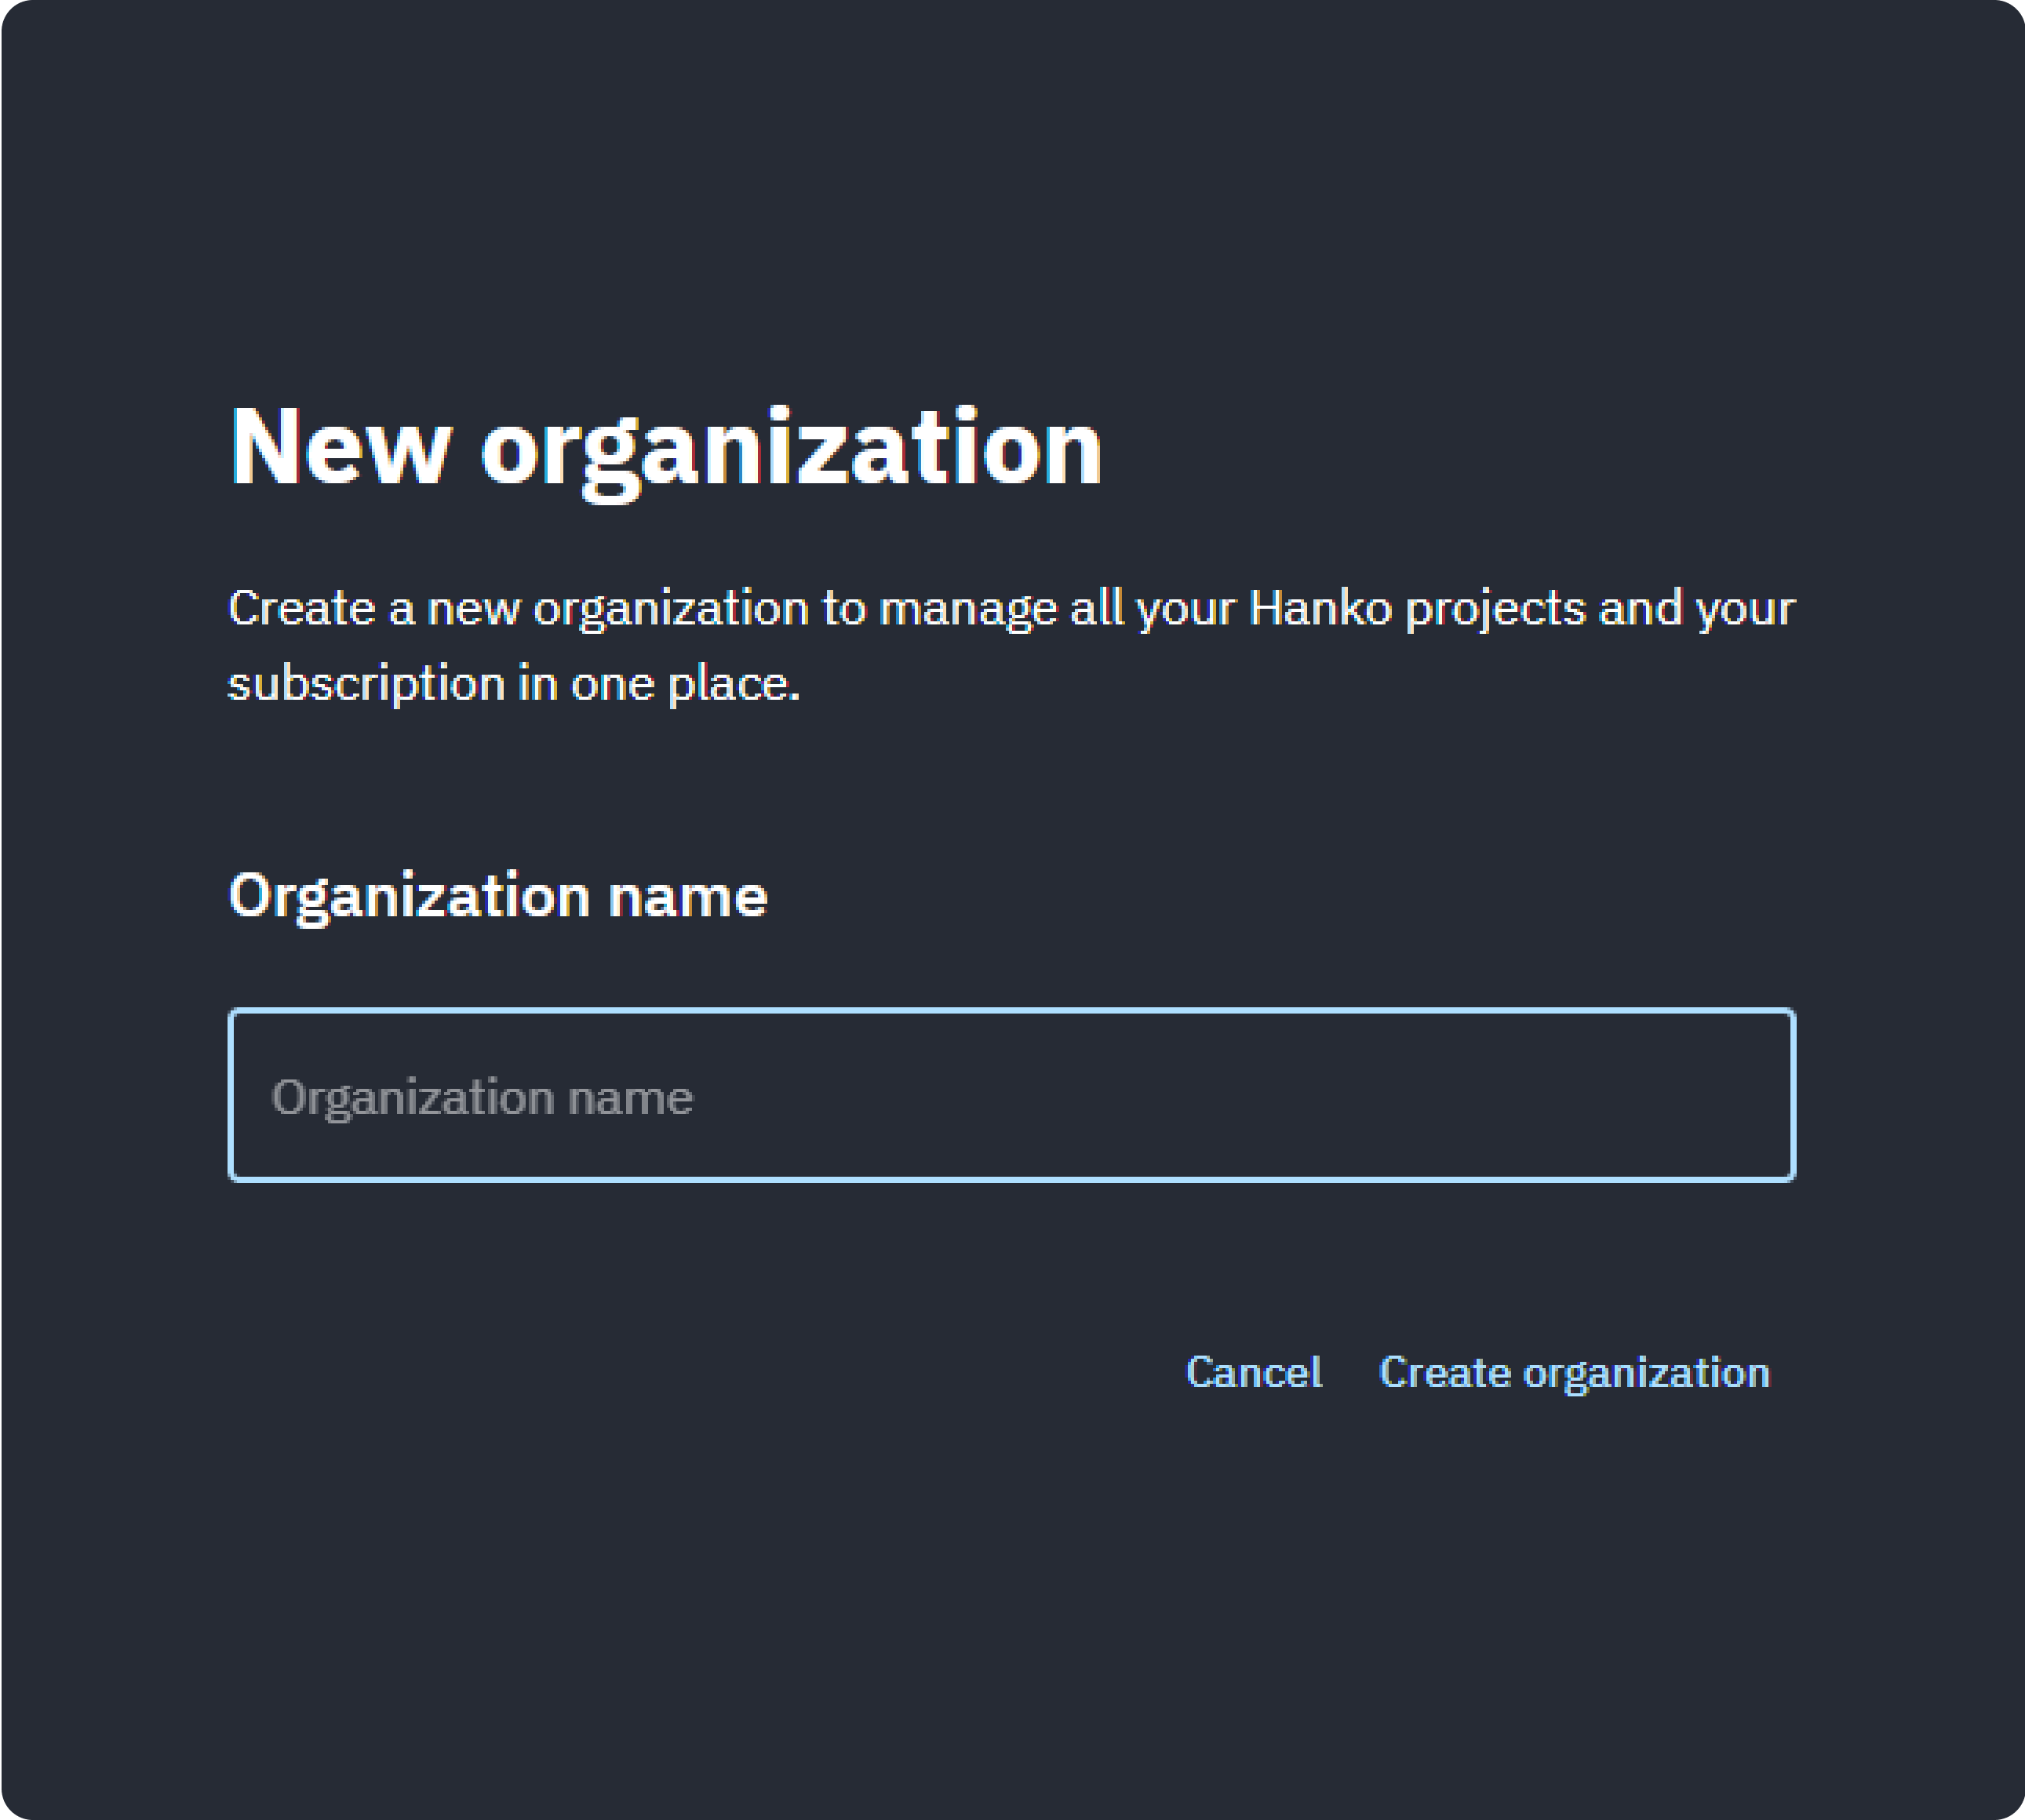
![](https://mintlify.s3-us-west-1.amazonaws.com/hanko/images/get-started/create-org.png)
Initiate a new Passkey Project
With your organization set, it’s time to kick off a new Passkey project. Choose ‘Passkey Infrastructure’ and click ‘Create Project’.
![](https://mintlify.s3-us-west-1.amazonaws.com/hanko/images/passkey-api/get-started/create-project.png)
Input your project name and provide your app’s URL. For the app URL, make sure to enter the full URL including 
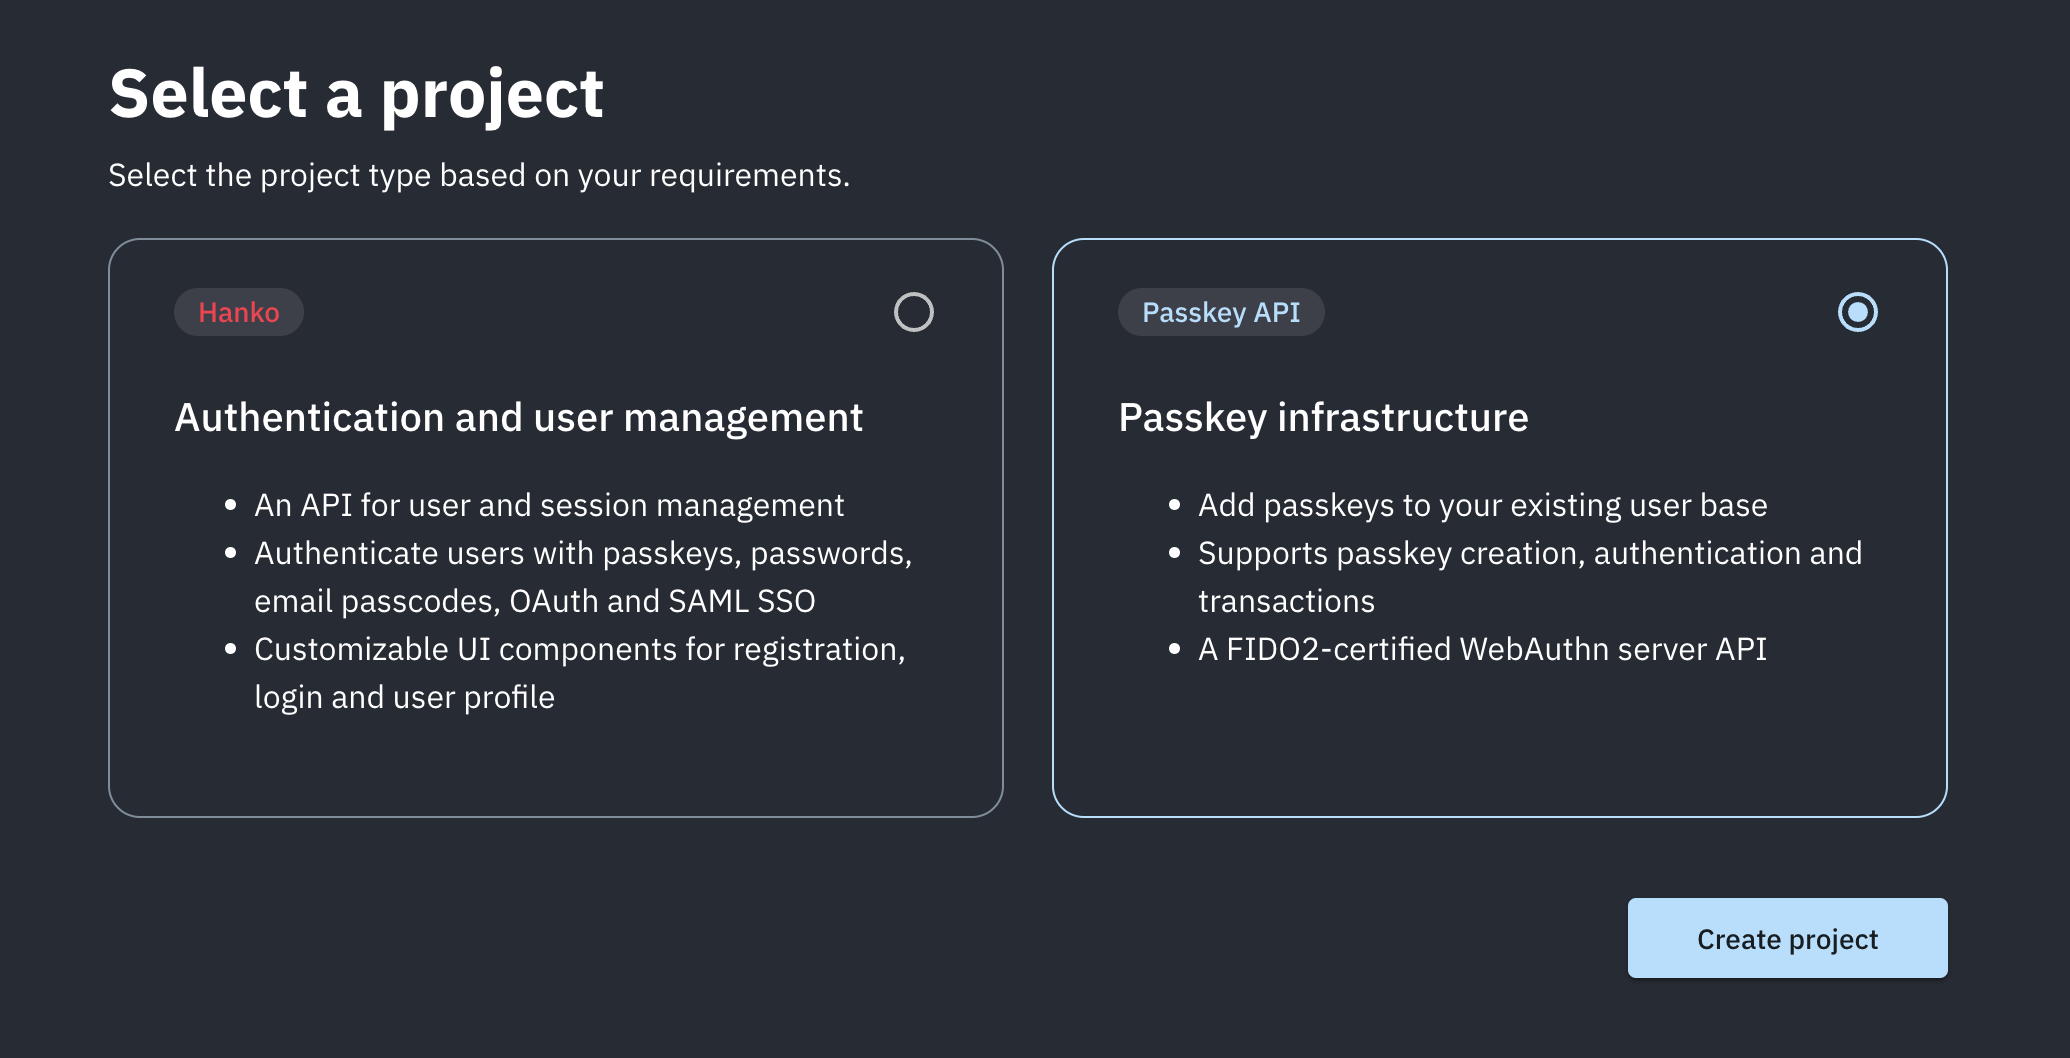
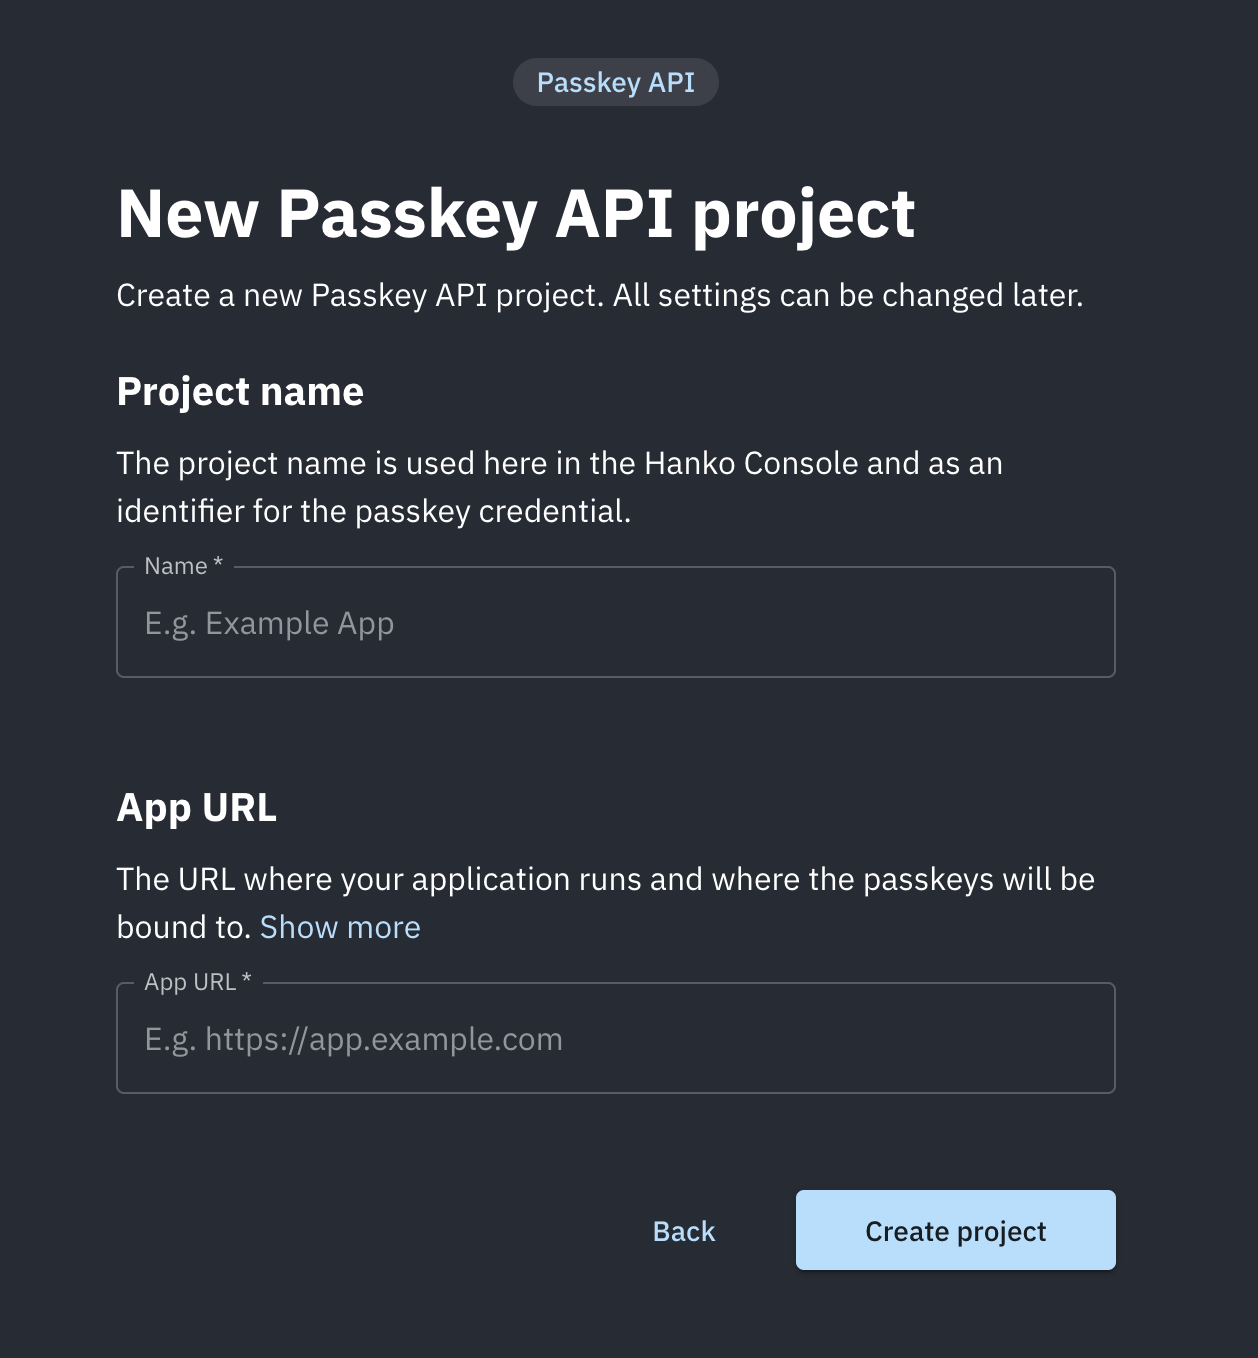
http://
or https://
and the port in case it’s localhost, e.g. http://localhost:3000
.
![](https://mintlify.s3-us-west-1.amazonaws.com/hanko/images/passkey-api/get-started/create-proj-modal.png)
Get Tenant ID and API key
Upon entering the dashboard, copy the Tenant ID and create an API key. You’ll need these for future integrations.
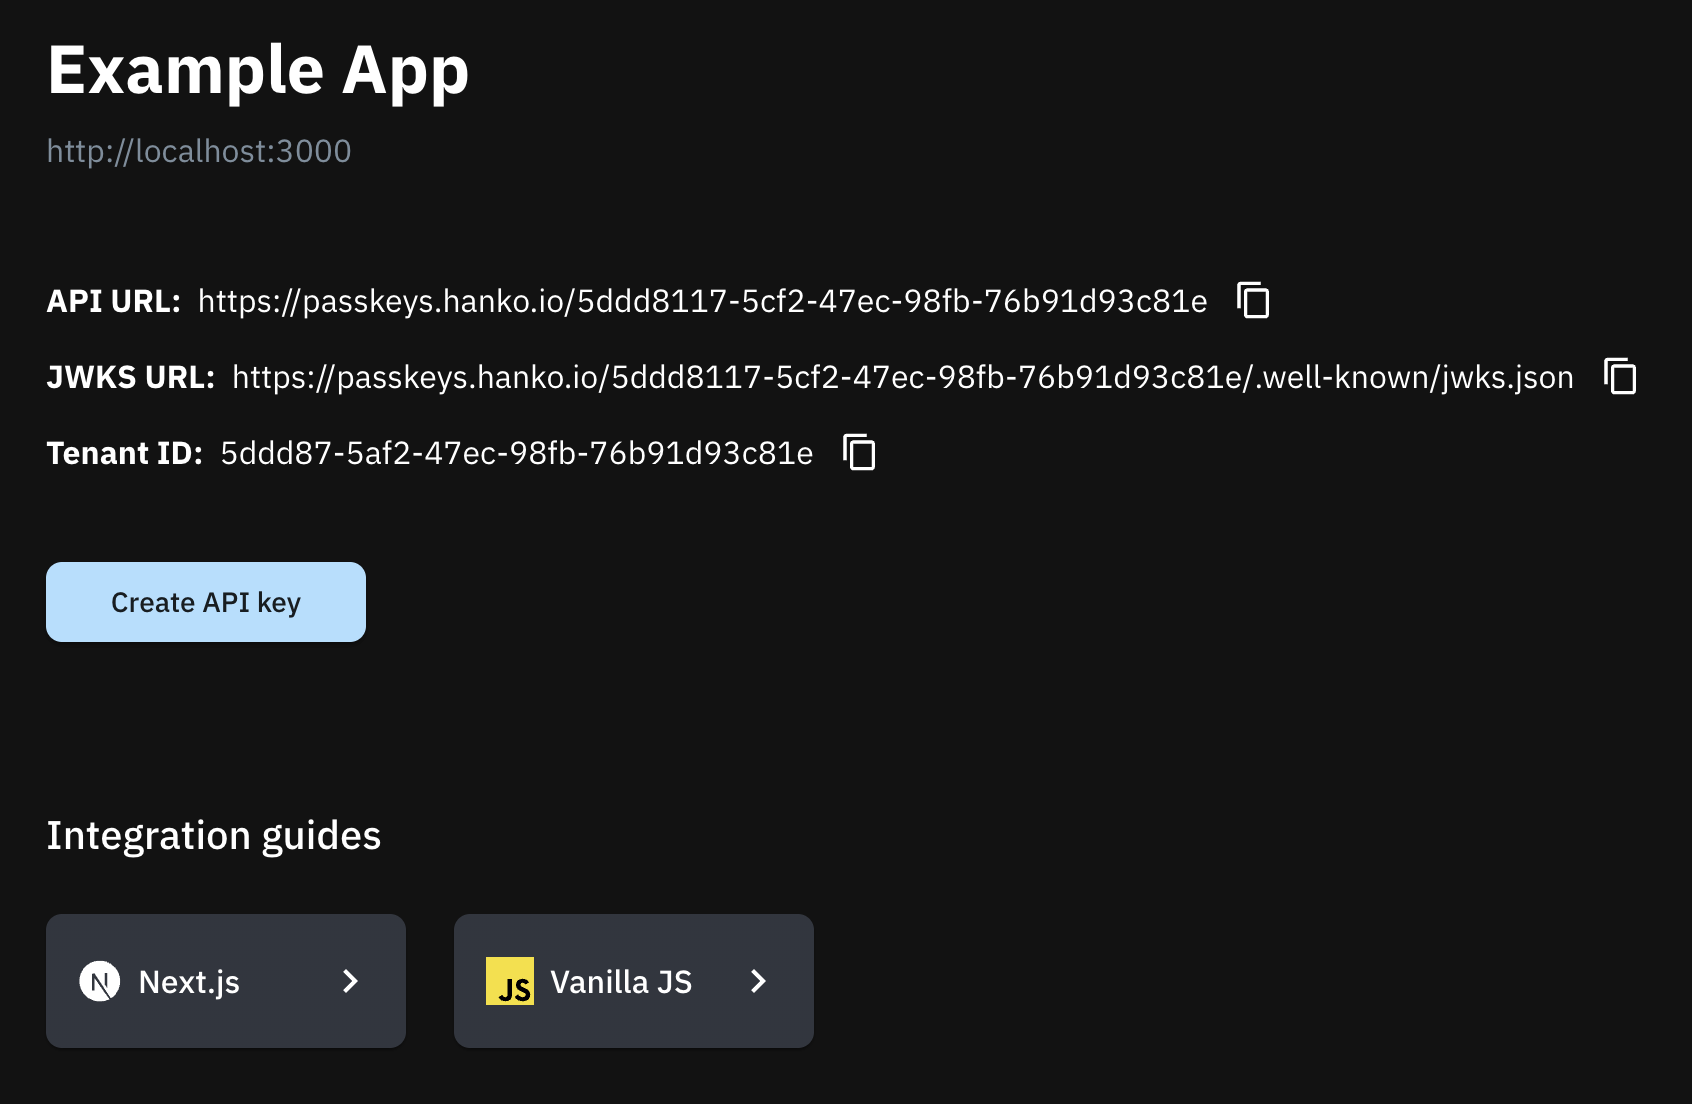
![](https://mintlify.s3-us-west-1.amazonaws.com/hanko/images/passkey-api/get-started/tenant-api-key.png)
Dive into Integrations
You’re all set! Visit the next sections to kick off your integration journey.
Was this page helpful?