Content-Type: application/json.
As of writing, for the frontend, the Web Authentication API expects you to pass
ArrayBuffer (instead of plain old objects) in a lot of places, which can be inconvenient.In the examples below, we use @github/webauthn-json, which is a wrapper for the Web Authentication API to make things easier.1
Get your tenant ID and API key
Get your tenant ID and API key from your Hanko Cloud project dashboard.The base URL for the Passkey API depends on your
tenant_id..env
Explanation for tenant ID
Explanation for tenant ID
If the app you’re building supports organizations, teams, or anything similar, you will likely have heard of multitenancy.The Passkey API supports multitenancy as well — you can create tenants (a.k.a. organizations, teams, …) and add the passkeys of users exclusively to those tenants. Then your users will only be able to log in with passkeys specifically for that tenant.For example: In your app, a user is part of two teams: the “ACME Corp.” and the “A-Team.”They create a passkey to log into “ACME Corp.”That passkey will only work for the “ACME Corp.”, not the “A-Team”.
If you self-host the Passkey API, there are endpoints that let you create,
list, and manage tenants programmatically. See the API
reference.
2
Add endpoints to start and finish passkey registration
Registering passkeys is a two-step process. First, let’s add an endpoint to our backend.BackendFrontendHere’s what the whole flow looks like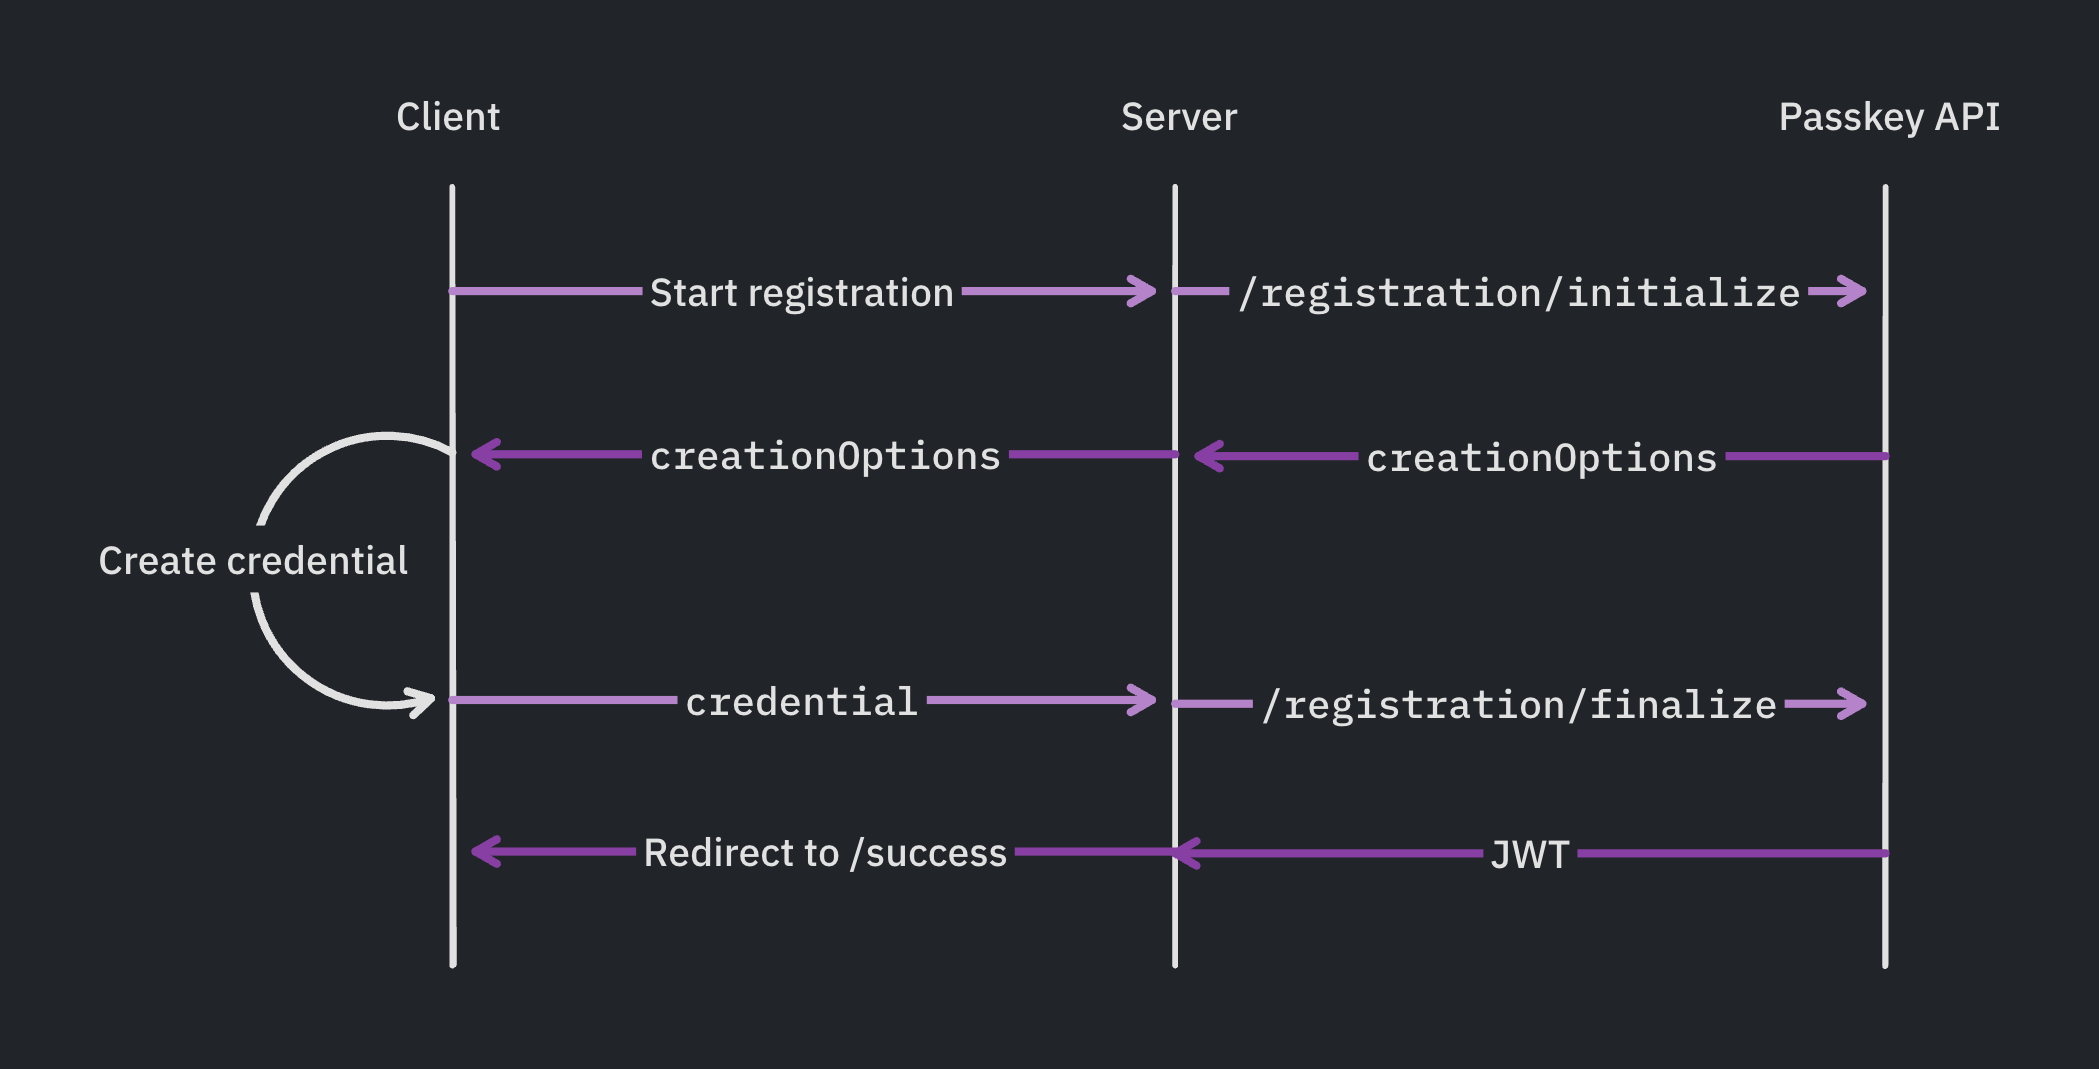
- Node.js (Express)
- Python (Flask)
3
Add endpoints to start and finish logging in
Similar to how registering a passkey is a two-step process, so is logging in.Backend:Frontend
- Node.js (Express)
- Python (Flask)
For logging in, the server can also talk to the Passkey API directly, instead of going through your backend first. Whether you go with the server-first or client-first approach is up to preference. See Client-First Login Flow.