SAML Providers
Learn how to set up an Enterprise Connection with Google.
Hanko Google SAML Integration Guide
About Hanko: Hanko is a modern, passwordless authentication solution that enables secure user login experiences through passkeys, SAML SSO, and other advanced authentication methods. This guide demonstrates how to integrate Hanko with Google Workspace for enterprise SAML authentication.What This Guide Covers: This guide demonstrates how to configure Google Workspace as a SAML identity provider for your Hanko project, enabling secure single sign-on authentication for Google Workspace users.Key Technologies:- SAML 2.0
- XML digital signatures
- Google Workspace
- Google Admin Console
- custom SAML applications
- metadata XML files
- attribute mapping
- Active Google Workspace account with admin privileges
- Hanko Cloud project
- Basic understanding of SAML authentication protocols
- Ability to host XML metadata files publicly
- Create custom SAML application in Google Admin Console
- Download and host SAML metadata XML file
- Configure service provider details (ACS URL and Entity ID)
- Set up attribute mapping for email addresses
- Configure user access permissions
- Create enterprise connection in Hanko Cloud
- Test integration using IdP-initiated flow
Prerequisites
You need your project’s SAML Assertion Consumer Service (ACS) URL and the Service Provider (SP) Entity ID.Service Provider Entity ID
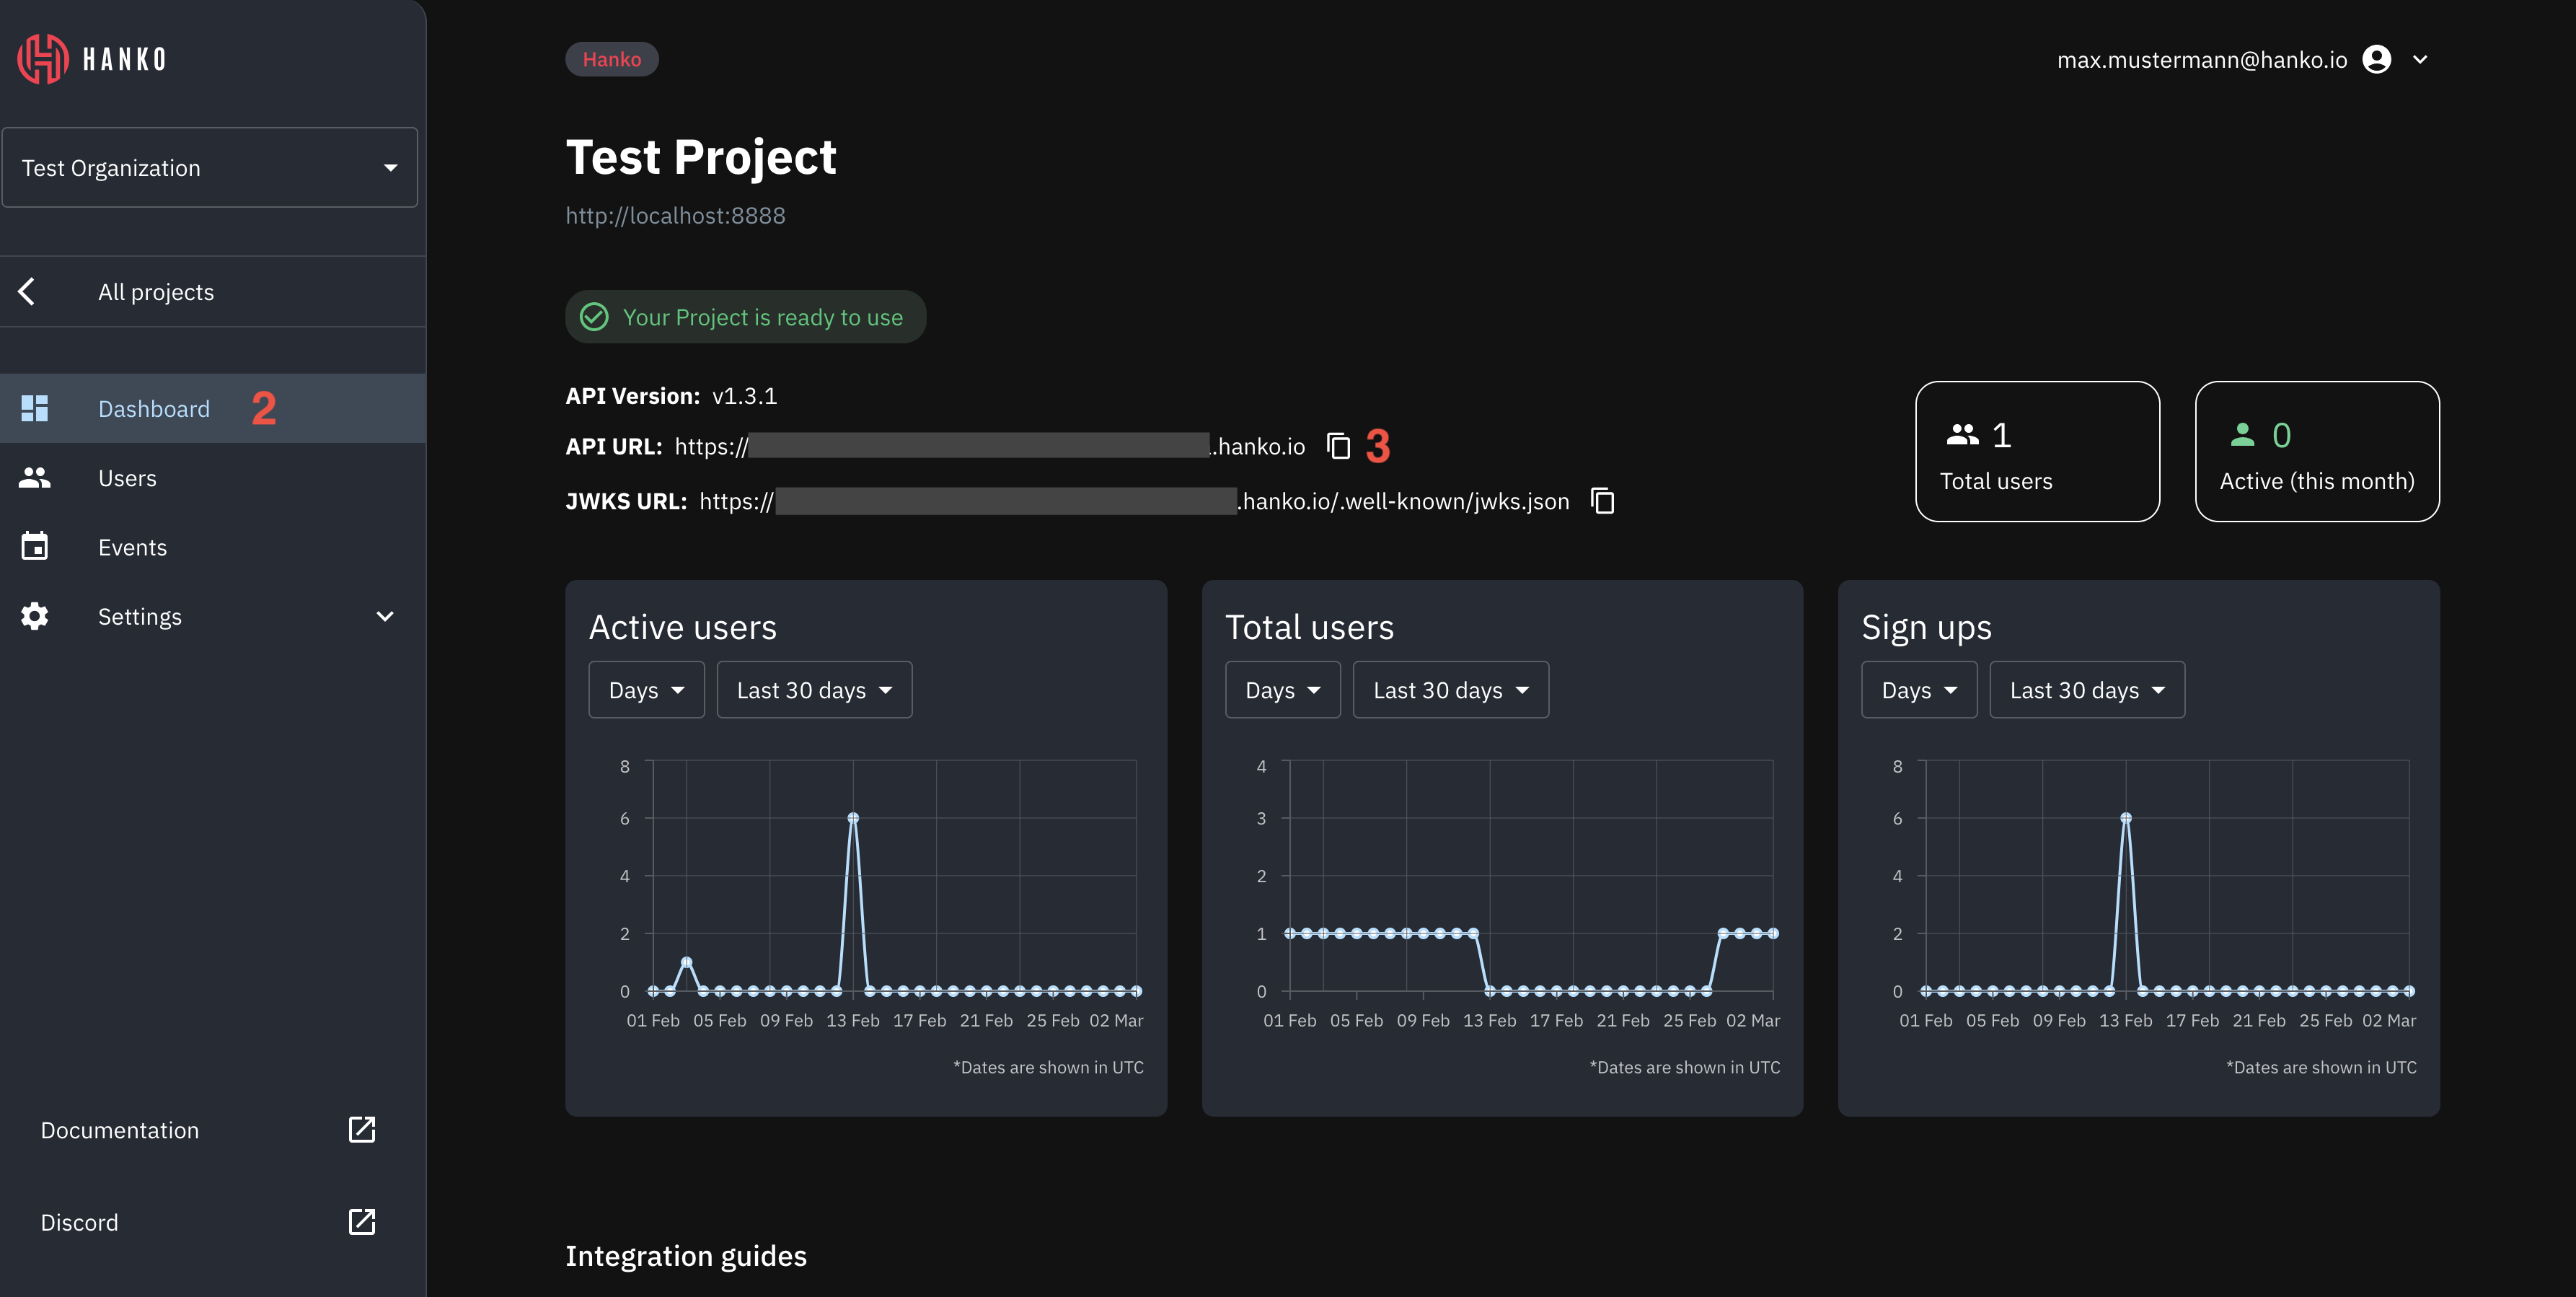
The SP Entity ID for your Hanko project is equal to the API URL of your project. To find the API URL for your project:- Log in to Hanko Cloud and select your project.
- Navigate to
Dashboard. - Copy and save the
API URL.
Service Provider ACS URL
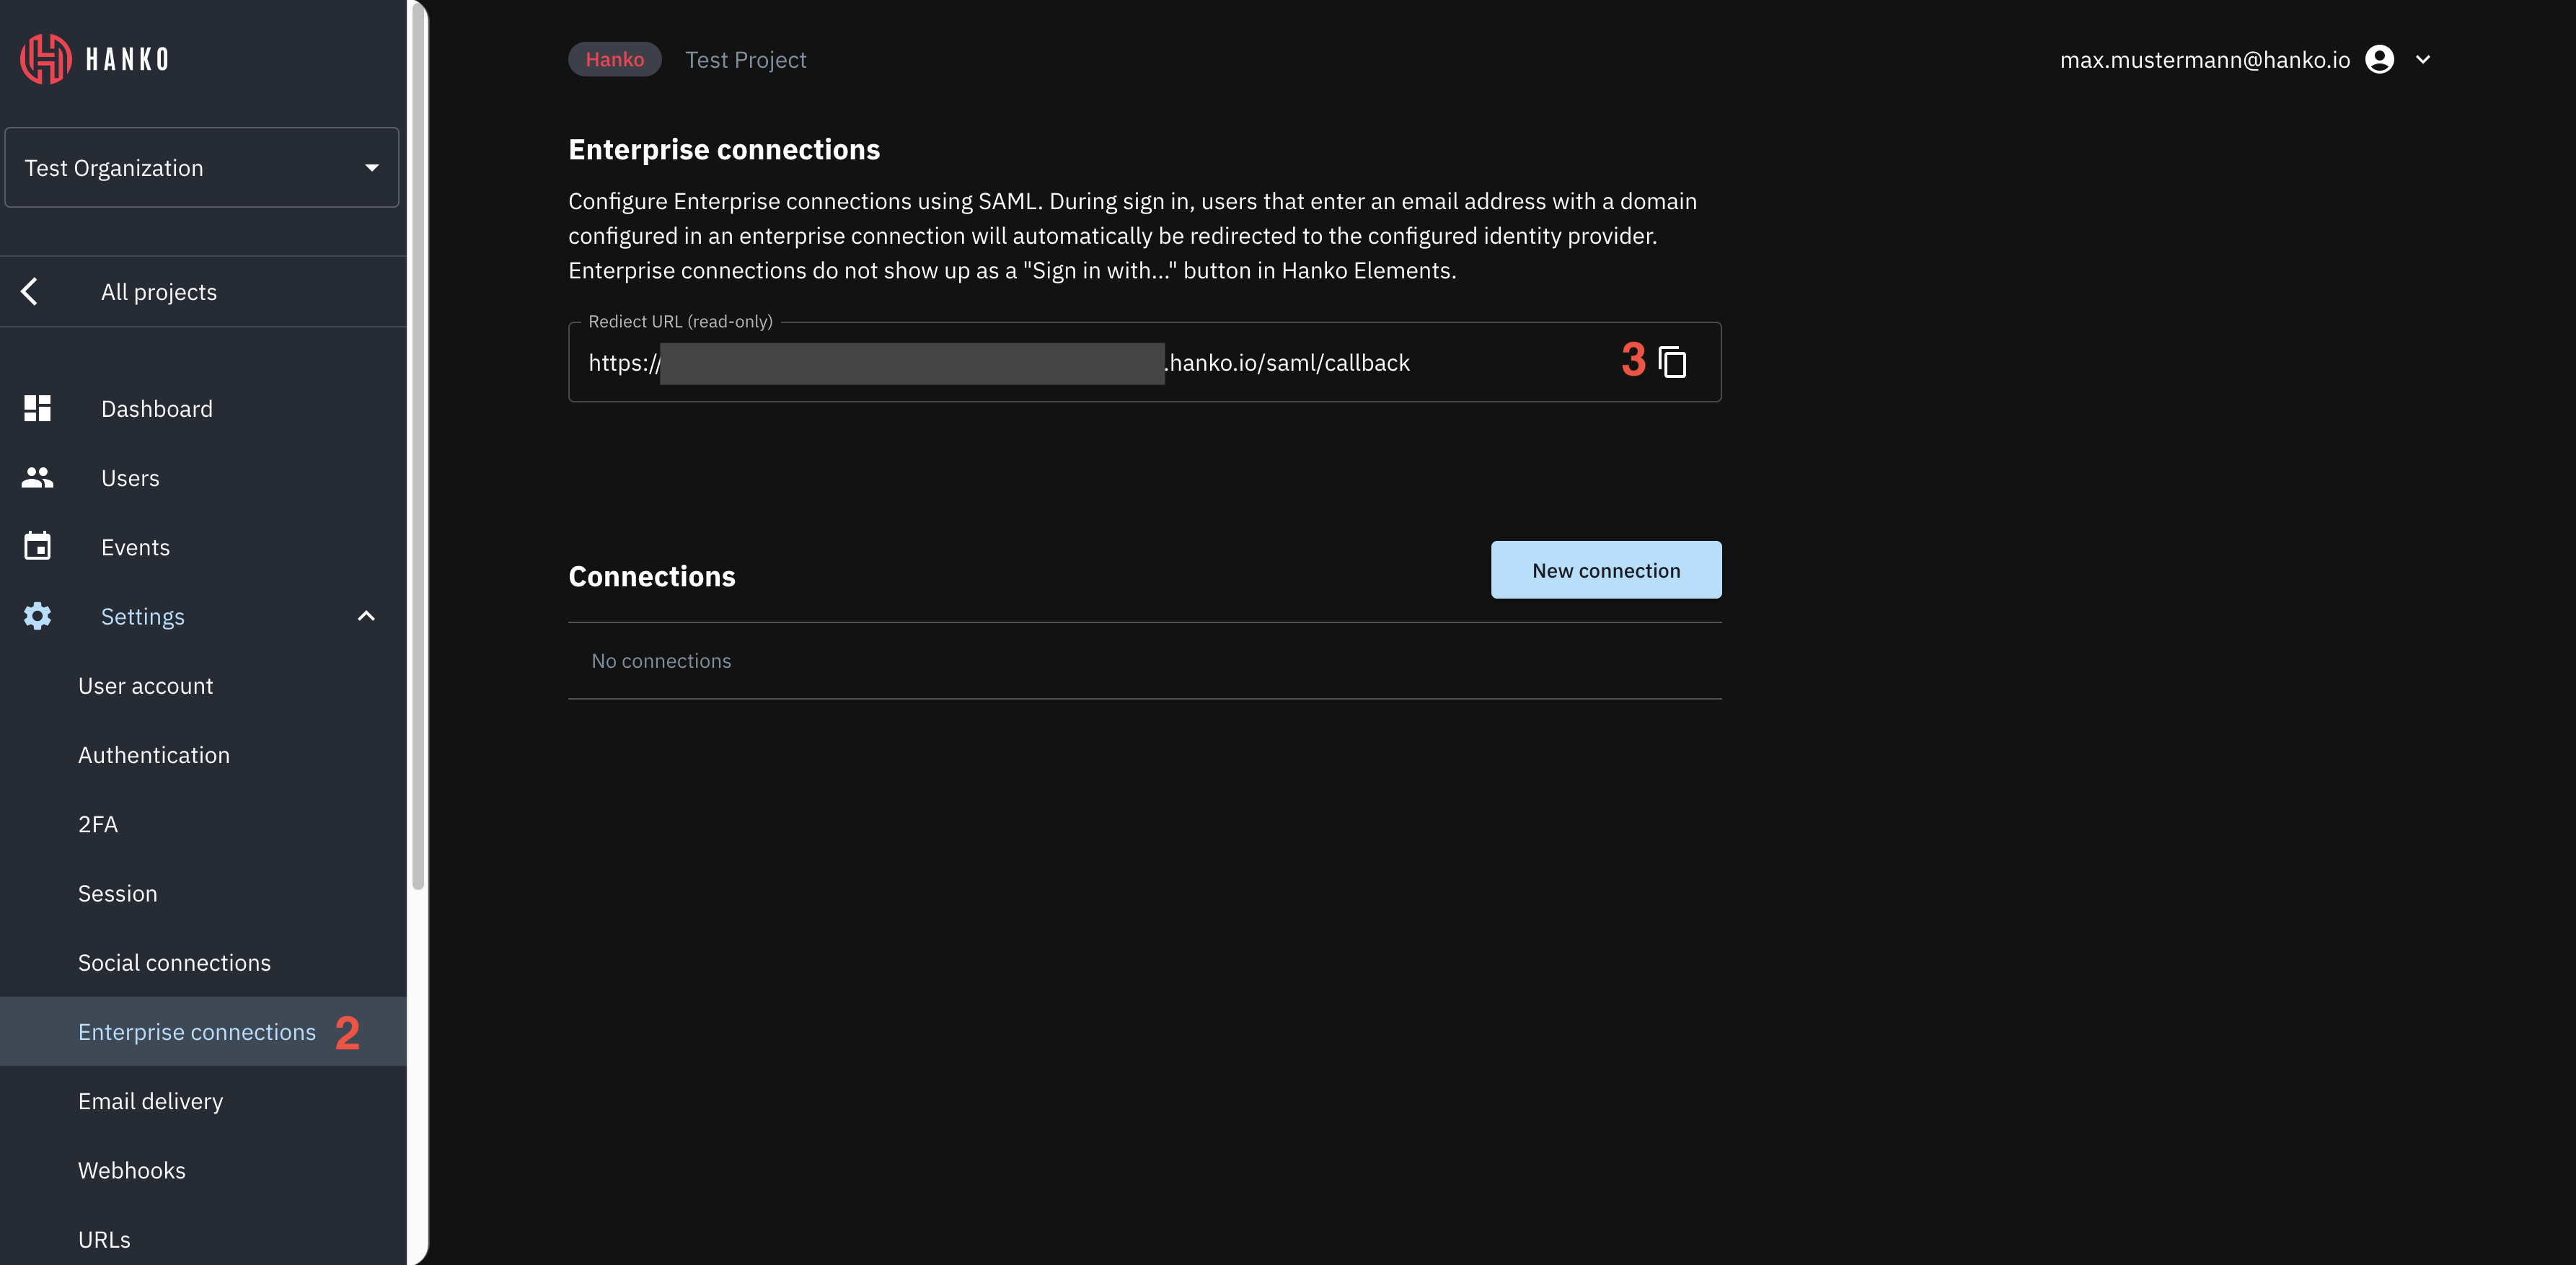
To find the Assertion Consumer Service (ACS) URL for your project:- Log in to Hanko Cloud and select your project.
- Navigate to
Settings > Enterprise connections. - Under
Enterprise connectionsfind theRedirect URLpanel. - Copy and save the URL.
Create a Google Workspace application
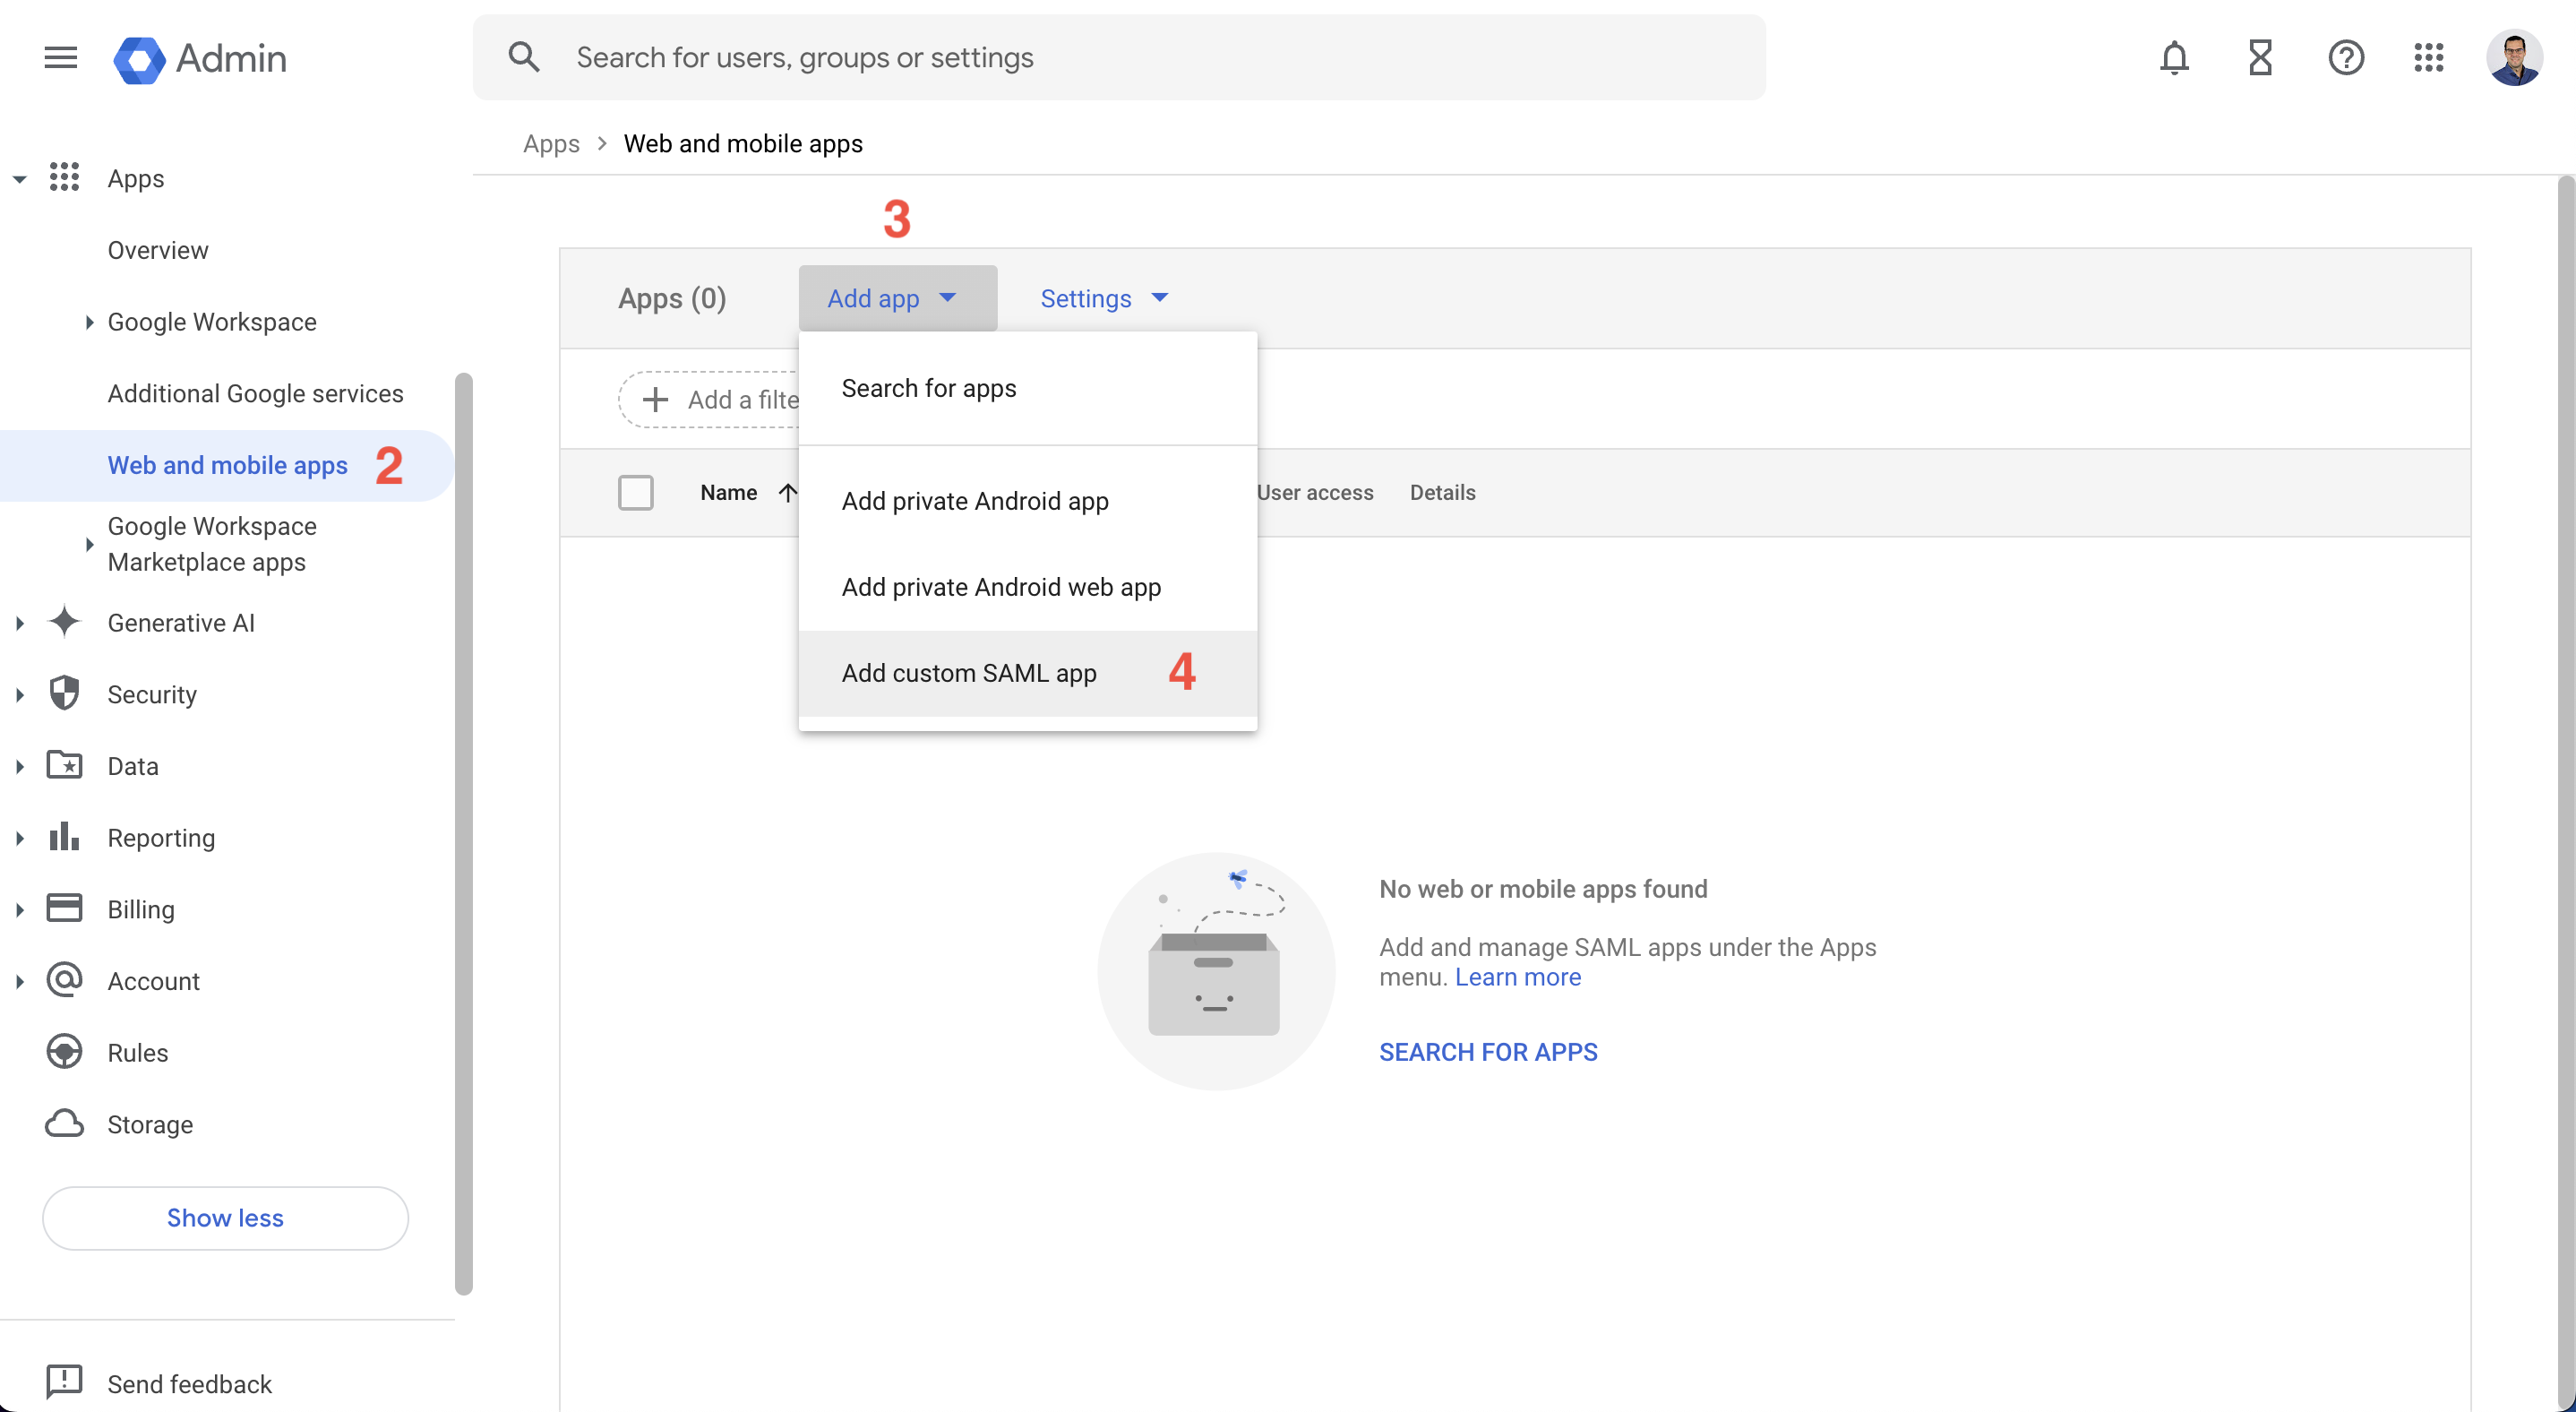
- Sign in to the Google Admin Console.
- In the left sidebar select
Apps > Web and mobile apps. - Toggle the
Add appdropdown in the main view. - Click
Add custom SAML app.
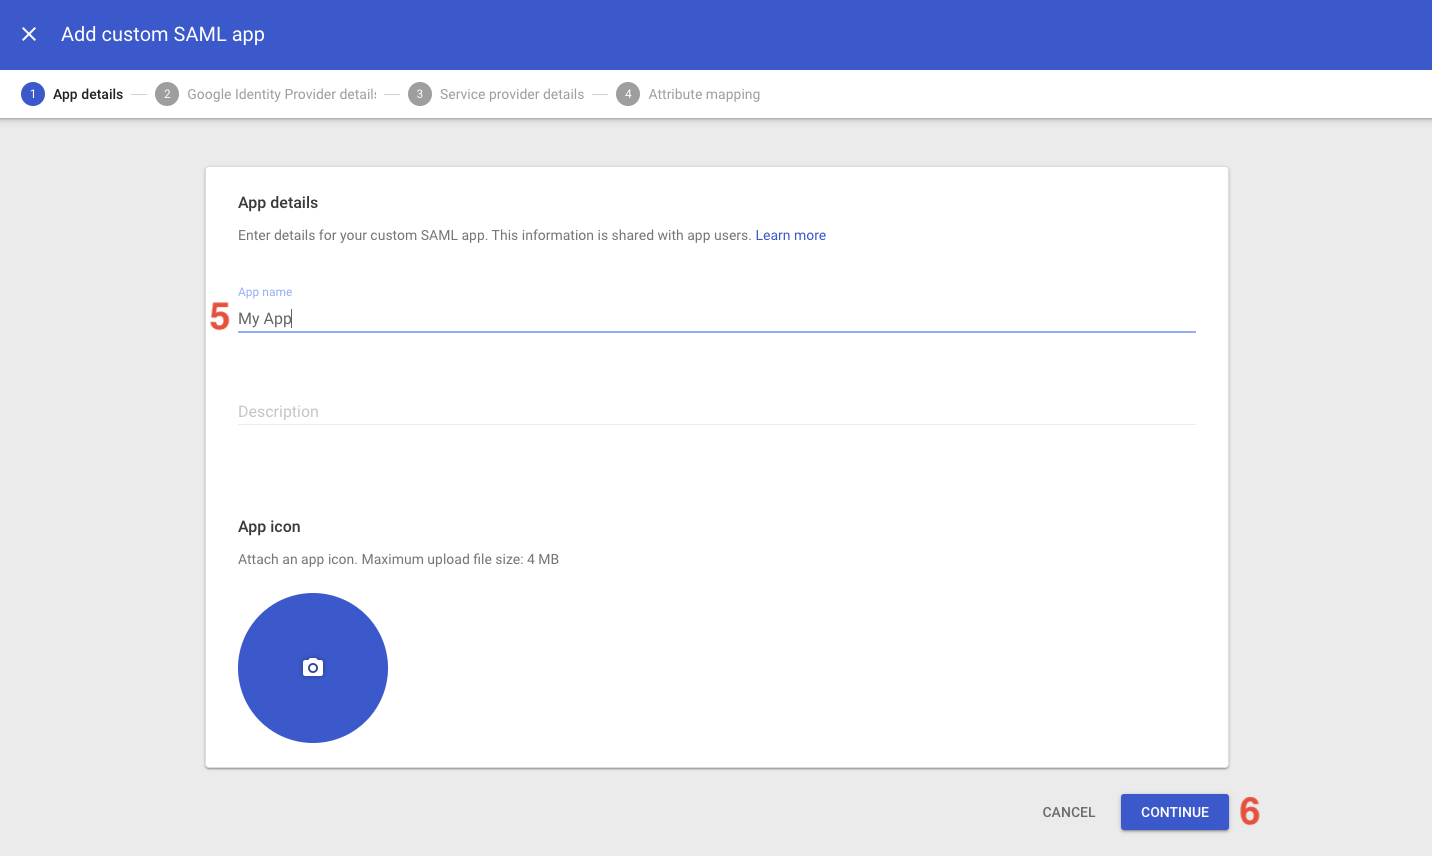
- Provide a name for your app.
- Click
Continue.
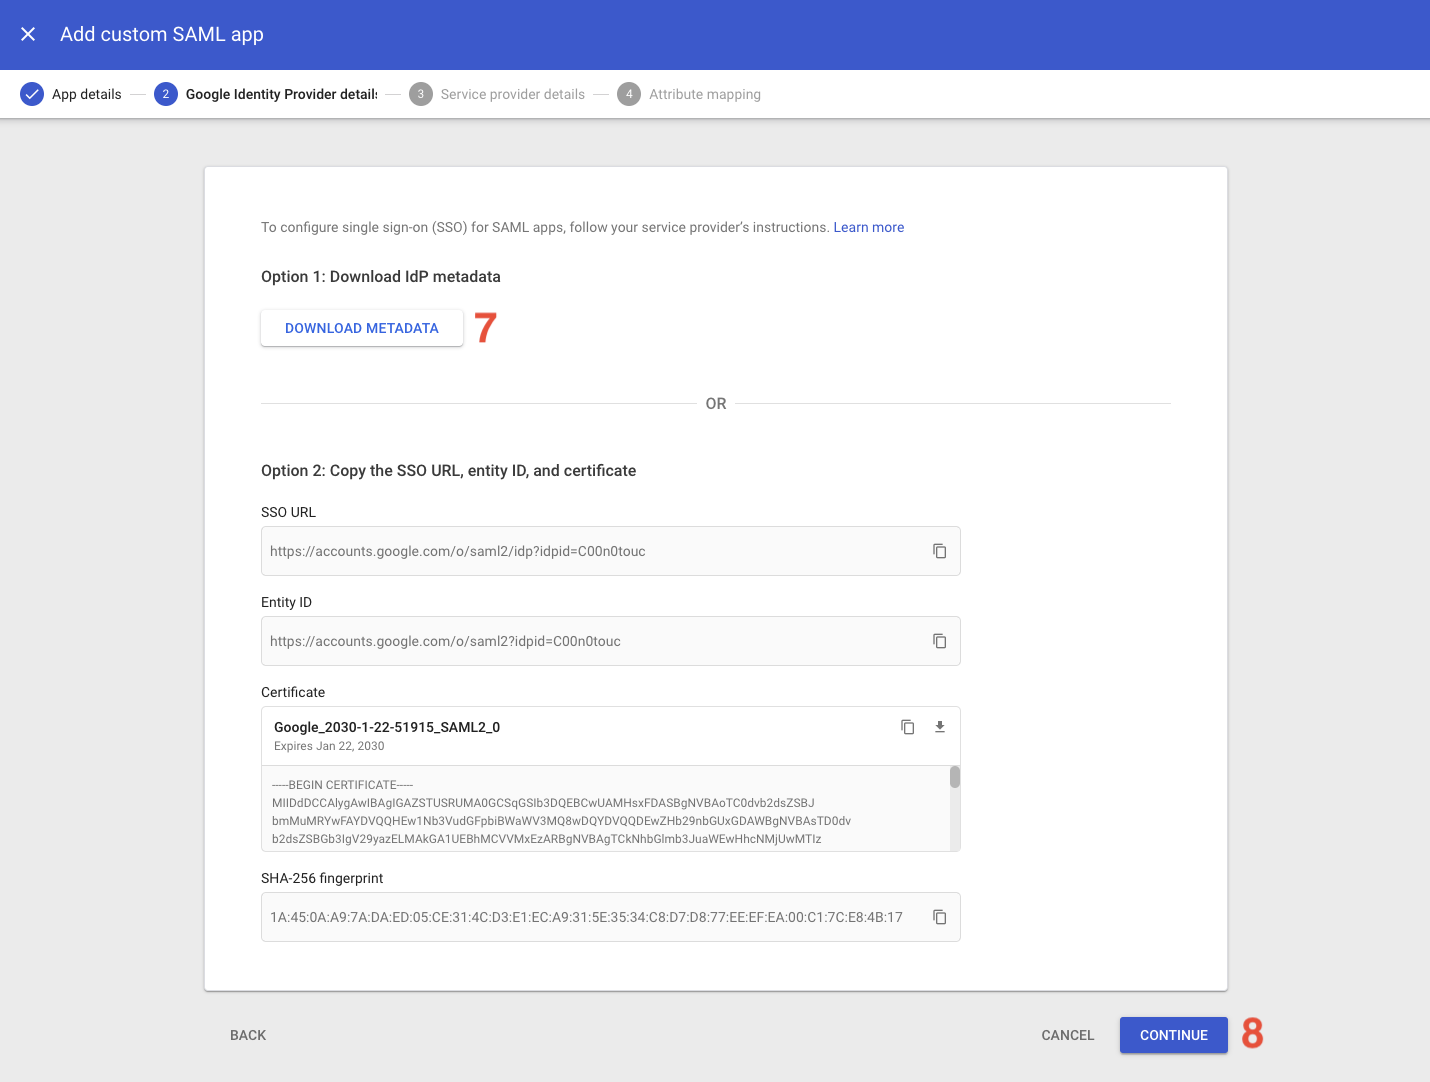
- Click
Download Metadata. You need to download and host this file publicly because Hanko requires access to the metadata file via URL. See Hosting the SAML XML Metadata file for details. - Click
Continue.
- Under
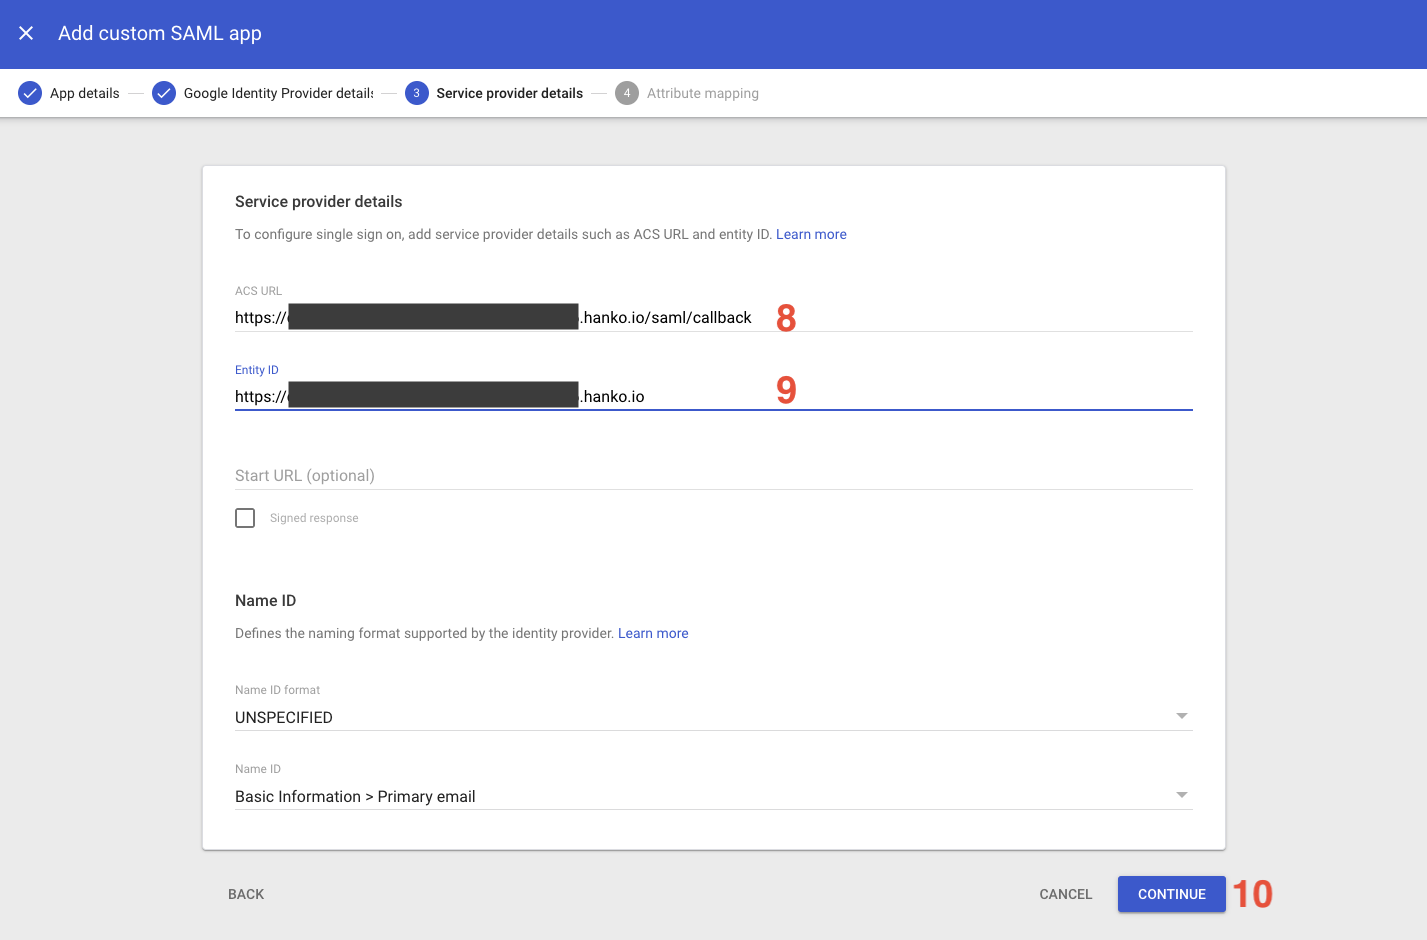
ACS URLenter your ACS URL (see Prerequisites - Service Provider ACS URL). - Under
Entity IDenter you project API URL (see Prerequisites - Service Provider Entity ID). - Click
Continue.
- In the
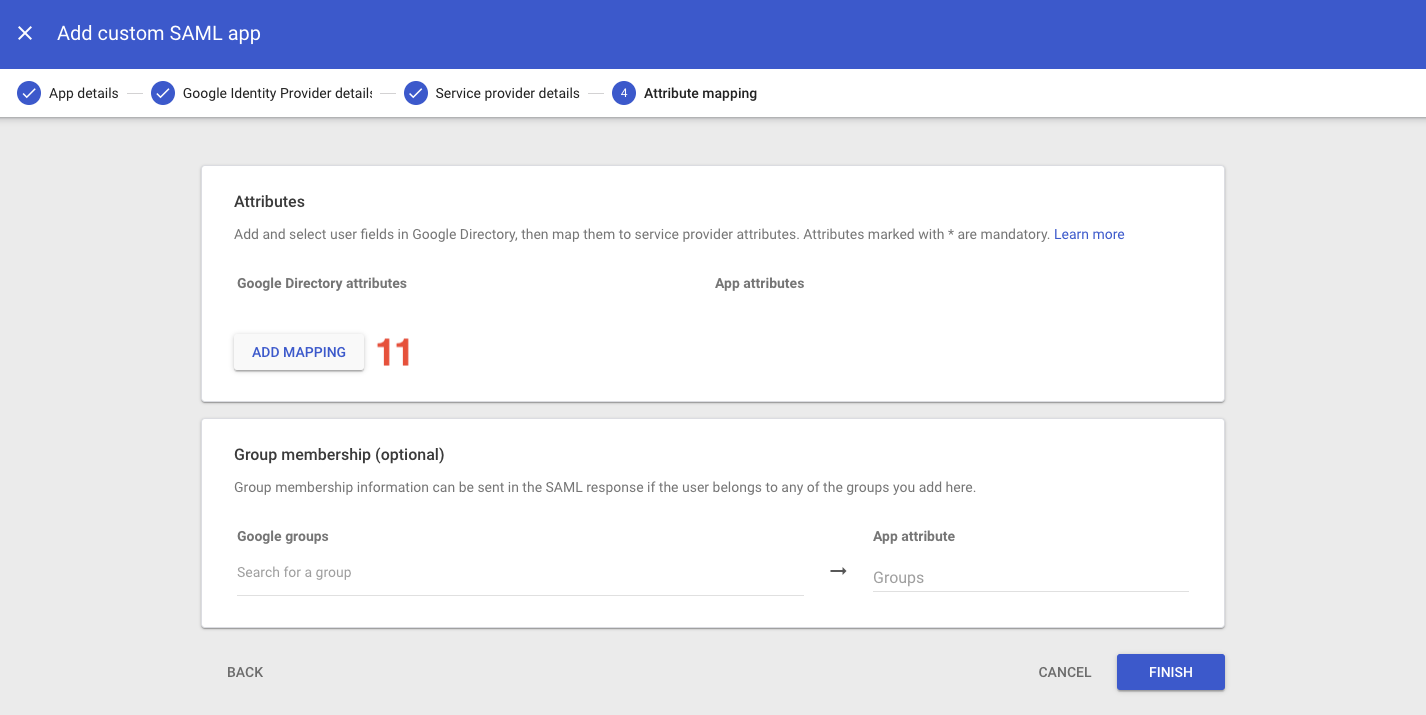
Attributespanel, clickAdd Mapping.
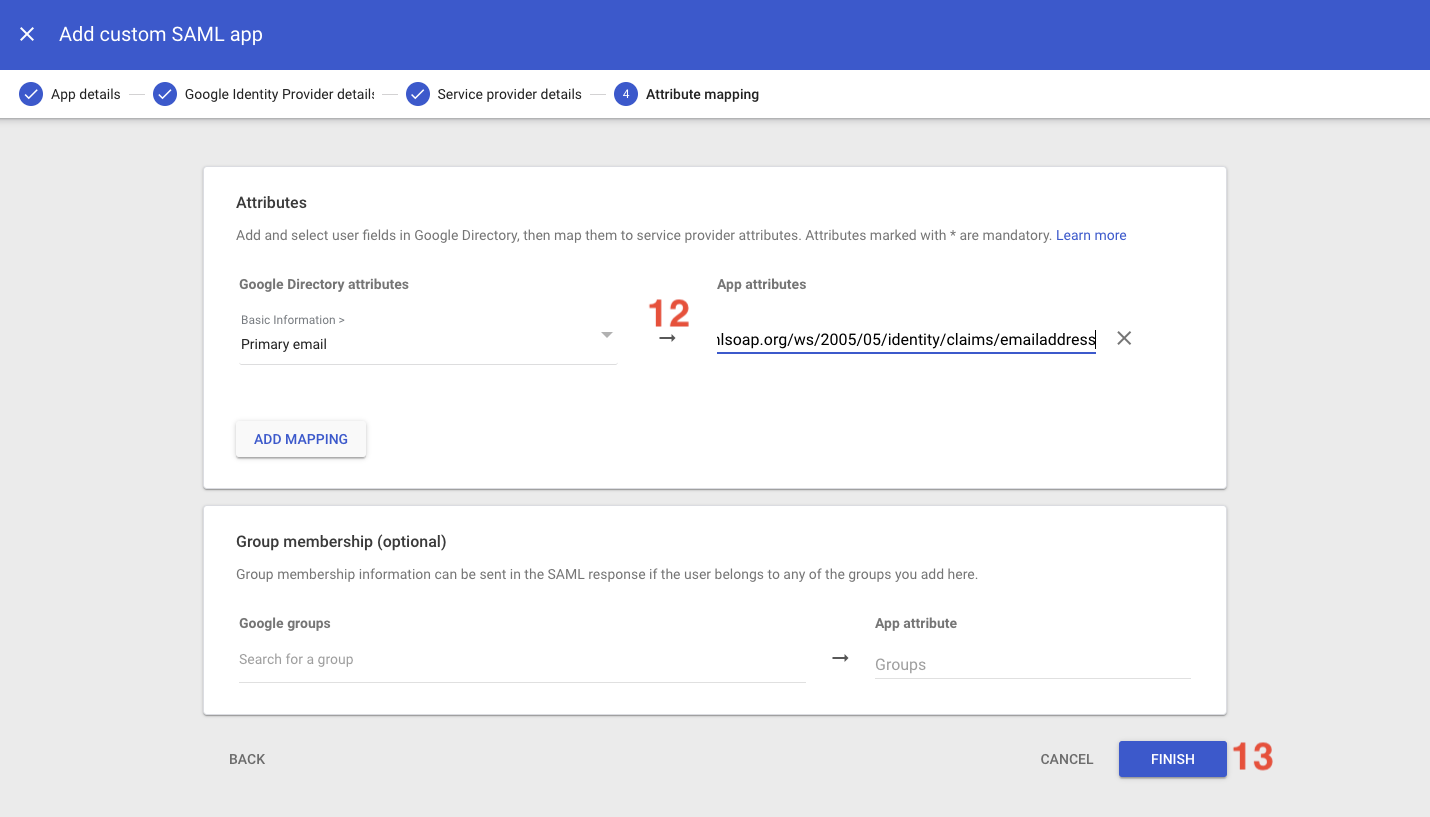
- Provide the following mapping:
| Google Directory Attribute | App attribute |
|---|---|
Primary email | http://schemas.xmlsoap.org/ws/2005/05/identity/claims/emailaddress |
- Click
Finish.
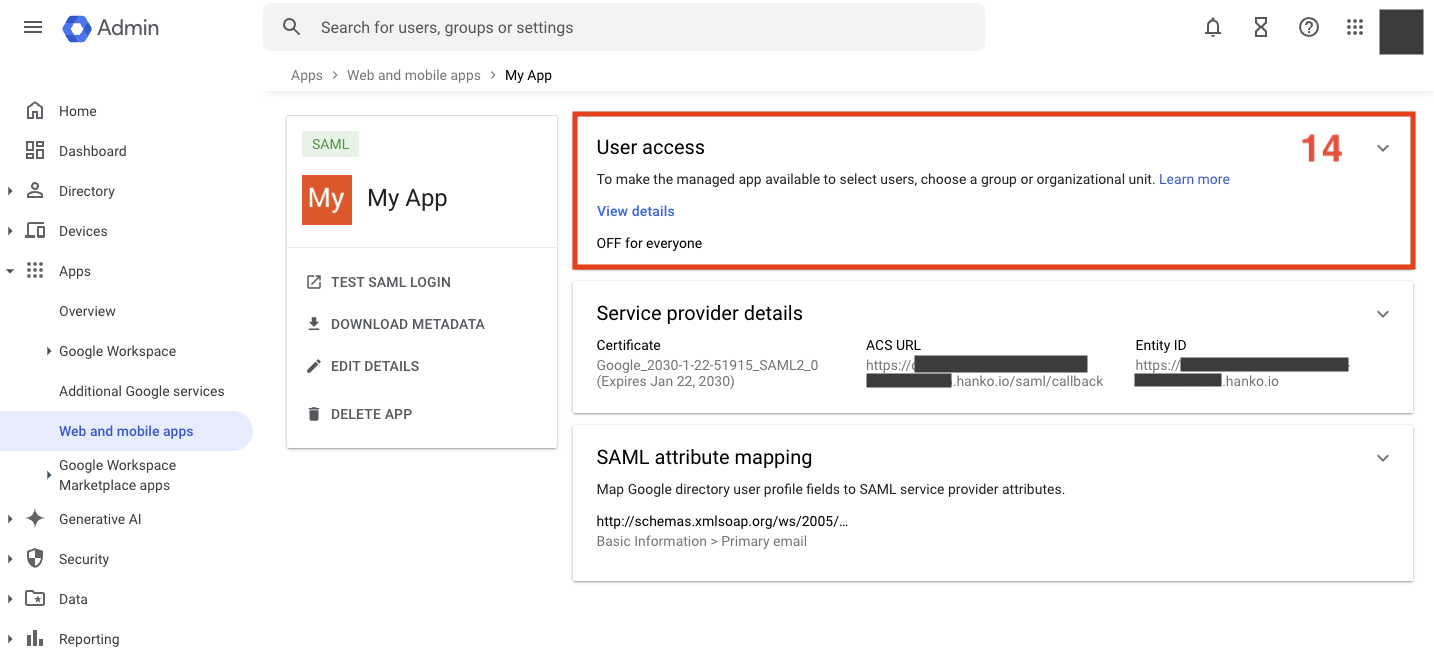
- You should be redirected to your app’s “dashboard”. Click the
User accesspanel.
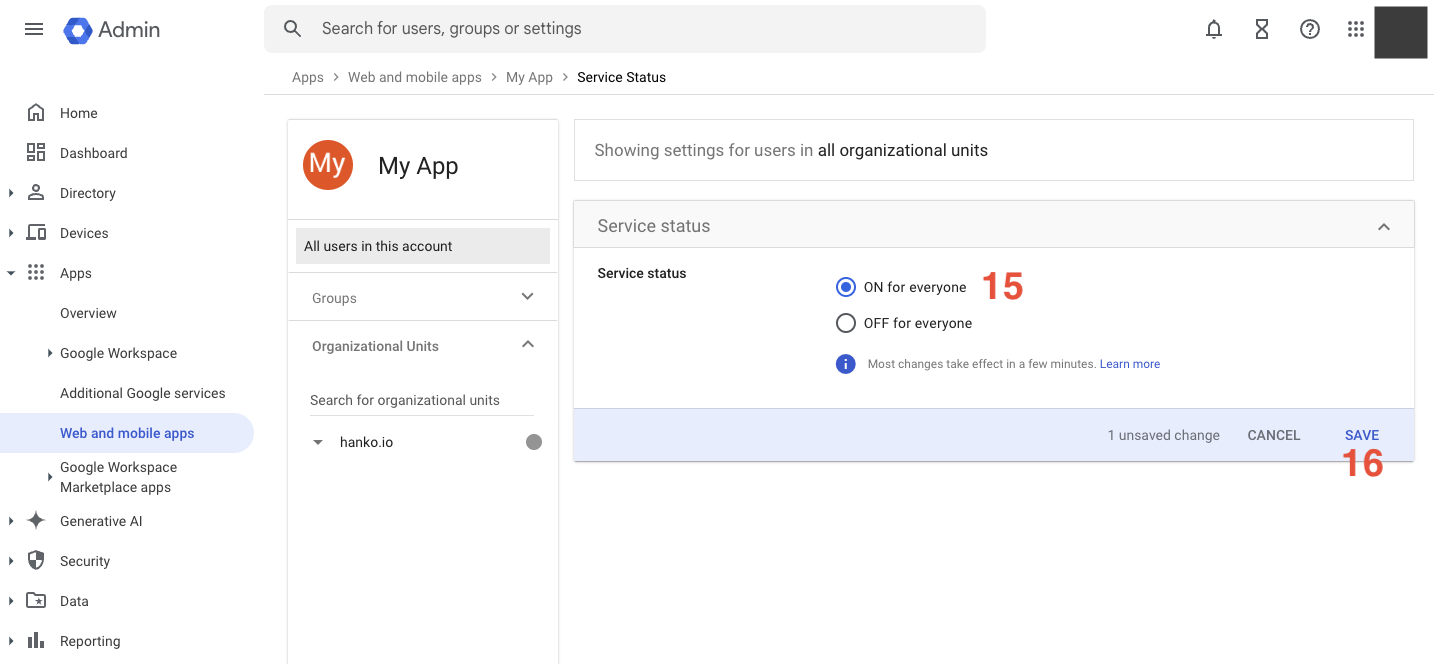
- Set the
Service statustoON for everyone. - Click
Save.
Hosting the SAML XML Metadata file
Google only provides SAML metadata as a downloadable XML file, but Hanko requires access to metadata files via URL rather than file upload. You must host the downloaded file on a publicly accessible web service (such as AWS S3, Cloudflare R2, or a public website) that Hanko can access.Configure an enterprise connection
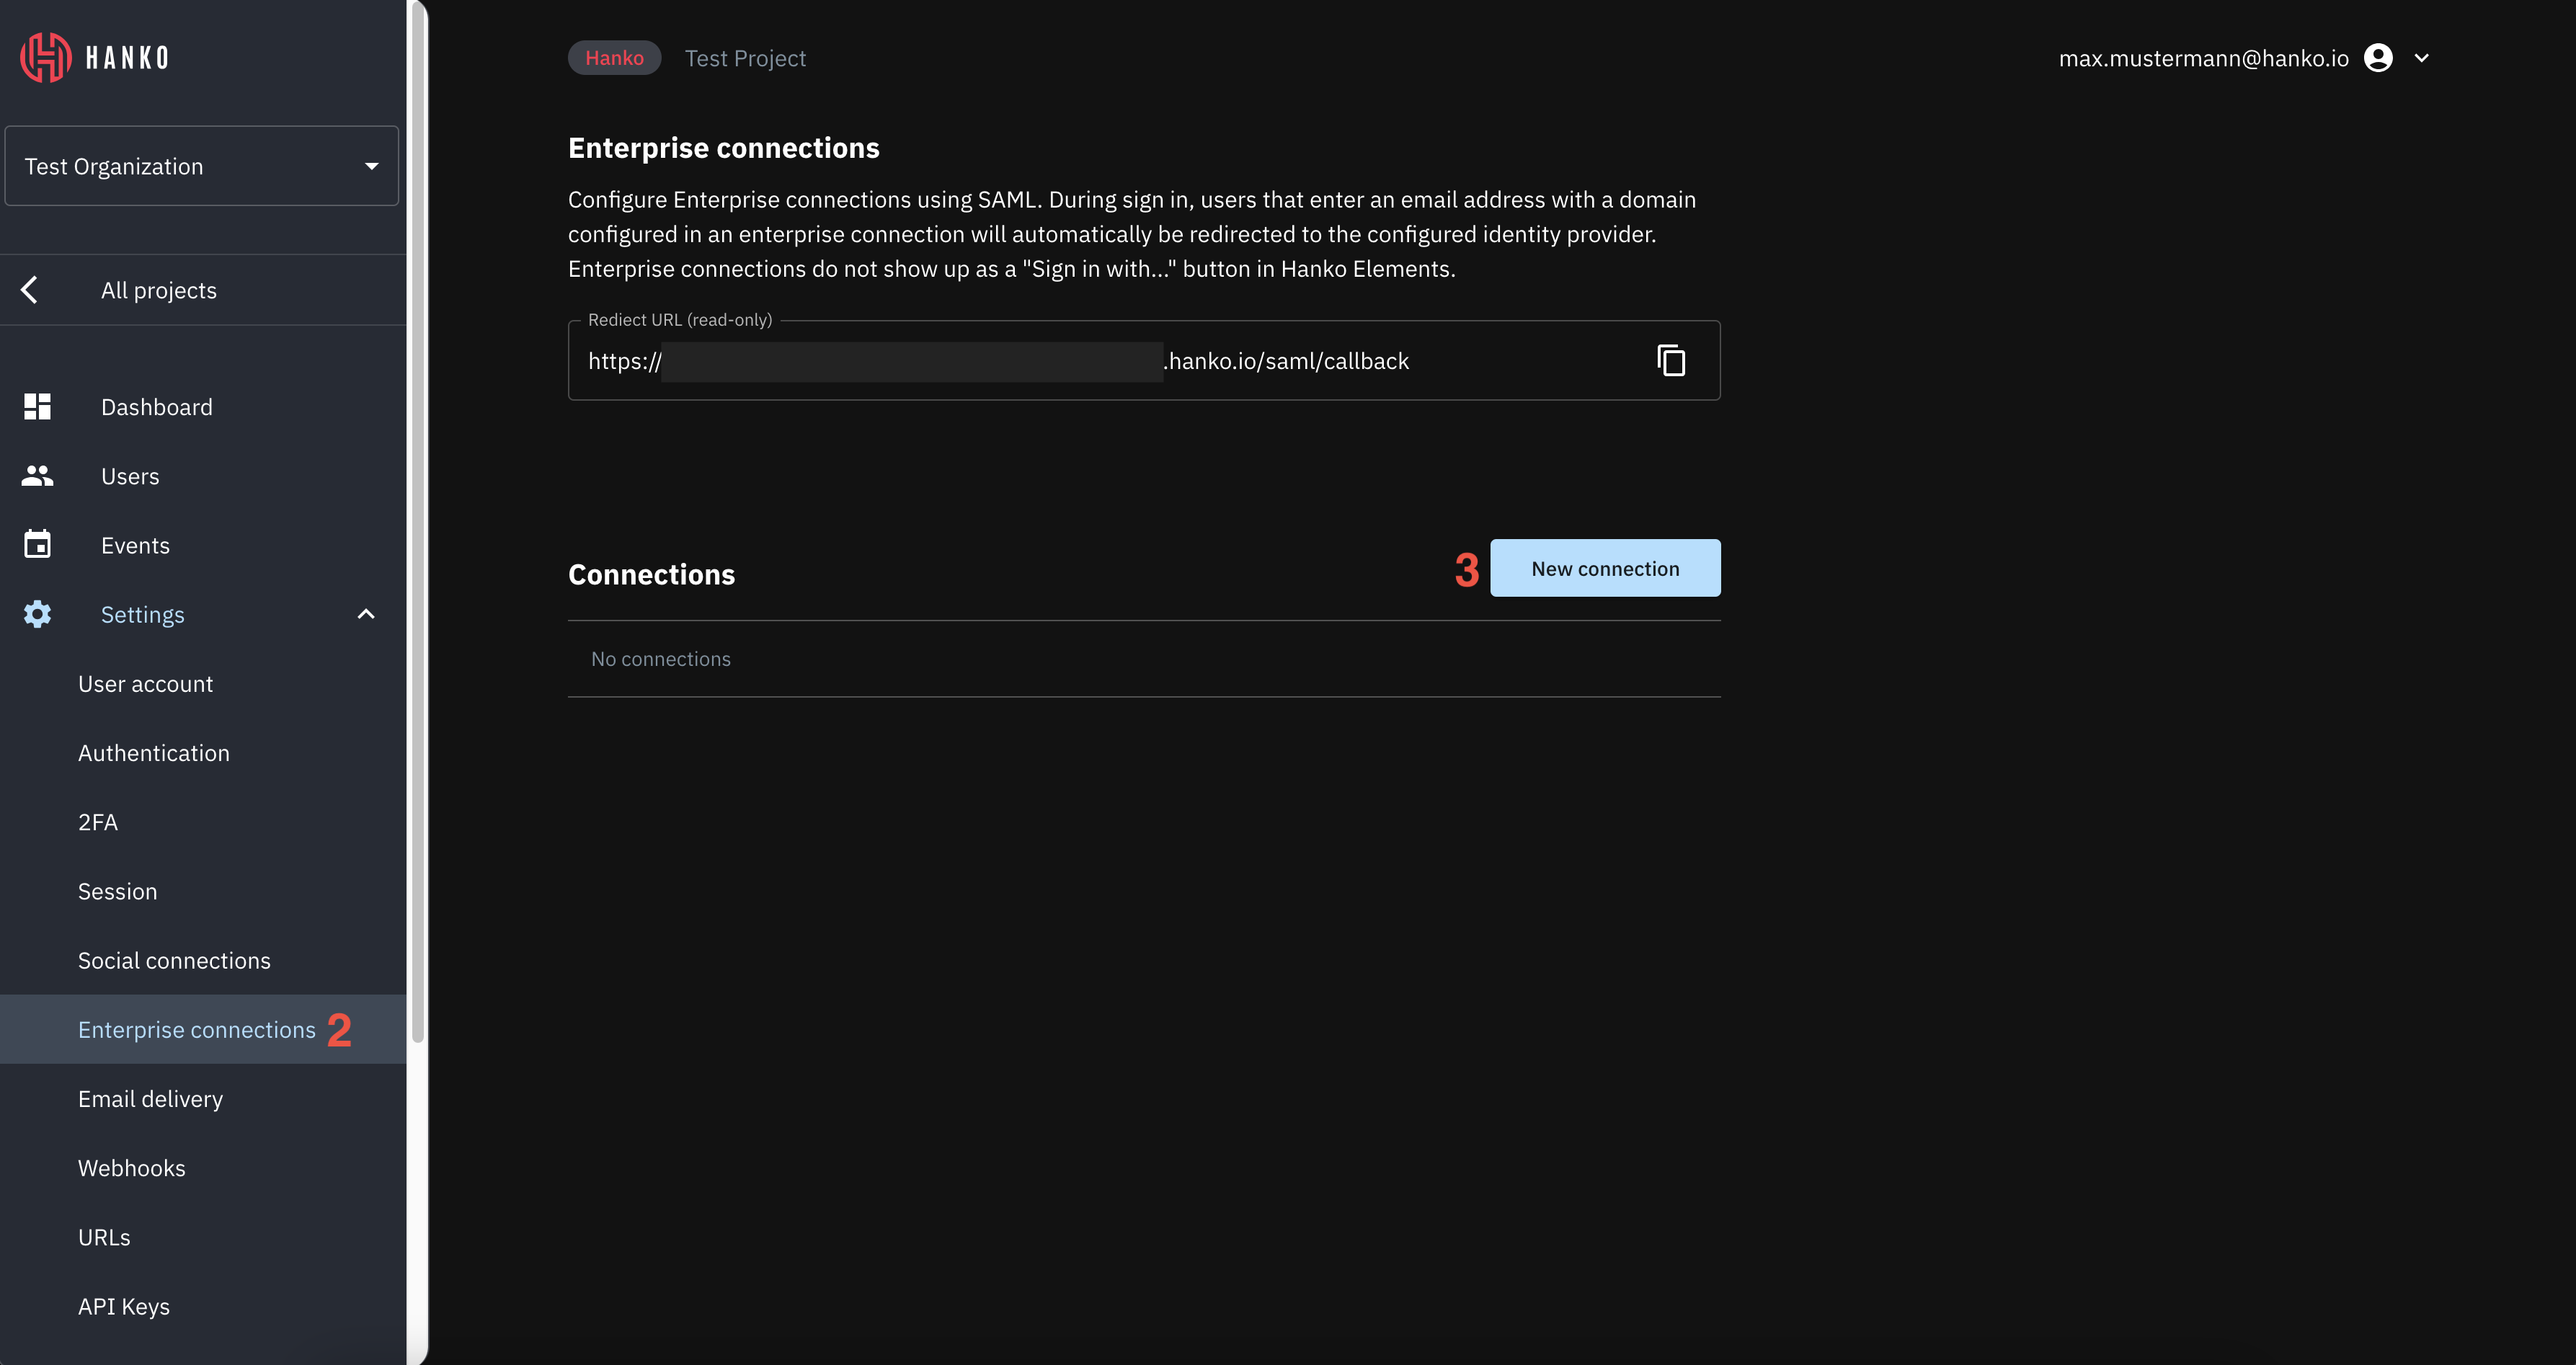
- Log in to Hanko Cloud and select your project.
- Navigate to
Settings > Enterprise connections. - Under
Connections, clickNew connection.
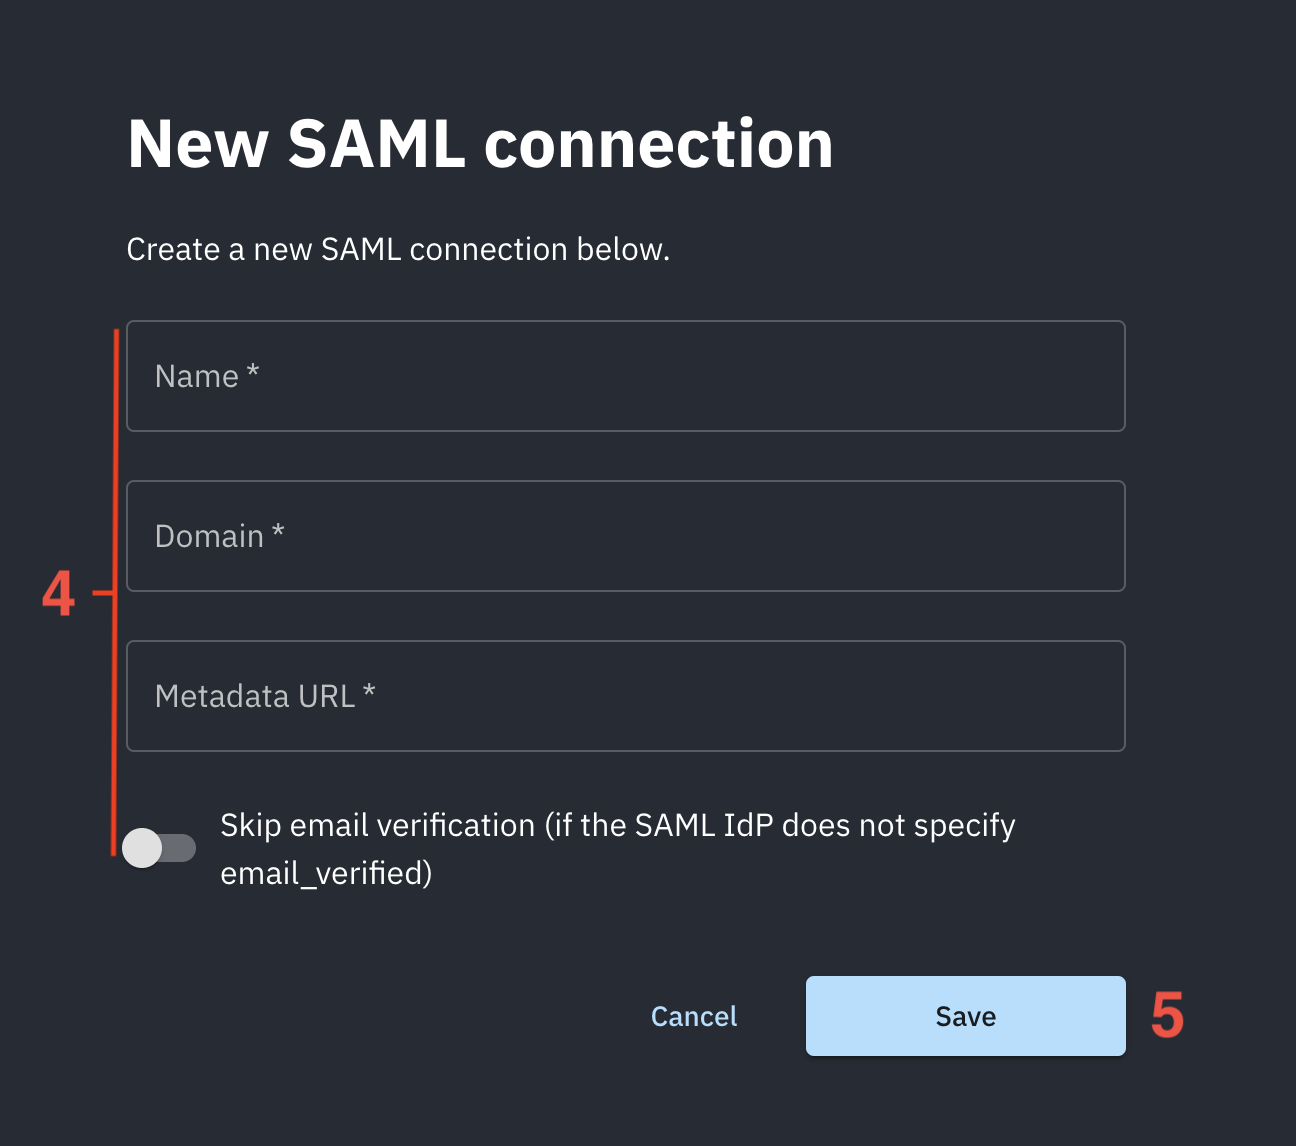
- In the shown modal provide the following data:
- A
Namefor the connection. - A
Domainfor the connection. When users authenticate via SAML SSO, the domain of the email address provided as an identifier at the start of an authentication flow must match the domain configured here. - A
Metadata URL. This is the URL of your hosted SAML XML Metadata file. - Select whether you want skip email verification for this provider.
- A
- Click
Saveto create the connection.
Testing your integration
To test your integration via IdP-initiated flow:- Open one of the Google Workspace applications, e.g. Google Calendar.
- Access the user’s available applications in the top navigation.
- Find your application and click the icon for your application.


