> ## Documentation Index
> Fetch the complete documentation index at: https://docs.hanko.io/llms.txt
> Use this file to discover all available pages before exploring further.
# Integrate Hanko with Next.js
> Learn how to quickly add authentication and a user profile to your Next.js app using Hanko.
**Hanko Fullstack Integration Guide**:
**About Hanko**:
Hanko is a modern open source authentication solution and the fastest way you integrate passkeys, 2FA, SSO, and more—with full control over your data. Move between self-hosted and Hanko Cloud anytime. No lock-in. Just Auth how it should be: secure, user friendly, and fully yours.
**What This Guide Covers**: This comprehensive guide demonstrates integrating Hanko authentication into your fullstack application using the `@teamhanko/hanko-elements` package. You'll learn to set up authentication components, implement session management, secure routes with middleware, and handle user data across both client and server-side contexts.
**Key Technologies**:
* Modern fullstack framework with TypeScript,
* Server-side rendering capabilities
* Hanko Elements
* Hanko Cloud Console
* Session management
* Middleware protection
**Prerequisites**:
* Node.js installed on your system
* Basic knowledge of your chosen fullstack framework
* A Hanko Cloud account (sign up at [https://cloud.hanko.io/signup](https://cloud.hanko.io/signup))
**Integration Tasks You'll Complete**:
* Install and configure Hanko Elements package for your framework
* Set up HankoAuth component with session event handling and navigation
* Create HankoProfile component for user credential management
* Implement logout functionality with proper session cleanup and redirects
* Secure routes using framework-specific middleware with session validation
* Retrieve user data both client-side and server-side using appropriate APIs
* Handle authentication redirects, error states, and edge cases
* Configure server-side rendering integration and hydration
* Customize component appearance and behavior for your application
## Create a Next.js application
Run the following command to [create a new Next.js application](https://nextjs.org/docs/app/getting-started/installation):
When setting up Next.js, you’ll choose either the [App Router](https://nextjs.org/docs/app) or the [Pages Router](https://nextjs.org/docs/pages). Be sure to follow the proper directory structure and add the matching code for the router you selected.
This creates a new Next.js application using the latest version and default settings.
```bash terminal theme={null}
npx create-next-app@latest project-name
```
## Install `@teamhanko/hanko-elements`
Once you've initialized your NextJS app, installing hanko-elements provides you with access to the prebuilt components: `hanko-auth` and `hanko-profile`.
This installs the Hanko Elements package, providing pre-built authentication components.
```bash npm theme={null}
cd project-name
npm install @teamhanko/hanko-elements
```
```bash pnpm theme={null}
cd project-name
pnpm add @teamhanko/hanko-elements
```
```bash bun theme={null}
cd project-name
bun add @teamhanko/hanko-elements
```
```bash yarn theme={null}
cd project-name
yarn add @teamhanko/hanko-elements
```
## Set up your Hanko project
Go to the [Hanko Console](https://cloud.hanko.io/) and [create a project for this application.](/setup-hanko-cloud)
During creation make sure to input the URL you will be developing on as the `APP URL`.
(Most likely [http://localhost:3000](http://localhost:3000))
## Add your Hanko API URL
Retrieve your API URL from the [Hanko Console](https://cloud.hanko.io/), and paste this in a `.env` file.
Set up your environment variable for the Hanko API URL. The NEXT\_PUBLIC\_ prefix makes it accessible in the browser.
```sh .env.local theme={null}
NEXT_PUBLIC_HANKO_API_URL=https://f4****-4802-49ad-8e0b-3d3****ab32.hanko.io
```
If you are self-hosting you need to provide the URL of your running Hanko backend.
## Create Hanko components
Create a folder called `components` and create two files, `HankoAuth.tsx` and `HankoProfile.jsx`.
### Add Typescript types
To get these elements to work with typescript, currently we must add the types to the project.
To do do this, create a file called `custom.d.ts` and place it in your apps root / src folder.
Add TypeScript declarations for Hanko Web Components to enable type checking and IntelliSense support.
```jsx src/custom.d.ts theme={null}
import { HankoAuthElementProps, HankoProfileElementProps, HankoEventsElementProps } from "@teamhanko/hanko-elements";
declare module "react" {
namespace JSX {
interface IntrinsicElements {
"hanko-auth": HankoAuthElementProps;
"hanko-login": HankoAuthElementProps;
"hanko-registration": HankoAuthElementProps;
"hanko-profile": HankoProfileElementProps;
"hanko-events": HankoEventsElementProps;
}
}
}
```
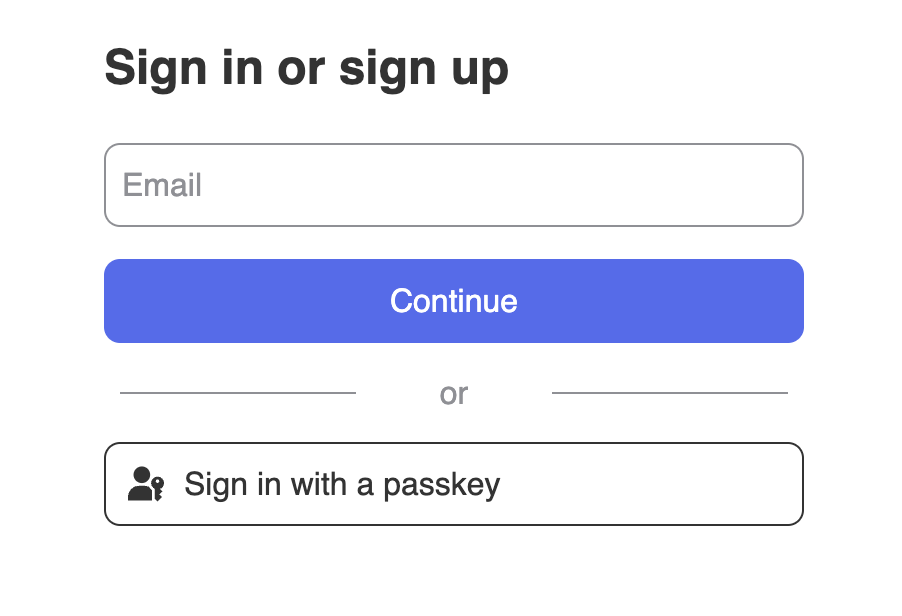
### Login page with ``
Now lets setup the `HankoAuth.tsx` file to create a functioning login page.
Here we subscribe to the `onSessionCreated` [event](/guides/hanko-elements/using-frontend-sdk#events), this triggers when a user successfully logs in. You can use these event to perform any desired action. (e.g. redirect to your dashboard).
For more information please refer to the [Auth component page.](/guides/hanko-elements/auth-component)
App Router version: This authentication component handles session events and redirects users after successful login.
```jsx components/HankoAuth.tsx theme={null}
"use client"; //Only for NextJS App Router
import { useEffect, useCallback, useState } from "react";
import { useRouter } from "next/navigation";
import { register, Hanko } from "@teamhanko/hanko-elements";
const hankoApi = process.env.NEXT_PUBLIC_HANKO_API_URL || '';
export default function HankoAuth() {
const router = useRouter();
const [hanko, setHanko] = useState();
useEffect(() => setHanko(new Hanko(hankoApi)), []);
const redirectAfterLogin = useCallback(() => {
// change this to the page you wish to be redirected to
router.replace("/dashboard");
}, [router]);
useEffect(
() =>
hanko?.onSessionCreated(() => {
// successfully logged in
redirectAfterLogin();
}),
[hanko, redirectAfterLogin]
);
useEffect(() => {
register(hankoApi).catch((error) => {
// handle error
console.log(error);
});
}, []);
return ;
}
```
Pages Router version: This authentication component uses next/router instead of next/navigation.
```jsx components/HankoAuth.tsx theme={null}
import { useEffect, useCallback, useState } from "react";
import { useRouter } from "next/router";
import { register, Hanko } from "@teamhanko/hanko-elements";
const hankoApi = process.env.NEXT_PUBLIC_HANKO_API_URL || '';
export default function HankoAuth() {
const router = useRouter();
const [hanko, setHanko] = useState();
useEffect(() => setHanko(new Hanko(hankoApi)), []);
const redirectAfterLogin = useCallback(() => {
// change this to the page you wish to be redirected to
router.replace("/dashboard");
}, [router]);
useEffect(
() =>
hanko?.onSessionCreated(() => {
//succesfully logged in
redirectAfterLogin();
}),
[hanko, redirectAfterLogin]
);
useEffect(() => {
register(hankoApi).catch((error) => {
// handle error
console.log(error)
});
}, []);
return ;
}
```
Now simply import the component you just created.
App Router login page that renders the HankoAuth component.
```jsx app/login/page.tsx theme={null}
import HankoAuth from "@/components/HankoAuth";
export default function LoginPage() {
return (
);
}
```
Pages Router login page that renders the HankoAuth component.
```jsx pages/login.tsx theme={null}
import HankoAuth from "@/components/HankoAuth";
export default function LoginPage() {
return (
);
}
```
By now, your sign-up and sign-in features should be working. You should see an interface similar to this 👇
### Profile page with ``
After setting up `HankoAuth`, let's set up the `HankoProfile.jsx` file to create an interface where users can
manage their email addresses and login methods.
For more information please refer to the [Profile component page.](/guides/hanko-elements/profile-component)
App Router profile component for managing user emails and credentials.
```jsx components/HankoProfile.jsx theme={null}
"use client" //Only for NextJS App Router
import { useEffect } from "react";
import { register } from "@teamhanko/hanko-elements";
const hankoApi = process.env.NEXT_PUBLIC_HANKO_API_URL || '';
export default function HankoProfile() {
useEffect(() => {
register(hankoApi).catch((error) => {
// handle error
});
}, []);
return ;
}
```
Pages Router profile component for managing user emails and credentials.
```jsx components/HankoProfile.jsx theme={null}
import { useEffect } from "react";
import { register } from "@teamhanko/hanko-elements";
const hankoApi = process.env.NEXT_PUBLIC_HANKO_API_URL || '';
export default function HankoProfile() {
useEffect(() => {
register(hankoApi).catch((error) => {
// handle error
});
}, []);
return ;
}
```
After you created the `HankoProfile` component, simply import it into any page.
```jsx app/dashboard/page.tsx theme={null}
import HankoProfile from "@/components/HankoProfile";
export default function Dashboard() {
return (
);
}
```
```jsx pages/dashboard.tsx theme={null}
import HankoProfile from "@/components/HankoProfile";
export default function Dashboard() {
return (
);
}
```
It should look something like this 👇
## Implement logout functionality
You can use `@teamhanko/hanko-elements` to easily logout users. Here we will make a logout button.
Create `LogoutButton.tsx` and insert the code below.
App Router logout button component that handles session cleanup and navigation.
```jsx components/LogoutButton.tsx theme={null}
"use client"; //Only for NextJS App Router
import { useState, useEffect } from "react";
import { useRouter } from "next/navigation";
import { Hanko } from "@teamhanko/hanko-elements";
const hankoApi = process.env.NEXT_PUBLIC_HANKO_API_URL || '';
export default function LogoutBtn() {
const router = useRouter();
const [hanko, setHanko] = useState();
useEffect(() => setHanko(new Hanko(hankoApi ?? "")), []);
const logout = async () => {
try {
await hanko?.logout();
router.push("/");
router.refresh();
return;
} catch (error) {
console.error("Error during logout:", error);
}
};
return ;
}
```
Pages Router logout button component using router.reload() instead of refresh().
```jsx components/LogoutButton.tsx theme={null}
import { useState, useEffect } from "react";
import { useRouter } from "next/router";
import { Hanko } from "@teamhanko/hanko-elements";
const hankoApi = process.env.NEXT_PUBLIC_HANKO_API_URL || '';
export default function LogoutBtn() {
const router = useRouter();
const [hanko, setHanko] = useState();
useEffect(() => setHanko(new Hanko(hankoApi ?? "")), []);
const logout = async () => {
try {
await hanko?.logout();
router.push("/");
router.reload();
return;
} catch (error) {
console.error("Error during logout:", error);
}
};
return ;
}
```
## Customize component styles
You can customize the appearance of `hanko-auth` and `hanko-profile` components using CSS variables and parts. Refer to our [customization guide](/guides/hanko-elements/customize-appearance).
## Securing routes with middleware
To verify the session token in your Next.js application, we're using the [session/validate API request](/api-reference/public/session-management/validate-a-session). By checking for a valid session token this middleware will ensure secure access to specific routes, like `/dashboard` and `/protected`.\
The middleware extracts and verifies the session token, and redirect unauthorized users back to the home or login page.
For more info on middlewares and where to put the `middleware.ts` file,\
please refer to [NextJS Middleware](https://nextjs.org/docs/app/building-your-application/routing/middleware).
Middleware tends to not always work after creating it, if this is the case try restarting your next app.
This Next.js middleware protects routes by validating Hanko session tokens.
```jsx middleware.ts theme={null}
import { NextResponse, NextRequest } from "next/server";
const hankoApi = process.env.NEXT_PUBLIC_HANKO_API_URL;
export async function middleware(req: NextRequest) {
const token = req.cookies.get("hanko")?.value;
const validationOptions = {
method: 'POST',
headers: {'Content-Type': 'application/json'},
body: `{"session_token":"${token}"}`
}
try {
const validationResponse = await fetch(
new URL(`${hankoApi}/sessions/validate`),//Hanko session validation
validationOptions
);
if (!validationResponse.ok) {
throw new Error('Session validation failed');
}
const responseData = await validationResponse.json();
if(!responseData.is_valid){
throw new Error('Session token not valid');
}
} catch (error) {
console.log(error)
return NextResponse.redirect(new URL("/", req.url));// URL to redirect the user to
}
}
export const config = {
matcher: ["/dashboard"],
};
```
To verify that it works, logout on your app and go to `/dashboard`, you should get redirected back.
## Getting user data
### Client side
Lets use the Hanko SDK to get user data.
Lets update the `dashboard` page to log some of the information from the user and session.
App Router dashboard with client-side user data retrieval using the Hanko SDK.
```jsx app/dashboard/page.tsx theme={null}
"use client" //Only for NextJS App Router
import HankoProfile from "../components/HankoProfile";
import LogoutButton from "../components/LogoutButton";
import { Hanko } from "@teamhanko/hanko-elements";
import { useState, useEffect } from "react";
const hankoApi = process.env.NEXT_PUBLIC_HANKO_API_URL || "";
export default function Dashboard() {
const [hanko, setHanko] = useState();
useEffect(() => setHanko(new Hanko(hankoApi)), []);
useEffect(() => {
hanko?.getUser()
.then((user) => {
console.log("User profile:", user);// Log user Profile
console.log(user.emails?.[0]?.address);
console.log(user.user_id);
})
}, [hanko]);
return (
);
}
```
Pages Router dashboard with client-side user data retrieval.
```jsx pages/dashboard.tsx theme={null}
import HankoProfile from "@/components/HankoProfile";
import LogoutButton from "@/components/LogoutButton";
iimport { Hanko } from "@teamhanko/hanko-elements";
import { useState, useEffect } from "react";
const hankoApi = process.env.NEXT_PUBLIC_HANKO_API_URL || "";
export default function Dashboard() {
const [hanko, setHanko] = useState();
useEffect(() => setHanko(new Hanko(hankoApi)), []);
useEffect(() => {
hanko?.getUser()
.then((user) => {
console.log("User profile:", user);// Log user Profile
console.log(user.emails?.[0]?.address);
console.log(user.user_id);
})
}, [hanko]);
return (
);
}
```
### Server side
On the server side, you can extract the `userID` from the session token, which you can use to fetch the user's data from the [Hanko Public API](/api-reference/public/user-management/get-a-user-by-id).
This server-side function validates sessions and fetches user data using the Hanko API.
```ts getUserData.ts theme={null}
import { cookies } from "next/headers";
const hankoApi = process.env.NEXT_PUBLIC_HANKO_API_URL || '';
export async function getUserData() {
try {
const token = (await cookies()).get("hanko")?.value;
const validationOptions = {
method: 'POST',
headers: {'Content-Type': 'application/json'},
body: `{"session_token":"${token}"}`
}
const validationResponse = await fetch(hankoApi + '/sessions/validate', validationOptions); //Get session data
if (!validationResponse.ok) {
throw new Error("validation was not succesfull");
}
const validationData = await validationResponse.json();
if(!validationData.is_valid){ //Validate session data
throw new Error("validation was not succesfull");
}
const userid = validationData.user_id; //use user id to request data
const userResponse = await fetch(hankoApi + '/users/' + userid, validationOptions);
if (!userResponse.ok) {
throw new Error("Could not get user data");
}
const userData = await userResponse.json();
return userData;
} catch (error) {
console.log(error)
return null;
}
return
}
```
## Try it yourself
}
>
Full source code available on our GitHub
}
>
Full source code available on our GitHub.
 ### Profile page with `
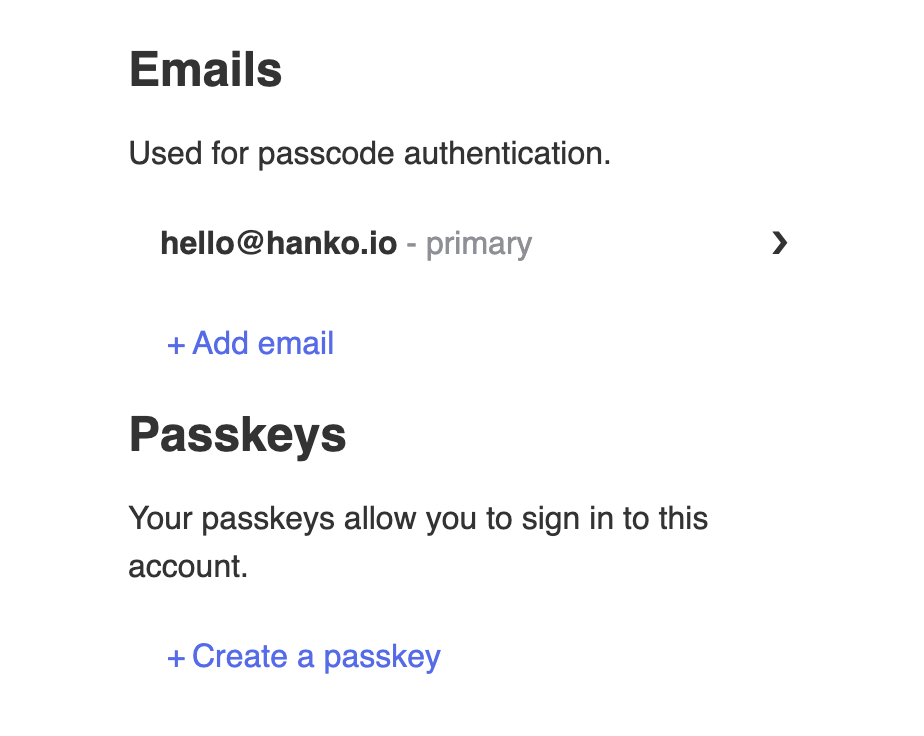 ## Implement logout functionality
You can use `@teamhanko/hanko-elements` to easily logout users. Here we will make a logout button.
Create `LogoutButton.tsx` and insert the code below.
## Implement logout functionality
You can use `@teamhanko/hanko-elements` to easily logout users. Here we will make a logout button.
Create `LogoutButton.tsx` and insert the code below.